Karaoke is a popular form of musical entertainment where participants sing along to a pre-recorded instrumental track, with the lyrics displayed on a screen. Combining karaoke with a home theater system can elevate the experience by providing enhanced audio and visual effects. In this article, we will guide you through the process of setting up a karaoke system with home theater, including selecting the right audio equipment, choosing the best microphone, and troubleshooting common problems.
Why You Should Consider a Karaoke System With Home Theater
Imagine a karaoke party where you can hear every note of the song with crystal-clear clarity, and see the lyrics in high-definition on a large screen. A karaoke system with home theater can create an immersive experience that will keep your guests engaged and entertained. Moreover, by integrating multiple components of a home theater system such as a projector, screen, and surround sound speakers, you can take your karaoke event to the next level.
Another advantage of having a karaoke system with home theater is the ability to customize the lighting and visual effects. With the use of LED lights and special effects projectors, you can create a dynamic and visually stunning atmosphere that will enhance the overall experience. This can be especially useful for themed parties or events where you want to create a specific ambiance.
Additionally, a karaoke system with home theater can be a great investment for those who enjoy singing and performing regularly. Instead of having to go out to a karaoke bar or rent a private room, you can have the same experience in the comfort of your own home. This can save you money in the long run and provide a convenient and enjoyable activity for you and your friends and family.
What You Need to Setup a Karaoke System With Home Theater
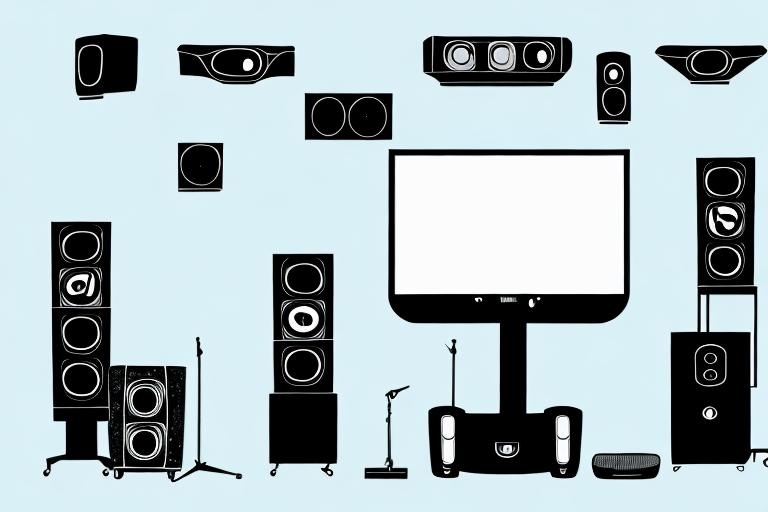
Before you start setting up your karaoke system with home theater, you will need to gather several audio and visual components. Some of the essentials include:
- A karaoke player that supports CD+G or MP3+G format
- A mixer or amplifier to connect the player to the speakers
- A microphone that is compatible with your system
- A projector or TV to display the lyrics
- A screen or blank wall for projection
- Surround sound speakers (optional but recommended)
In addition to the above components, you may also want to consider purchasing a microphone stand for added convenience and comfort during your karaoke sessions. Another important factor to keep in mind is the acoustics of the room where you will be setting up your system. You may need to add soundproofing materials or adjust the placement of your speakers to achieve the best sound quality.
Choosing the Right Audio Equipment for Your Karaoke System
The audio equipment you choose will play a crucial role in the overall quality of your karaoke system with home theater. Ideally, you want a setup that offers a crisp and clear sound, with minimal distortion and feedback. Here are some tips to help you select the right audio components:
- Choose a mixer or amplifier that matches the power ratings of your speakers
- Look for a microphone that has a cardioid or hyper-cardioid pickup pattern to reduce ambient noise
- Consider investing in a powered speaker system with built-in amplification
- Opt for speakers that have a wide frequency response and a low distortion rate
Another important factor to consider when choosing audio equipment for your karaoke system is the size of the room where you will be using it. If you have a large room, you may need to invest in additional speakers or a subwoofer to ensure that the sound is evenly distributed throughout the space. On the other hand, if you have a smaller room, you may be able to get away with a simpler setup.
It’s also worth considering the type of music you will be playing through your karaoke system. If you plan on singing mostly pop or rock songs, you may want to opt for speakers that have a strong bass response. Alternatively, if you prefer to sing ballads or acoustic songs, you may want to prioritize speakers that offer a more balanced sound with clear mid and high frequencies.
Selecting the Best Microphone for Your Karaoke System With Home Theater
A high-quality microphone can make a significant difference in the way your voice sounds during a karaoke session. When selecting a microphone for your karaoke system with home theater, here are some factors to consider:
- Microphone type: Dynamic or condenser
- Microphone pattern: Cardioid, supercardioid, or omnidirectional
- Microphone frequency range and sensitivity
- Microphone impedance and output level
Another important factor to consider when selecting a microphone for your karaoke system is the microphone’s build quality. A well-built microphone will last longer and provide better sound quality than a poorly constructed one. Look for microphones with sturdy metal bodies and high-quality components.
It’s also important to consider the microphone’s compatibility with your karaoke system. Some microphones may require additional adapters or cables to work with your system, so be sure to check the specifications before making a purchase. Additionally, some microphones may be better suited for certain types of music or vocal styles, so consider your personal preferences when making a selection.
Tips on Setting Up Your Karaoke System With Home Theater for Optimal Sound Quality
Once you have all the necessary components, it’s time to set up your karaoke system with home theater. Here are some tips to help you optimize the sound quality:
- Place the speakers strategically in the room for maximum coverage
- Use high-quality speaker cables to minimize resistance and signal loss
- Adjust the EQ and volume levels on the mixer or amplifier according to the venue size and audience
- Position the projector or TV at a proper distance from the screen for optimal image quality
- Make sure the microphone is not too close to the speakers to avoid feedback
- Encourage singers to stand at a reasonable distance from the speakers to reduce echo or distortion
- Use a pop filter to eliminate plosive sounds when singing
Wiring and Connecting Your Karaoke System With Home Theater Components
Before you can start singing karaoke with your home theater system, you need to connect all the components properly. Here is a step-by-step guide:
- Connect the karaoke player’s audio output to the mixer or amplifier’s input using an RCA or XLR cable
- Connect the mixer or amplifier’s output to the speakers using speaker cables
- Connect the microphone to the mixer or amplifier’s microphone input using an XLR or TRS cable
- Connect the projector or TV to the karaoke player’s video output using an HDMI or VGA cable
- Position the projector or TV in front of the screen or wall, and adjust the focus and zoom as necessary
- Plug in all the components and turn them on
- Test the audio and video output by playing a sample karaoke track
Adjusting Audio Settings for Your Karaoke System With Home Theater
As mentioned earlier, adjusting the EQ and volume levels on the mixer or amplifier is critical for achieving the best sound quality from your karaoke system with home theater. Here are some additional audio settings you may want to tweak:
- Reverb and echo effects to enhance the singing voice
- Compression and limiting to balance the audio levels and prevent clipping
- High-pass and low-pass filters to remove unwanted frequencies
- Equalization to adjust the tone and frequency response of the audio signal
How to Choose the Right Songs for Your Karaoke Party
Choosing the right songs for your karaoke party can be a daunting task, especially if you have guests with diverse musical tastes. Here are some suggestions to make your song selection process easier:
- Prepare a list of popular karaoke songs that are suitable for different age groups
- Include a variety of genres such as pop, rock, R&B, country, and oldies
- Choose songs that have easy-to-follow lyrics and catchy choruses
- Allow guests to request their favorite songs, or use a songbook for everyone to browse
- Consider using a karaoke app or website that has a vast collection of songs and lyrics
Hosting an Unforgettable Karaoke Party With Your Home Theater System
Hosting a karaoke party with your home theater system can be a fun and exciting way to entertain your friends and family. Here are some suggestions to make your event memorable:
- Choose a suitable date and time that works for everyone
- Create a comfortable and festive atmosphere with decorations, snacks, and drinks
- Invite guests to bring their own props or costumes to add to the karaoke experience
- Prepare some party games or activities to break the ice and keep everyone engaged
- Encourage guests to participate in group songs or duets for added fun
- Record and share the highlights of your karaoke party on social media
Maintaining and Upgrading Your Karaoke System With Home Theater
Like any other electronic device, your karaoke system with home theater may require regular maintenance, such as cleaning the components, replacing the batteries, or updating the firmware. Additionally, you may want to consider upgrading your system to enhance its performance and functionality. Here are some maintenance and upgrade tips:
- Store your components in a cool and dry place to avoid dust, moisture, or damage
- Replace the microphone windscreen periodically to prevent germs or odor buildup
- Upgrade the karaoke player software or firmware to support new features or formats
- Expand your system by adding more speakers, microphones, or accessories
- Consult with a professional audio installer or technician if you want to perform more significant upgrades or repairs
Troubleshooting Common Problems with a Karaoke System With Home Theater
Despite your best efforts, you may encounter some issues with your karaoke system with home theater. Here are some common problems and their solutions:
- No sound or distorted sound: Check the connections and cables, adjust the volume level, and ensure that the components are powered on
- Loud feedback or echo: Move the microphone away from the speakers, adjust the EQ settings, or use a soundproofing material
- Poor image quality: Adjust the projector or TV settings, change the screen brightness or aspect ratio, or upgrade to a higher-resolution display
- Incompatible microphone or player: Ensure that the microphone or player is compatible with your karaoke system, and use appropriate adapters if necessary
- Software or firmware issues: Check for software updates, reinstall the driver software, or contact the manufacturer’s support team for assistance
With these guidelines and tips, you should be ready to set up a karaoke system with home theater that will wow your guests and create lasting memories.