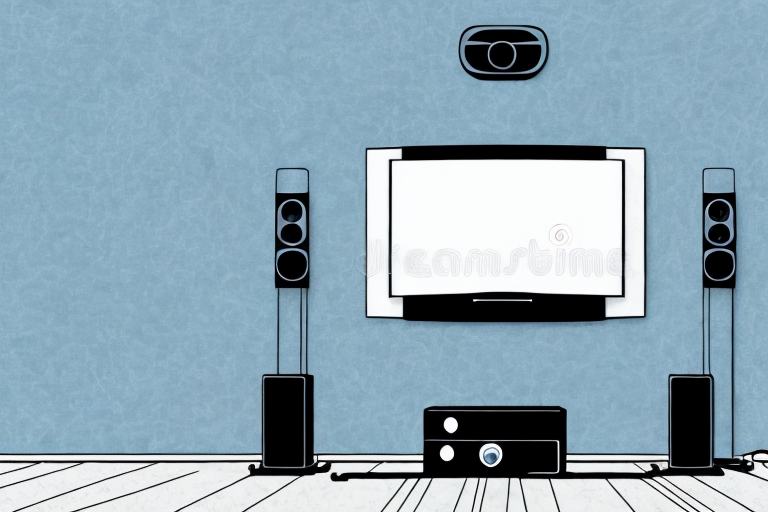
If you’re looking to upgrade your home entertainment setup, a Bose Home Theater System is a fantastic option. With its powerful sound and sleek design, it can transform your living room into your own personal movie theater. In this article, we’ll guide you through the process of hanging up your Bose Home Theater System, from planning the layout to troubleshooting issues that may arise.
Tools required to hang up your Bose Home Theater System
Before you begin, it’s important to make sure you have all the necessary tools. You’ll need a stud finder, a measuring tape, a level, a pencil, a power drill, a Phillips head screwdriver, and the mounting bracket that came with your system. It’s also recommended to have a partner to hold the system in place while you mount it. Once you have everything you need, you can start planning the layout of your home theater system.
When planning the layout of your home theater system, it’s important to consider the size and shape of the room. You’ll want to position the speakers and subwoofer in a way that provides optimal sound quality and balance. It’s also important to take into account any furniture or obstacles that may affect the placement of your system. Once you have a plan in place, you can begin the installation process with confidence, knowing that you have all the necessary tools and a solid plan for your Bose Home Theater System.
Planning the layout of your home theater system
The first step to hanging up your Bose Home Theater System is to plan where you want to place it. Consider the size and shape of your room, as well as the placement of your furniture. You want to make sure that the screen will be visible from all seats in the room, and that the speakers will be placed in optimal locations for the best sound quality. Once you have an idea of where you want everything to go, you can start measuring and marking the wall for installation.
Another important factor to consider when planning the layout of your home theater system is the lighting in the room. You want to avoid any glare or reflections on the screen, so it’s best to have the room as dark as possible. You can achieve this by using blackout curtains or blinds, or by installing dimmer switches on your existing lighting fixtures. Additionally, you may want to consider adding ambient lighting around the room to create a more immersive viewing experience.
Measuring and marking the wall for installation
Using your measuring tape and pencil, carefully measure the space where you want to hang your system. Make sure to mark the center point, which is where the bracket will be mounted. Use the stud finder to locate the studs in the wall where you will mount the bracket. Keep in mind that the bracket needs to be mounted securely to the stud to support the weight of the system. Once the stud locations are marked, you can begin to prepare the wall for mounting the Bose Home Theater System.
Before you start drilling holes in the wall, it’s important to consider the height at which you want to mount the system. Take into account the height of your seating area and the size of your TV screen to determine the optimal placement for the speakers. You may also want to consider the layout of the room and any potential obstacles that could affect the sound quality.
Once you have determined the ideal placement for the system, you can begin to mark the wall for the speaker placement. Use your measuring tape to measure the distance between the center point and the location of each speaker. Mark these points on the wall with your pencil, making sure they are level and evenly spaced. This will ensure that the speakers are properly aligned and provide the best sound quality.
Finding the perfect spot to mount your Bose Home Theater System
Once you’ve located the studs, you can now decide on the exact placement of your Bose Home Theater System. This is where a second person comes in handy – they can hold the system in place while you check the height and angle for optimal viewing and sound. Use your level to make sure that your system is straight and balanced. Once you’ve found the perfect spot, you can begin preparing the wall for mounting the bracket.
It’s important to consider the layout of your room when deciding on the placement of your Bose Home Theater System. You want to make sure that the system is positioned in a way that allows for the best possible viewing experience for everyone in the room. Take into account the size and shape of the room, as well as the location of windows and doors.
Another factor to consider is the type of wall you will be mounting the bracket on. If you have a plaster or drywall wall, you will need to use anchors to ensure that the bracket is securely attached. If you have a brick or concrete wall, you will need to use a masonry bit to drill holes for the anchors. Make sure to follow the manufacturer’s instructions for the specific type of wall you are working with.
Preparing the wall for mounting the Bose Home Theater System
Before you start drilling into the wall, make sure to clear the area and protect your floors and furniture from any dust or debris. Use your power drill to make pilot holes where you marked the stud locations. This will make it easier to screw in the screws that will hold the bracket in place. Once the pilot holes are made, you can begin installing the mounting bracket for your Bose Home Theater System.
It is important to note that the location of the mounting bracket should be carefully considered before installation. Take into account the height and distance from the viewing area to ensure the best viewing experience. Additionally, make sure to use the appropriate screws and anchors for the type of wall you are mounting the bracket on. If you are unsure, consult with a professional or refer to the manufacturer’s instructions for guidance.
Installing the mounting bracket for your Bose Home Theater System
With the pilot holes made, you can now attach the bracket to the mount. Use your Phillips head screwdriver to secure the screws into the stud locations. Make sure to tighten the screws firmly to ensure they are securely in place. Once the bracket is mounted, you can begin to mount and secure your Bose Home Theater System.
Before mounting your Bose Home Theater System, it is important to ensure that the bracket is level. Use a level tool to check that the bracket is straight and adjust it if necessary. A crooked bracket can cause your home theater system to hang unevenly, which can affect the sound quality and overall appearance of your setup.
Additionally, it is recommended to use a cable management system to organize the wires and cables that connect your home theater system. This will not only make your setup look neater and more professional, but it will also prevent any tripping hazards or accidental disconnections. There are various cable management options available, such as cable ties, cable clips, and cable sleeves, so choose the one that best suits your needs.
Mounting and securing your Bose Home Theater System to the wall bracket
Place the Bose Home Theater System onto the bracket and secure it using the screws or bolts provided with the mounting kit. This can be a heavy piece of equipment, so make sure you have assistance from another person to prevent any accidents. Once your system is securely in place, you can start wiring and connecting your Bose Home Theater System.
Wiring and connecting your Bose Home Theater System
Refer to the instructions that came with your system to connect the various components. This typically involves connecting the speakers to the receiver, and the receiver to your television or media player. Make sure to double-check all connections to ensure that they are properly secured. Once everything is connected, you can test and adjust the sound quality of your home theater system.
Testing and adjusting the sound quality of your home theater system
Power on your system and play some audio or video to test the sound quality. Make adjustments as necessary to ensure that the sound is well-balanced and at the right volume. You may need to adjust speaker placement or configuration to achieve the best sound quality. Once you’re satisfied with the sound, you can sit back and enjoy your new Bose Home Theater System.
Troubleshooting common issues with hanging up a Bose Home Theater System
If you experience any issues during the installation or setup process, refer to the troubleshooting section of your system’s manual or contact Bose customer support for assistance. Common issues may include poor sound quality, loose screws, or improper wiring. With a little patience and diligence, you can overcome these obstacles and get your system up and running in no time.
Frequently asked questions about hanging up a Bose Home Theater System
Q: Can I mount my Bose Home Theater System on drywall?
A: Yes, but you need to make sure to use toggle bolts or anchors to securely mount the bracket to the wall.Q: How do I know if I’ve found a stud in the wall?
A: Use a stud finder to locate the studs. They will typically be spaced 16 inches apart and will provide the most secure anchor points for mounting.Q: What’s the best way to clean my Bose Home Theater System?
A: Use a soft, dry cloth to gently clean the surface of your system. Avoid using harsh chemicals or abrasive materials that may damage the finish.Q: Can I use my Bose Home Theater System with a universal remote control?
A: Yes, many universal remotes are compatible with Bose Home Theater Systems. Refer to the instructions for your specific remote to program it for use with your system.
Tips for maintaining and cleaning your Bose Home Theater System
To keep your Bose Home Theater System in top condition, make sure to dust it regularly and avoid placing it in direct sunlight or near sources of heat or moisture. You can also use a soft-bristled brush to gently clean the speakers. Additionally, be sure to update your firmware and software as new updates become available to ensure optimal performance.
Comparing different mounting options for a Bose Home Theater System
There are a variety of mounting options available for Bose Home Theater Systems. These include wall mounts, floor stands, and ceiling mounts. The best option for you will depend on your specific needs and the layout of your room. Consider factors such as space, aesthetics, and ease of installation when choosing the best mounting option for your Bose Home Theater System.
In conclusion, hanging up your Bose Home Theater System may seem like a daunting task, but with the right tools and careful planning, it can be done easily and safely. Remember to take your time and double-check your work to ensure a secure and well-functioning system. With your new home entertainment setup, you can enjoy movies, music, and more like never before.