Are you tired of having your TV taking up valuable space on your furniture or stand? It’s time to mount it up on your wall, but where do you start? In this guide, we’ll walk you through the steps to hang up a TV mount yourself and make your TV viewing experience even better!
Choosing the Right Type of TV Mount for Your Room
Before we jump into the installation process, let’s first determine which type of TV mount you need. There are three types of TV mounts available: fixed, tilting, and full-motion mounts. A fixed mount is inexpensive but lacks mobility, while a tilting mount allows you to adjust your TV up and down, making it a great option for higher wall placements. A full-motion mount allows you to adjust your TV in any direction. Consider your placement and mobility preference before making a decision.
Another important factor to consider when choosing a TV mount is the weight and size of your TV. Make sure to check the weight and size specifications of the mount to ensure it can support your TV. Additionally, consider the viewing angle and distance from the TV to your seating area. A tilting or full-motion mount may be necessary to achieve the optimal viewing angle. Take the time to carefully evaluate your needs and preferences before making a final decision on which type of TV mount to purchase.
Tools Needed to Install a TV Mount
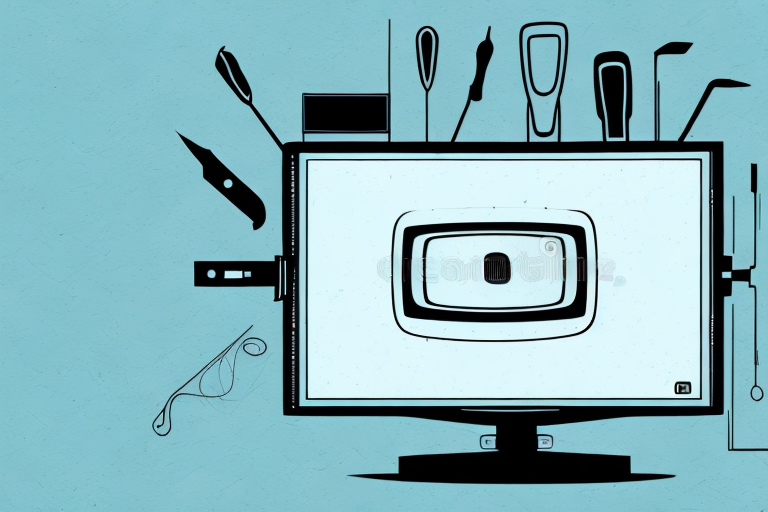
Before you start, gather all the tools you’ll need: a drill, a level, a stud finder, screws, a screwdriver, and measuring tape.
Installing a TV mount can be a daunting task, but having the right tools can make the process much easier. In addition to the basic tools mentioned above, you may also need a hammer, a pencil, and a drywall saw. A hammer can be useful for tapping in screws or nails, while a pencil can be used to mark the spots where you want to drill. A drywall saw can be used to cut holes in the wall for cables or wires.
It’s important to note that the specific tools you’ll need may vary depending on the type of TV mount you’re installing and the type of wall you’re mounting it on. For example, if you’re mounting the TV on a brick or concrete wall, you may need a masonry drill bit and anchors. If you’re unsure about what tools you’ll need, it’s always a good idea to consult the installation instructions or seek advice from a professional.
Measuring and Marking the Wall for the TV Mount
It’s important to measure and mark the wall where the mount will be placed. Use the measuring tape to determine the height and distance from the ground or furniture, and also measure the placement of studs in the wall to ensure the mount is securely attached.
Additionally, it’s important to consider the viewing angle when marking the wall for the TV mount. Take into account the height of the seating area and the size of the TV to determine the optimal placement for comfortable viewing. It’s also a good idea to use a level to ensure the mount is straight before drilling any holes into the wall.
Drilling Holes in the Wall for the TV Mount
Now that your wall is marked and measurements are complete, it’s time to drill the holes in the wall using a drill and a bit that is slightly smaller than the size of your screws. Make sure the drill bit is level to avoid crooked holes.
It’s important to note that if you’re drilling into a concrete or brick wall, you’ll need a masonry bit instead of a regular drill bit. Masonry bits are designed to drill through tough materials and will make the job much easier.
After drilling the holes, use a vacuum or a brush to clean up any debris left behind. This will ensure that the screws go in smoothly and securely. Once the holes are clean, you can attach the TV mount to the wall using the screws and a screwdriver. Make sure the mount is level before tightening the screws completely.
Attaching the Bracket to the Wall for the TV Mount
Now it’s time to attach the bracket to the wall. Secure the bracket to the wall by placing screws into the holes you previously drilled. Use a level to ensure the bracket is straight and secure.
Before attaching the bracket to the wall, make sure to check the weight capacity of the bracket and ensure that it can support the weight of your TV. It’s also important to consider the placement of the bracket and ensure that it is at a comfortable viewing height for your TV.
Once you have attached the bracket to the wall, it’s time to mount the TV. Make sure to follow the manufacturer’s instructions for attaching the TV to the bracket. It’s important to have someone assist you with this step to ensure that the TV is mounted safely and securely.
Attaching the Bracket to Your TV for the TV Mount
With the bracket securely in place on the wall, you can now mount the bracket to your TV. Many TV mounts come with a mounting plate that needs to be attached to the back of your TV. Make sure the plate is well-secured to the TV and matches the size and weight of your TV.
Before attaching the mounting plate to your TV, it’s important to locate the VESA pattern on the back of your TV. This pattern consists of four screw holes arranged in a square or rectangular shape. The mounting plate should have corresponding holes that match the VESA pattern of your TV. If the holes don’t match, you may need to purchase an adapter plate to ensure a secure fit.
Once you’ve attached the mounting plate to your TV, carefully lift the TV and align it with the bracket on the wall. Double-check that the TV is level and centered before tightening the screws that secure the TV to the bracket. It’s a good idea to have someone assist you with this step to ensure that the TV is properly aligned and doesn’t fall during installation.
Lifting and Installing Your TV onto the Wall Mount
Now comes the fun part! Make sure you have a second pair of hands to help lift the TV onto the bracket and attach it securely. Avoid making sudden movements and be sure you have a good grip on the TV so that it does not fall or slip.
It’s important to note that the weight of your TV will determine the type of wall mount you need. Be sure to check the weight limit of the mount and compare it to the weight of your TV before purchasing. Additionally, make sure the wall you are mounting the TV on is sturdy enough to support the weight of the TV and the mount. If you are unsure, consult a professional to ensure a safe and secure installation.
Adjusting and Leveling Your TV on the Wall Mount
Once the TV is securely attached to the wall mount, you can now adjust it to the perfect viewing angle. Use a level to make sure the TV is straight and level. This step is essential for a comfortable viewing experience.
When adjusting the TV, consider the height at which it is mounted. The center of the screen should be at eye level when seated. This will prevent neck strain and ensure a more enjoyable viewing experience. If the TV is mounted too high or too low, adjust the mount accordingly.
It’s also important to consider the lighting in the room. If there is a lot of natural light, you may need to adjust the angle of the TV to prevent glare. You can also invest in an anti-glare screen protector to reduce glare and improve the picture quality.
Hiding Wires and Cables After Installing a TV Mount
Now that your TV is mounted and level, it’s time to clean up the appearance. Hide cables and wires by running them through a wall or hiding them with a cord cover. It will give your installation a clean and professional look.
If you choose to run the cables through a wall, make sure to use a stud finder to locate any electrical wires or plumbing pipes before cutting into the drywall. You can also use a cable management system to keep the wires organized and prevent them from getting tangled. Another option is to use a wireless HDMI transmitter to eliminate the need for cables altogether.
Tips and Tricks for a Safe and Secure TV Installation
Before installing a TV mount, be sure to check the weight and size limits as specified by the manufacturer. Make sure to use the correct screws and tools for installation, and always use a level to ensure your TV is straight and secure.
It is also important to consider the location of your TV installation. Avoid installing your TV near sources of heat or moisture, such as radiators or bathrooms, as this can damage the TV and pose a safety hazard. Additionally, make sure to secure any loose cables or cords to prevent tripping hazards and potential damage to the TV or other electronics.
Common Mistakes to Avoid When Installing a TV Mount
One of the most common mistakes when installing a TV mount is to mount it on an unsupported wall. Always check if the wall can support the weight of your TV and mount. Another mistake is not using the correct size screws or bolts, which can cause damage to your TV or your wall. Be sure to double-check all aspects of the installation process!
By following these steps, you’ll be able to hang up your TV mount like a pro!
Another mistake to avoid when installing a TV mount is not properly securing the cables and wires. Make sure to organize and secure all cables and wires before mounting the TV to prevent any damage or interference with the TV’s performance. Additionally, it’s important to ensure that the TV is level and straight before tightening all screws and bolts. Taking the time to properly install your TV mount will not only ensure the safety of your TV, but also enhance your viewing experience.