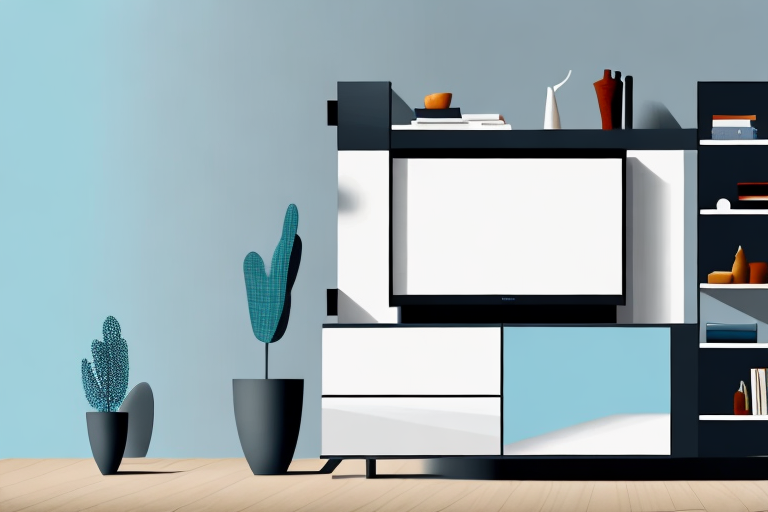
If you’re looking for a way to organize your home entertainment system and give your living room a sleek new look, building a TV wall mount cabinet is a great DIY project to take on. Not only does it provide a polished and modern feel to your living space, but it also allows you to hide unsightly cords and wires out of view. Here’s a step-by-step guide on how to build your own TV wall mount cabinet:
Materials Needed for the Project
Before you begin building your wall mount cabinet, it’s essential to gather all the necessary materials. You will need:
- Wood – ¾ inch plywood sheets, 1×2-inch boards, and 1×4-inch boards
- Wall mount bracket
- Screws, wood glue, and finishing nails
- Saw (a circular saw or miter saw is recommended)
- Sandpaper (120-grit and 220-grit)
- Tape measure and level
- Stain or paint of your choice
It’s important to note that the size of the cabinet will determine the amount of wood needed. Make sure to measure the space where you plan to mount the cabinet and calculate the amount of wood required accordingly. Additionally, if you plan to add shelves to the cabinet, you will need to purchase additional wood and shelf brackets.
Measuring the Wall for the Cabinet
The first step in building your TV wall mount cabinet is measuring the wall where you want to mount it. Use a tape measure and level to ensure the wall is level and plumb. Measure the width and height of the wall and determine the size of the cabinet you want to build.
It’s important to also consider any obstacles on the wall, such as electrical outlets or light switches, and make sure they won’t interfere with the placement of the cabinet. Additionally, think about the weight of the cabinet and make sure the wall can support it. If you’re unsure, consult a professional or use a stud finder to locate the studs in the wall for added support.
Choosing the Right Wood for Your Cabinet
When choosing wood for your TV wall mount cabinet, select high-quality plywood sheets. Look for sheets with no knots or defects to ensure a flawless finish. Additionally, choose 1×2 and 1×4 boards for your cabinet framing, as these sizes provide stability and durability for the structure.
It’s also important to consider the type of wood you choose for your cabinet. Hardwoods such as oak, maple, and cherry are popular choices for their durability and attractive grain patterns. Softwoods like pine and cedar are more affordable options, but may not be as durable in the long run. Ultimately, the type of wood you choose will depend on your budget and personal preferences.
Cutting and Sanding the Wood
Using a saw, cut the plywood sheets and boards to the desired size. Sand all the cut pieces of wood with 120-grit sandpaper to remove splinters and rough edges. Then, use 220-grit sandpaper to smooth out the surface of the wood, preparing it for finishing.
It is important to wear protective gear, such as safety glasses and a dust mask, while cutting and sanding the wood to avoid any potential injuries or health hazards. Additionally, it is recommended to work in a well-ventilated area to prevent the buildup of sawdust and fumes.
If you are working with particularly rough or uneven pieces of wood, you may need to use a wood filler to fill in any gaps or holes before sanding. This will ensure a smooth and even surface for finishing. Allow the wood filler to dry completely before sanding with 220-grit sandpaper.
Assembling the Cabinet Box
Using wood glue and screws, put together the plywood sheets to form the sides, top, bottom, and back of the cabinet. Once the box is complete, reinforce the corners by adding 1×2 boards to each corner, attaching them with finishing nails.
Before attaching the 1×2 boards, make sure to sand the edges of the plywood sheets to ensure a smooth finish. This will also help the wood glue adhere better to the surface.
Once the 1×2 boards are attached, use wood filler to fill any gaps or holes in the corners. Sand the corners again to create a seamless finish. This will not only improve the appearance of the cabinet, but also strengthen the corners and prevent any potential damage in the future.
Adding Shelves and Dividers to Your Cabinet
The next step is to add shelves and dividers inside the cabinet. Cut additional pieces of plywood to the desired size and attach them to the cabinet’s sides using wood glue and screws.
When adding shelves, it’s important to measure the height between each shelf to ensure that there is enough space for the items you plan to store. Dividers can also be added to create separate compartments within the cabinet, making it easier to organize and access your belongings. Consider using a level to ensure that the shelves and dividers are installed evenly and securely.
Installing the Wall Mount Bracket
Following the manufacturer’s instructions, install the wall mount bracket on the wall where you want to hang the cabinet. Make sure to use screws and anchors when securing the bracket to ensure it can handle the weight of the cabinet.
It is important to also consider the placement of the bracket in relation to the studs in the wall. If possible, align the bracket with the studs for added stability. If the bracket cannot be placed directly on a stud, use a stud finder to locate nearby studs and attach the bracket to them with longer screws.
Attaching the Cabinet Box to the Wall Mount Bracket
Once the wall mount bracket is in place, attach the cabinet box to the bracket using screws. Make sure the cabinet is level before securing it to the bracket.
It is important to use the appropriate screws for attaching the cabinet box to the wall mount bracket. The screws should be long enough to securely hold the cabinet in place, but not so long that they penetrate through the cabinet box. It is also recommended to use washers with the screws to distribute the weight of the cabinet evenly across the bracket.
Finishing Your TV Wall Mount Cabinet with Stain or Paint
Now that your cabinet is complete, it’s time to add the finishing touch. Apply stain or paint of your choice to the cabinet, ensuring it is thoroughly covered and evenly distributed.
When choosing between stain or paint, consider the look you want to achieve. Stain will enhance the natural beauty of the wood grain, while paint will provide a more uniform and opaque finish. Additionally, if you plan to mount your TV on the cabinet, make sure to choose a finish that will not reflect too much light and cause glare on the screen.
Tips for Running Cables and Wires Inside Your Cabinet
If you plan on running cables inside your TV wall mount cabinet, make sure to drill holes in the back of the cabinet to provide access for the cords. Use cord clips and zip ties to manage the cables and keep them organized.
Another important tip is to label the cables and wires to avoid confusion and make it easier to identify which cable goes where. This can save you a lot of time and frustration in the long run.
Additionally, it’s important to consider the length of the cables and wires you are using. Make sure they are long enough to reach the necessary components without being too long and creating unnecessary clutter inside the cabinet.
Maintaining and Cleaning Your TV Wall Mount Cabinet
Regularly dust and clean your TV wall mount cabinet with a soft, damp cloth. Avoid abrasive cleaning products that can damage the wood or finish.
Building a TV wall mount cabinet is an excellent DIY project that can enhance the look and functionality of your living space. With the right tools and materials on hand, you can build a durable and stylish cabinet that will keep your entertainment system organized and out of sight while adding a modern flair to your home. Follow these steps, and you’ll have a beautiful new cabinet in no time!
It’s important to note that when mounting your TV on the wall, you should always follow the manufacturer’s instructions and use the appropriate hardware. Improper installation can lead to damage to your TV or even injury. Additionally, make sure to periodically check the mount and hardware for any signs of wear or damage, and replace as necessary to ensure the safety of your TV and those around it.