Are you looking for a way to enhance your home entertainment system? The Sony Home Theater System is a great choice, offering impressive sound and picture quality that can transform your TV viewing experience. However, setting up this system can be a bit intimidating for beginners. In this article, we’ll cover everything you need to know about connecting and configuring your Sony Home Theater System.
Understanding the Components of a Sony Home Theater System
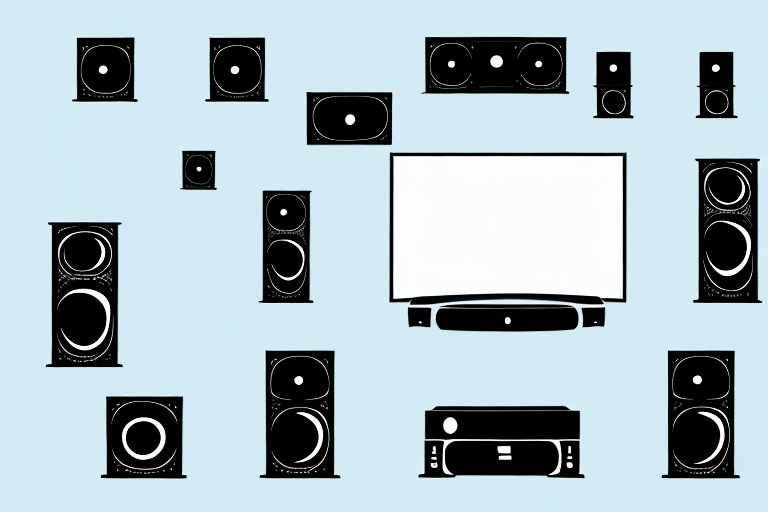
Before we dive into the setup process, let’s take a look at the components that make up a typical Sony Home Theater System. There are typically five main components:
- AV receiver
- Front speakers (left and right)
- Center speaker
- Surround speakers (left and right)
- Subwoofer
The AV receiver acts as the brain of your home theater system, receiving signals from your TV and other devices and distributing them to the appropriate speakers. The front and center speakers are typically placed in front of the viewer, while the surround speakers are placed behind or to the sides for a more immersive experience. The subwoofer is responsible for providing low-frequency sounds, such as bass and drums.
It’s important to note that not all Sony Home Theater Systems are created equal. Some may come with additional components, such as rear speakers or a soundbar, while others may have fewer components. Additionally, the quality of the components can vary, with higher-end systems offering better sound quality and more advanced features.
When choosing a Sony Home Theater System, it’s important to consider your specific needs and budget. If you’re a movie buff who wants a truly immersive experience, a system with more speakers and higher-end components may be worth the investment. However, if you’re just looking for a basic setup for watching TV and movies, a simpler system may suffice.
Choosing the Right Cables for Your Sony Home Theater System
Now that you understand the components, it’s important to choose the right cables to connect them. The most common types of cables used in a Sony Home Theater System are HDMI, optical, and speaker wire.
HDMI cables are used to transfer both audio and video signals between your TV and AV receiver. Optimal cables, on the other hand, are used specifically for audio. If your TV or other devices don’t have an optical output, you can also use HDMI cables for audio. Speaker wire is used to connect your speakers to the AV receiver.
When purchasing cables, quality is key. Choose cables that are compatible with your devices and offer good build quality to ensure a stable signal transfer and prevent any audio or video degradation.
It’s also important to consider the length of the cables you need. If your components are far apart, you may need longer cables to connect them. However, keep in mind that longer cables can sometimes result in signal loss or degradation. It’s best to measure the distance between your components and choose cables that are just long enough to reach.
Another factor to consider is the price of the cables. While it’s important to choose high-quality cables, you don’t necessarily need to spend a fortune. Look for cables that offer a good balance between quality and price, and don’t be swayed by overly expensive cables that may not offer any additional benefits.
Setting Up Your Sony Home Theater System: Step-by-Step Guide
Now that you have all the necessary components and cables, it’s time to set up your Sony Home Theater System. Here’s a step-by-step guide:
- Place your front and center speakers in front of your TV at ear level.
- Place your surround speakers behind or to the side of your viewing area.
- Connect your AV receiver to your TV using an HDMI cable.
- Connect your other devices (Blu-ray players, gaming consoles, etc.) to the AV receiver using HDMI cables.
- Connect your speakers to the AV receiver using the appropriate speaker wires.
- Plug in your subwoofer using the provided cable.
- Connect the power cables to all components and plug them into a power outlet.
Once you’ve completed these steps, you’re ready to turn on your Sony Home Theater System and start enjoying an enhanced audio and video experience!
It’s important to note that when setting up your Sony Home Theater System, you should also take into consideration the layout of your room. The placement of your speakers can greatly affect the quality of sound you receive. For example, if your room is small, you may want to consider placing your surround speakers closer to your listening area to create a more immersive experience.
Additionally, if you’re having trouble with the setup process, don’t hesitate to consult the user manual or reach out to Sony’s customer support team. They can provide you with additional guidance and troubleshooting tips to ensure that your home theater system is set up correctly and functioning at its best.
Connecting Your Speakers to the Sony Home Theater System
The key to getting the most out of your Sony Home Theater System is proper speaker placement and configuration. When connecting your speakers, make sure you place them in optimal locations to get the best possible sound quality.
It’s also important to configure your speakers correctly using your AV receiver’s setup menu. Make sure you select the appropriate speaker size and channel levels to optimize your listening experience.
Another important factor to consider when connecting your speakers to the Sony Home Theater System is the type of cables you use. It’s recommended to use high-quality speaker cables that are thick enough to handle the power output of your system. This will ensure that you get the best possible sound quality and prevent any interference or distortion.
Lastly, don’t forget to regularly clean your speakers and check for any damage or wear and tear. Dust and debris can accumulate on the speaker cones and affect the sound quality, while any damage or wear and tear can also impact the performance of your system. By taking care of your speakers, you can ensure that you enjoy high-quality sound for years to come.
Configuring Your Audio and Video Settings on the Sony Home Theater System
Once your components are connected, you can use your AV receiver’s setup menu to configure your audio and video settings. This includes adjusting the bass and treble levels, selecting different sound modes, and adjusting the picture quality settings.
Experiment with different settings to find the best configuration for your viewing preferences. You can also use the built-in test tones in your AV receiver to adjust speaker volume and balance.
Another important aspect of configuring your audio and video settings is calibrating your TV’s color and brightness levels. This can be done using a calibration disc or by using the built-in calibration tools on your TV. Proper calibration can greatly enhance your viewing experience and ensure that colors are accurate and vibrant.
It’s also important to consider the placement of your speakers and subwoofer. Proper placement can greatly impact the sound quality and overall experience. Refer to your AV receiver’s manual for recommended speaker placement and experiment with different positions to find the best sound.
Troubleshooting Common Issues with Your Sony Home Theater System
If you encounter any issues with your Sony Home Theater System, don’t panic! There are several common issues that can be easily resolved. For example, if you’re experiencing audio or video dropout, check your cables to make sure they’re plugged in securely. If you’re hearing distortion in your sound, adjust the channel levels in your setup menu.
If you’re still experiencing issues, refer to your user manual or reach out to Sony’s customer support for assistance.
Another common issue that you may encounter with your Sony Home Theater System is the inability to connect to your Wi-Fi network. In this case, make sure that your Wi-Fi network is working properly and that your home theater system is within range. You can also try resetting your network settings on the home theater system.
If you’re experiencing issues with your remote control, try replacing the batteries or resetting the remote control. You can also try using the Sony Remote app on your smartphone as an alternative.
Enhancing Your Viewing Experience with the Sony Home Theater System
Now that your Sony Home Theater System is set up and configured, it’s time to sit back and enjoy your enhanced viewing experience! With its impressive sound and picture quality, you’ll feel like you’re part of the action.
There are several tips and tricks you can use to enhance your viewing experience even further. For example, adjusting the brightness and contrast levels on your TV can help you see more detail in dark scenes. You can also experiment with different sound modes and EQ settings to find the perfect audio configuration for your preferences.
Another way to enhance your viewing experience is by using the Sony Home Theater System’s built-in streaming capabilities. With access to popular streaming services like Netflix and Hulu, you can watch your favorite movies and TV shows in stunning high-definition quality.
Additionally, the Sony Home Theater System comes with a variety of connectivity options, including Bluetooth and Wi-Fi. This allows you to easily connect your smartphone or tablet to the system and stream music or other audio content directly from your device.
Customizing Your Sound Settings on the Sony Home Theater System
The Sony Home Theater System offers a variety of sound settings that you can customize to suit your tastes. This includes adjusting the balance and volume of each channel, selecting different sound modes, and adjusting the EQ settings.
Experiment with different settings to find the perfect configuration for your viewing preferences. You can also save your settings as presets for different types of content (movies, music, sports) for quick and easy access.
Additionally, the Sony Home Theater System allows you to adjust the distance and level of each speaker to optimize the sound quality in your room. This feature is especially useful if your room has an irregular shape or if your seating position is not centered. By adjusting the speaker settings, you can ensure that the sound is evenly distributed throughout the room and that you are getting the best possible audio experience.
Optimizing the Picture Quality on Your Sony Home Theater System
The Sony Home Theater System offers several picture quality settings that you can adjust to optimize your viewing experience. This includes adjusting the brightness, contrast, and color settings, as well as selecting different picture modes.
Experiment with different settings to find the optimal configuration for your preferences. You can also use the built-in color calibration tools to ensure the most accurate color reproduction possible.
Understanding Audio Formats Supported by Sony Home Theater Systems
The Sony Home Theater System supports several audio formats, including Dolby Digital, DTS, and PCM. Each format offers different levels of compression and sound quality.
Some formats are better suited to certain types of content, such as movies versus music. Experimenting with different formats can help you find the optimal sound quality for each type of content you enjoy.
With these tips and tricks, you’re well on your way to enjoying an enhanced viewing experience with your Sony Home Theater System. Whether you’re watching movies, playing games, or listening to music, you’ll appreciate the immersive sound and picture quality that this system offers.