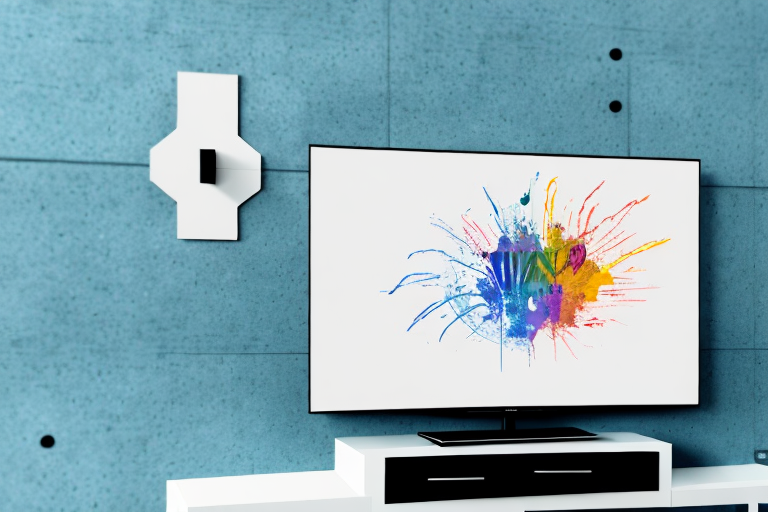
Are you tired of your TV taking up too much space in your living room? Or do you want to create a more cinematic experience at home? Whatever your motivation may be, mounting your TV on the wall is a great way to enhance your viewing experience. But before you can sit back and enjoy your favorite shows, you’ll need to go through the process of assembling and installing the TV wall mount. In this comprehensive guide, we’ll cover everything you need to know to get the job done right.
Tools Required for Assembling a TV Wall Mount
To assemble your TV wall mount, you’ll need a few essential tools, including a drill, drill bits, a level, a pencil, and a stud finder. Some manufacturers may also include tools like a wrench or screwdriver in the box.
It’s important to note that the specific tools required may vary depending on the type of wall mount and the surface you’ll be mounting it on. For example, if you’re mounting the TV on a brick or concrete wall, you may need a hammer drill and masonry bits. Additionally, if you’re mounting a larger TV, you may need a second person to assist with lifting and positioning the mount. Always refer to the manufacturer’s instructions and recommendations for the specific tools and equipment needed for your TV wall mount installation.
Types of TV Wall Mounts Available in the Market
There are several types of TV wall mounts available in the market, including fixed mounts, tilting mounts, full-motion mounts, and ceiling mounts. Each type of mount offers its own benefits and drawbacks, so it’s important to choose the right one based on your specific needs.
Fixed mounts are the most basic type of TV wall mount and are ideal for those who want a simple and affordable option. They hold the TV in a fixed position, which means that you won’t be able to adjust the angle or position of the TV once it’s mounted. Tilting mounts, on the other hand, allow you to adjust the angle of the TV up or down, which can be useful if you need to mount the TV higher up on the wall. Full-motion mounts are the most versatile type of mount and allow you to adjust the angle and position of the TV in any direction. Finally, ceiling mounts are ideal for those who want to mount their TV in a high location, such as in a commercial setting or in a room with high ceilings.
Choosing the Right TV Wall Mount for Your Home
When choosing a TV wall mount, you’ll need to consider factors such as the size and weight of your TV, the type of wall you’ll be mounting it on, and the viewing angle you’re looking to achieve. It’s also important to choose a mount that’s compatible with your TV’s mounting pattern.
Another important factor to consider when choosing a TV wall mount is the level of adjustability you require. Some mounts offer tilt and swivel options, which can be useful if you need to adjust the viewing angle of your TV depending on the time of day or the position of your furniture. Additionally, some mounts come with built-in cable management systems, which can help keep your cables organized and out of sight.
Measuring Your TV and Wall for Proper Mount Placement
Before you begin the installation process, you’ll need to measure both your TV and the wall where it will be mounted. This will help you determine the ideal height and placement for your TV wall mount.
When measuring your TV, be sure to take note of the VESA pattern on the back of the TV. This is the pattern of screw holes that will be used to attach the TV to the wall mount. Make sure the VESA pattern on your TV matches the pattern on the wall mount you plan to use. Additionally, consider the weight of your TV when selecting a wall mount. You’ll want to choose a mount that can support the weight of your TV to ensure it stays securely in place.
Preparing Your Wall for TV Wall Mount Installation
Before you install your TV wall mount, you’ll need to prepare your wall for the installation process. This may involve removing any existing hardware or patching any holes in the wall. You’ll also need to locate the studs in the wall where you’ll be attaching the mount.
It’s important to note that not all walls are suitable for TV wall mount installation. If you have a plaster or drywall surface, you’ll need to ensure that it’s strong enough to support the weight of your TV and the mount. In some cases, you may need to reinforce the wall with additional support beams or brackets. It’s always a good idea to consult with a professional if you’re unsure about the strength of your wall.
Assembling the TV Wall Mount Bracket
The first step in assembling your TV wall mount is to put together the wall bracket. This will involve attaching any necessary pieces and hardware, such as the mounting arms and back bracket.
Once the wall bracket is assembled, the next step is to attach it to the wall. It is important to choose a sturdy and level location for the bracket, and to use appropriate hardware for the type of wall you are mounting it on. Once the bracket is securely attached to the wall, you can then attach the mounting plate to the back of your TV. Make sure to follow the manufacturer’s instructions for attaching the plate, and double check that it is securely fastened before hanging your TV on the wall mount.
Attaching the Bracket to the Wall Studs
Once you have assembled the wall bracket, the next step is to attach it to the wall studs. This will involve drilling pilot holes into the studs and then screwing the bracket into place.
Before drilling any holes, it is important to locate the wall studs accurately. You can use a stud finder tool to locate the studs behind the drywall. Once you have located the studs, mark their positions on the wall with a pencil.
When drilling the pilot holes, make sure to use a drill bit that is slightly smaller than the screws you will be using. This will ensure a tight fit and prevent the screws from becoming loose over time. After drilling the pilot holes, attach the bracket to the wall studs using screws and a screwdriver or drill.
Hanging the TV on the Wall Bracket
With the wall bracket securely in place, it’s time to hang your TV on the mount. This will typically involve attaching the mounting plate to the back of your TV and then connecting it to the wall bracket.
Before you start hanging your TV, make sure you have all the necessary tools and equipment. This may include a drill, screws, a screwdriver, and a level. It’s also important to have someone to assist you, as hanging a TV can be a two-person job.
Once you have everything you need, carefully lift the TV and attach the mounting plate to the back of it. Make sure the plate is securely fastened and level. Then, carefully lift the TV and connect it to the wall bracket. Double-check that the TV is level and securely attached before letting go.
Adjusting the TV Angle and Position on the Wall
Once your TV is securely mounted on the wall bracket, you’ll need to adjust the angle and position of the TV to achieve your desired viewing experience. This may involve tilting or swiveling the TV or adjusting its height on the wall.
When adjusting the angle of your TV, it’s important to consider the lighting in the room. If there is a window or light source behind the TV, you may need to tilt the TV downwards to reduce glare. On the other hand, if the room is dimly lit, you may need to tilt the TV upwards to improve visibility.
Additionally, if you have multiple seating areas in the room, you may need to adjust the position of the TV to ensure that everyone has a clear view. This may involve swiveling the TV to face different areas of the room or adjusting its height on the wall to accommodate different seating arrangements.
Securing the Cables and Wires for a Neat Look
To give your TV wall mount installation a neat, clean look, you’ll need to secure any cables or wires in place. This may involve using cable ties, cable clips, or other mounting hardware.
One important thing to keep in mind when securing cables and wires is to avoid bending them too sharply. Sharp bends can damage the wires and affect the quality of the signal. Instead, use gentle curves when routing the cables to ensure they remain in good condition.
Another option for securing cables and wires is to use cable raceways. These are plastic or metal channels that can be mounted to the wall and used to hide and protect cables. They come in a variety of sizes and colors to match your decor and can be painted to blend in seamlessly with your walls.
Troubleshooting Common Issues during Installation
Even with careful planning and preparation, sometimes installation issues can arise during the TV wall mount installation process. Some common issues to watch out for include uneven mounting, loose screws, and cable management problems.
Another common issue that can occur during TV wall mount installation is incorrect bracket size. It is important to ensure that the bracket size matches the size and weight of the TV being mounted. Using an incorrect bracket size can result in the TV falling off the wall or causing damage to the wall. It is also important to follow the manufacturer’s instructions carefully and use the recommended tools for installation to avoid any issues.
Maintenance Tips to Keep Your TV Securely Mounted on the Wall
Once your TV wall mount is in place, it’s important to take steps to keep it securely mounted on the wall. This may involve performing regular checks of the screws and brackets or cleaning and dusting the mount to prevent damage over time.
By following these steps and taking the time to properly assemble and install your TV wall mount, you can enhance your viewing experience and create a more stylish and organized living space.
Another important maintenance tip to keep your TV securely mounted on the wall is to avoid placing any heavy objects on or near the mount. This can cause unnecessary stress on the mount and potentially lead to it becoming loose or damaged over time. Additionally, it’s important to ensure that the mount is installed on a sturdy and level surface to prevent any wobbling or instability.