Are you tired of watching movies and TV shows on a screen that doesn’t seem to show colors the way they should be? If so, it might be time to calibrate your TV. This process involves the use of a colorimeter – a device that can measure the accuracy of the colors displayed on your TV screen. In this article, we will explore in detail how to mount a colorimeter to your TV, as well as other important aspects of the calibration process.
Why calibrating your TV with a colorimeter is important
Calibrating your TV with a colorimeter is important because it ensures that the colors you see on your screen are accurate, vibrant, and true to life. Without calibration, your TV may display colors that are too dull, too bright, or simply incorrect. This can lead to a poor viewing experience, as well as distortion of the original content.
Additionally, calibrating your TV can also help to reduce eye strain and fatigue. When the colors on your screen are not properly calibrated, your eyes have to work harder to process the information, which can lead to discomfort and even headaches. By calibrating your TV, you can create a more comfortable viewing experience for yourself and your family.
Understanding the basics of color calibration
Before we dive into the technicalities of mounting a colorimeter to your TV, it is essential to understand the basics of color calibration. At its core, calibration involves measuring the colors produced by your TV and adjusting them so that they match the colors intended by the content creator. This ensures that what you see on your screen is an accurate representation of the source material.
One important thing to keep in mind is that color calibration is not a one-time process. As your TV ages and its components wear down, the colors it produces may shift. This means that you may need to recalibrate your TV periodically to ensure that it continues to display accurate colors.
Another factor to consider is the lighting in your viewing environment. The color temperature and brightness of the ambient light can affect how colors appear on your screen. For this reason, it is recommended to calibrate your TV in the same lighting conditions in which you typically watch TV.
Types of colorimeters available in the market
There are several types of colorimeters available in the market. Some are standalone devices, while others are designed to work with specific software. In general, colorimeters fall into two main categories: hardware and software-based. Hardware colorimeters are physical devices that you mount or place against your TV screen. They come in a variety of shapes and sizes, and they typically connect to your computer via USB. Software-based colorimeters, on the other hand, are a type of plug-in that you install on your TV or computer. They use your TV’s built-in sensors to measure color accuracy.
Another type of colorimeter available in the market is the spectrophotometer. Unlike traditional colorimeters, spectrophotometers measure the entire spectrum of light, rather than just specific wavelengths. This allows for more accurate color measurements and is often used in industries such as printing and textiles. Spectrophotometers can be either handheld or benchtop devices and are typically more expensive than traditional colorimeters.
Preparing your TV for calibration
Before you can calibrate your TV with a colorimeter, you need to make some adjustments to your TV’s settings. Start by turning off your TV’s built-in image processing, such as automatic brightness adjustment, contrast enhancement, and motion smoothing. These features can interfere with the calibration process and produce inaccurate results. Additionally, make sure that your TV is displaying content in its native resolution and color space.
It is also important to ensure that your TV has been running for at least 30 minutes before beginning the calibration process. This allows the TV to warm up and stabilize, which can affect the accuracy of the calibration. Additionally, make sure that the room lighting is consistent throughout the calibration process, as changes in lighting can also affect the results. Once you have made these adjustments, you can proceed with calibrating your TV to achieve the best possible picture quality.
Connecting the colorimeter to your TV
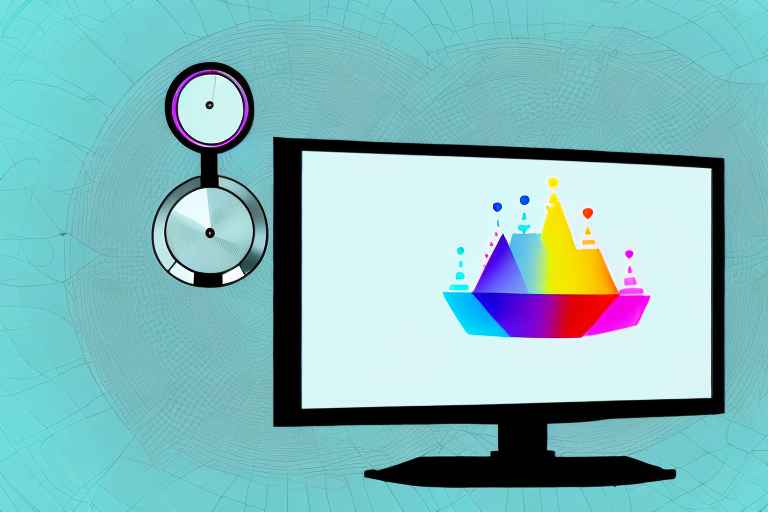
The next step is to connect the colorimeter to your TV. Most colorimeters come with suction cups or adhesive mounting options, allowing you to attach the device to your TV screen. Once you have mounted the colorimeter, connect it to your computer via USB.
It is important to note that before connecting the colorimeter to your TV, you should ensure that your TV is properly calibrated. This will ensure that the colorimeter is able to accurately measure the colors on your screen. You can use a calibration tool or software to calibrate your TV before connecting the colorimeter.
Installing the calibration software on your computer
Now that your colorimeter is connected, it’s time to install the calibration software on your computer. The software will guide you through the calibration process, step-by-step. Make sure to follow the instructions carefully to achieve the best results.
Before installing the calibration software, make sure that your computer meets the minimum system requirements. These requirements can usually be found on the software’s website or in the user manual. If your computer does not meet the requirements, the software may not function properly or may not be compatible with your system. It’s also a good idea to close any other programs or applications before starting the installation process to avoid any potential conflicts.
Configuring the settings in the calibration software
Once your software is installed, you need to configure its settings. This typically involves inputting your TV’s model number, resolution, and other basic details so the software knows what it’s working with. Additionally, you may be given the option to choose from several pre-set calibration profiles, depending on how accurate you want your colors to be.
It’s important to note that while pre-set calibration profiles can be a good starting point, they may not be perfectly suited to your specific TV and viewing environment. For the most accurate results, it’s recommended to use a calibration tool, such as a colorimeter or spectrophotometer, to create a custom calibration profile for your TV. This will take into account factors such as the lighting in your room and the specific characteristics of your TV’s display panel.
Running a full calibration with the colorimeter
With the software configured, it’s time to run a full calibration using the colorimeter. This typically involves displaying various test patterns on your TV screen and adjusting your TV’s settings to match the colorimeter’s readings. The software should guide you through each step of the process.
It’s important to note that running a full calibration with the colorimeter can take some time, so be prepared to spend a few hours on the process. However, the end result will be a much more accurate and pleasing picture on your TV.
Additionally, it’s recommended to run a full calibration with the colorimeter every few months, as the settings on your TV can drift over time. This will ensure that you always have the best possible picture quality on your TV.
Verifying the accuracy of the calibration results
Once your calibration is complete, it’s important to verify the accuracy of the results. This typically involves comparing the colors on your TV screen to a reference image, such as a photograph or a color chart. If the colors match, then your calibration was successful.
However, if the colors do not match, it may be necessary to recalibrate your TV. It’s important to note that factors such as lighting conditions in the room and the age of your TV can affect the accuracy of the calibration results. Therefore, it’s recommended to periodically check and recalibrate your TV to ensure optimal viewing experience.
Tips for maintaining accurate TV calibration over time
After calibrating your TV, it’s important to maintain its accuracy over time. This may involve re-calibrating your TV periodically, especially if you notice any changes in its colors or image quality. Additionally, avoid using your TV’s automatic image processing features, as they can interfere with calibration settings.
Another important tip for maintaining accurate TV calibration is to avoid exposing your TV to direct sunlight or bright lights. This can cause glare and reflections on the screen, which can affect the image quality and make it difficult to see the true colors. It’s also a good idea to keep your TV in a cool, dry place, as excessive heat or humidity can damage the internal components and affect the calibration.
Finally, make sure to use high-quality cables and connections when setting up your TV. Poor quality cables can cause signal loss and interference, which can affect the image quality and make it difficult to maintain accurate calibration settings. By using high-quality cables and connections, you can ensure that your TV is receiving the best possible signal and that your calibration settings are working as intended.
Troubleshooting common issues during TV calibration
During the calibration process, you may encounter some technical difficulties. One common issue is a mismatch between your computer and TV’s resolution, which can cause the calibration settings to be inaccurate. Another issue is color cast, where certain colors appear tinted or discolored. Fortunately, these issues can be resolved by following the troubleshooting guide included in your calibration software.
Another issue that may arise during TV calibration is incorrect brightness or contrast levels. This can result in a picture that is too dark or too bright, making it difficult to see details in the image. To fix this issue, you can adjust the brightness and contrast settings manually or use the calibration software to guide you through the process. It’s important to note that the optimal brightness and contrast levels may vary depending on the lighting conditions in your room, so it may take some trial and error to find the perfect settings.
Frequently asked questions about mounting a colorimeter to your TV
Here are some frequently asked questions about mounting a colorimeter to your TV:
- Q: Can I use any colorimeter with my TV?
- A: No, you should always use a colorimeter that is compatible with your TV’s brand and model.
- Q: How often should I calibrate my TV?
- A: This depends on how frequently you use your TV and how important color accuracy is to you. Some users calibrate their TV once a year, while others do it every few months.
- Q: Can I calibrate my TV without a colorimeter?
- A: It is possible to adjust your TV’s settings manually, but this can be time-consuming, and the results may not be as accurate as using a colorimeter.
In summary, mounting a colorimeter to your TV is a crucial step in achieving accurate, true-to-life colors on your screen. By following the steps outlined in this article, you can ensure that your TV’s colors are displayed in the right way, enhancing your overall viewing experience.
However, it is important to note that not all colorimeters are created equal. Some may have more advanced features or better accuracy than others. It is recommended to do research and read reviews before purchasing a colorimeter to ensure that it meets your needs.
Another factor to consider when calibrating your TV is the lighting in your viewing environment. If you typically watch TV in a brightly lit room, you may need to adjust your TV’s settings differently than if you watch in a dimly lit room. It is important to take into account the lighting conditions when calibrating your TV for the most accurate results.