If you’re looking for a sleek and space-saving option for your home entertainment setup, wall mounting your Son TV could be the perfect solution. With a few tools and some careful planning, you can achieve a professional-looking installation that enhances your viewing experience and complements the décor of your room. Here’s how to wall mount your Son TV in 11 easy steps.
Gather the Necessary Tools and Equipment
Before you begin, you’ll need to acquire a few essential tools and equipment to ensure a successful installation. Here’s a list of everything you’ll need:
- Power drill and drill bits
- Stud finder
- Screwdriver
- Level
- Measuring tape
- Wall mount bracket kit (compatible with your Son TV model)
- Optional: cable cover kit to hide cables once installed
With these tools and equipment in hand, you’re ready to move on to the next step.
It’s important to note that the size and weight of your TV will determine the type of wall mount bracket kit you’ll need. Be sure to check the weight and size specifications of your TV before purchasing a bracket kit. Additionally, if you’re unsure about the compatibility of the bracket kit with your TV model, consult the manufacturer’s website or customer service for guidance.
Another important consideration is the location of the wall mount. Make sure the wall you choose is sturdy enough to support the weight of your TV and bracket. Avoid mounting the TV on a wall with electrical wiring or plumbing behind it, as this can be dangerous and cause damage to your home. It’s also a good idea to measure the height and distance from the wall to ensure optimal viewing angles and comfort.
Choose the Right Wall Mount for Your TV
With so many different wall mounts available on the market, it’s crucial to choose the right one to ensure that your TV is securely mounted and that you can adjust it easily. The most important factor to consider is compatibility with your Son TV model and weight. You’ll typically find VESA compatibility details listed on the back of your TV or in the user manual. You’ll also want to consider the type of mount that suits your viewing preferences, such as fixed, tilting or full-motion.
Another important factor to consider when choosing a wall mount for your TV is the location where you plan to mount it. If you’re mounting your TV in a high-traffic area, such as a living room or family room, you may want to consider a mount that allows you to easily adjust the viewing angle to reduce glare or reflections. On the other hand, if you’re mounting your TV in a bedroom or home office, a fixed mount may be sufficient. Additionally, you’ll want to make sure that the wall you plan to mount your TV on is sturdy enough to support the weight of your TV and the mount.
Measure and Mark the Wall for Mounting
Once you have your wall mount kit, you’ll need to measure and mark the wall where you want to place the TV. To ensure that your TV is at the ideal height and angle for viewing, measure the distance from the floor to your eye level when seated and mark the wall accordingly. You’ll also need to locate the studs in the wall, as this is where you’ll need to drill the mounting screws. Use a stud finder to detect the wooden beams within the wall and mark them with a pencil.
It’s important to make sure that the wall you’re mounting the TV on is strong enough to support the weight of the TV and the mount. If you’re unsure about the strength of the wall, consult a professional before proceeding with the installation. Additionally, make sure that the area around the TV is clear of any potential hazards, such as furniture or sharp objects, to prevent any accidents or damage to the TV.
Locate and Mark the Studs on the Wall
Locating the studs is a critical step in ensuring a secure installation. You’ll need to drill the screws into the studs, so make sure you locate them accurately. With your stud finder, run it horizontally across the wall, moving it slowly until you hear a beep or see a light indicating the position of the stud. Once you find it, mark the location with an ‘X’ using your pencil.
It’s important to note that not all walls have studs in the same spacing. Some may have studs every 16 inches, while others may have them every 24 inches. It’s important to measure the distance between the studs and mark them accordingly. This will ensure that your installation is secure and able to hold the weight of the object you’re hanging.
Install the Wall Plate and Bracket
With the studs located and marked, you can now install the wall plate and bracket. To do so, position the wall plate onto the wall according to your measurements and stud marks. Drill pilot holes through the mounting holes on the wall plate at the stud locations. Then attach the wall bracket to the wall plate using the supplied screws and washers. Ensure that the bracket is level and secure.
It is important to note that the weight of the object being mounted should be taken into consideration when installing the wall plate and bracket. If the object is particularly heavy, it may be necessary to use additional mounting hardware or consult a professional for installation. Additionally, be sure to follow any specific instructions provided by the manufacturer for the wall plate and bracket installation.
Attach the Mounting Arms to Your TV
With the wall mount plate and bracket installed, it’s time to attach the mounting arms to your Son TV. Follow the instructions provided with your wall mount kit to attach the mounting arms to the back of your TV. Make sure you use the appropriate screws provided and tighten them firmly but not too tight to avoid damaging your TV. Once attached, lift the TV and mounting arms carefully so that they align with the wall bracket and slide them into place.
It’s important to note that the weight of your TV should be evenly distributed across the mounting arms. If the weight is not evenly distributed, it can cause the TV to tilt or even fall off the wall mount. To ensure even weight distribution, adjust the mounting arms so that they are level and parallel to each other. Use a level tool to check that the TV is straight before tightening the screws completely. Once you’re sure that the TV is securely attached to the wall mount, you can sit back and enjoy your newly mounted TV!
Lift and Securely Attach Your TV to the Wall Mount
With your TV and mounting arms in position, it’s time to lift and attach your TV to the wall mount. Carefully lift the TV and slide it into the wall bracket, making sure it is aligned correctly and securely. Once in place, secure the TV to the wall bracket using the locking screws or bolts provided with your wall mount kit. Ensure that the TV is level and adjust it before tightening the screws or bolts completely.
It’s important to note that the weight of your TV should be within the weight limit specified by your wall mount. Exceeding the weight limit can cause the wall mount to fail and potentially damage your TV or injure someone. Always check the weight limit and ensure that your TV is within the specified range before mounting it to the wall.
Adjust Your TV’s Viewing Angles After Installation
Once you’ve securely mounted your Son TV to the wall, it’s time to make any necessary adjustments to ensure optimal viewing angles. Depending on your wall mount type, you may be able to adjust the tilt, swivel or rotation of your TV. Use your level to ensure that your TV is level and adjust it as needed. Test different viewing angles to find the most comfortable position and adjust accordingly.
It’s important to note that the lighting in your room can also affect your viewing experience. If there is too much glare on your TV screen, it can be difficult to see the picture clearly. Consider adjusting the position of your TV or adding curtains or blinds to block out excess light.
Additionally, if you have multiple people watching TV from different angles, you may want to consider a TV mount that allows for easy adjustment. This will ensure that everyone can enjoy the best possible viewing experience, no matter where they are sitting in the room.
Troubleshooting Common Issues During Installation
While wall mounting your Son TV is relatively straightforward, you may encounter a few common issues during the process. If you’re having difficulty locating studs or drilling pilot holes, try using a hammer to tap the wall and listen for a different sound where the studs are located. If your TV isn’t level after installation, adjust it accordingly using your level. If you encounter any other issues, refer to the troubleshooting section of your wall mount kit manual or reach out to the manufacturer for assistance.
Understanding Different Types of Wall Mounts for Your Specific Needs
While we’ve covered the basics of wall mounting your Son TV, it’s worth noting that there are many different types of wall mounts available on the market. From fixed wall mounts to tilting and full-motion mounts, each has its own advantages and disadvantages depending on your specific needs. Consider your room layout, seating arrangement and viewing habits before deciding on a type of wall mount for your Son TV.
Safety Tips to Consider When Wall Mounting Your TV
Wall mounting a TV requires some physical effort and care. Here are some safety tips to keep in mind during the installation process:
- Use a sturdy ladder or step stool to reach high areas.
- Work with a partner to help lift and position your TV and wall mount.
- Avoid over-tightening screws or bolts, as this can damage your TV or wall.
- Keep children and pets away from the work area.
By following these basic safety guidelines, you can ensure a safe and successful installation.
How to Hide Unsightly Cables After Wall Mounting Your TV
One downside of wall mounting your Son TV is that it can leave unsightly cables dangling from the wall. Fortunately, there are several ways to hide cables and keep your entertainment setup looking neat and organized. Options include using cable covers, installing an in-wall cable management system or even opting for wireless connectivity where possible.
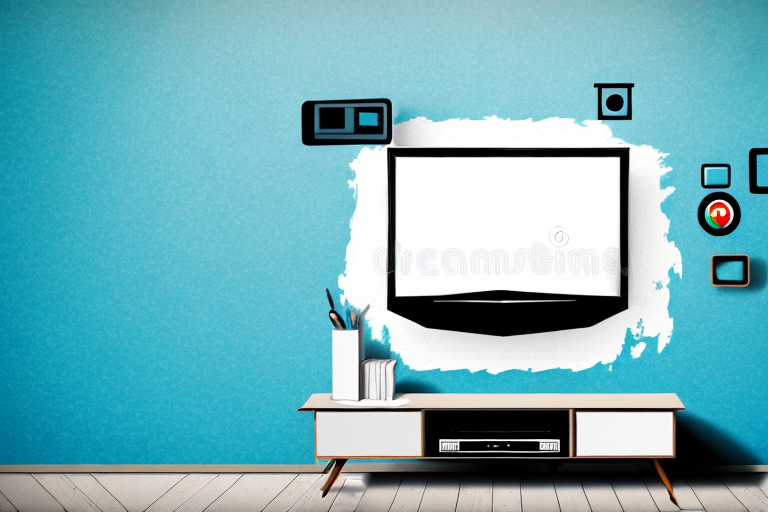
The Benefits of Wall Mounting Your TV Over Other Placement Options
Wall mounting your Son TV over other placement options such as a TV stand or cabinet can bring several benefits. By freeing up floor space, you can create a more open and inviting room layout. Wall-mounting can also offer more flexible viewing angles and reduce glare and eye strain, which can enhance your overall viewing experience. Additionally, wall mounting can create a sleek and modern aesthetic that complements your room’s décor.
Now that you know how to wall mount your Son TV, you can enjoy a professional-looking installation that enhances your viewing experience and adds a touch of style to your room.