If you’re a movie lover or a passionate gamer, a home theater system is an excellent investment that can elevate your experience to new heights. While wireless systems have grown in popularity, wired home theater systems are still the preferred choice for many. In this article, we’ll guide you through the step-by-step process of setting up your own wired home theater system, from understanding the basics to comparing wired and wireless systems.
Understanding the Basics of a Wired Home Theater System
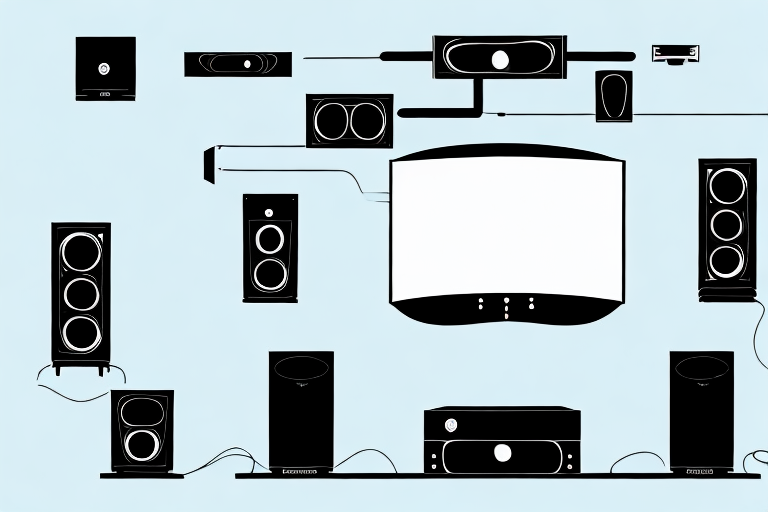
Before you begin setting up your home theater system, it’s essential to understand the basics of how they work. A wired home theater system typically consists of several components, including a DVD or Blu-Ray player, an Audio/Video (AV) receiver, speakers, and a TV or projector. The AV receiver is the central hub that connects all the other components and enables them to work together seamlessly.
One of the most critical components of a wired home theater system is the AV receiver. It acts as the central hub that connects all the other components and enables them to work together seamlessly. The AV receiver receives audio and video signals from the DVD or Blu-Ray player and sends them to the speakers and TV or projector.
When setting up a wired home theater system, it’s essential to consider the placement of the speakers. The speakers should be positioned correctly to ensure that the sound is evenly distributed throughout the room. It’s also important to consider the size of the room and the number of speakers required to achieve the desired sound quality.
Essential Components for a Wired Home Theater System Setup
There are several essential components you’ll need to set up a wired home theater system. First, you’ll need a high-quality AV receiver that can decode and amplify the audio signals. Next, you’ll need several speakers, including left and right front speakers, a center channel speaker, and two to four surround speakers. Finally, you’ll need a projector or TV screen to display the video content.
In addition to the basic components mentioned above, there are a few other items that can enhance your home theater experience. One such item is a subwoofer, which can provide deep, powerful bass that adds a new dimension to your audio. Another item to consider is a universal remote control, which can simplify the process of controlling all of your devices with a single remote.
It’s also important to consider the layout and design of your home theater room. Factors such as room size, seating arrangement, and acoustics can all impact the quality of your audio and video. To optimize your setup, you may want to consult with a professional home theater installer who can help you design and install a system that meets your specific needs and preferences.
Choosing the Right Room for Your Wired Home Theater System
Choosing the right room for your home theater system is crucial for optimal performance. Ideally, you’ll want a room with minimal ambient light, adequate ventilation, and sufficient space to accommodate all the components and seating arrangements. Keep in mind that the room’s dimensions and shape can also impact the audio quality, so choose wisely.
Another important factor to consider when choosing the right room for your wired home theater system is the location of the room within your home. If possible, choose a room that is isolated from other areas of the house to minimize external noise and distractions. Additionally, consider the proximity of the room to other living spaces, as loud audio and bright lights can disturb others in the house. By carefully selecting the location of your home theater room, you can ensure a more immersive and enjoyable viewing experience for everyone.
Preparing Your Room for a Wired Home Theater System Installation
Once you’ve selected your room, it’s time to prepare it for the installation. Start by cleaning the area thoroughly and removing any obstacles that could interfere with the installation process. You’ll also need to decide where to place your components, speakers and run wires to ensure a clean and organized setup.
It’s important to consider the layout of your room when deciding where to place your components and speakers. You’ll want to ensure that the speakers are positioned in a way that provides optimal sound quality and that the components are easily accessible for maintenance and upgrades. Additionally, it’s a good idea to plan for future upgrades by leaving extra space for additional components or speakers.
Wiring Your Home Theater System: Step-by-Step Guide
Wiring your home theater system can be challenging, but it’s crucial for optimal performance. Start by running the speaker wires from the AV receiver to each speaker location, making sure to use a high-quality cable that can carry the signal without interference. Next, connect the video output from your DVD or Blu-Ray player to the TV or projector using an HDMI cable. Finally, connect all other components (such as gaming consoles or streaming devices) to the AV receiver using the appropriate cables.
It’s important to consider the placement of your speakers when wiring your home theater system. The front speakers should be placed at ear level, while the center speaker should be placed above or below the TV. The surround speakers should be placed behind the viewer, and the subwoofer can be placed anywhere in the room for optimal bass response.
Another important factor to consider when wiring your home theater system is cable management. Make sure to label each cable and keep them organized to avoid confusion and tangling. You can also use cable ties or clips to secure the cables to the wall or furniture for a clean and professional look.
Setting Up Your TV and Surround Sound Speakers
Once you’ve wired your home theater system, it’s time to set it up. Start by calibrating the speakers and the TV or projector to ensure they work seamlessly together. Configure the audio settings on the AV receiver and perform a sound test to ensure optimal sound quality. Next, adjust the video settings to ensure the picture quality is sharp and clear. Finally, position the speakers to provide an immersive surround sound experience.
When positioning your speakers, it’s important to consider the size and layout of your room. For example, if your room is small, you may want to opt for smaller speakers to avoid overwhelming the space. Additionally, you should aim to position your speakers at ear level for the best sound quality. If you’re unsure about the best placement for your speakers, consult the user manual or seek advice from a professional.
Another important factor to consider when setting up your home theater system is the type of cables you use. High-quality cables can make a significant difference in the overall sound and picture quality. Consider investing in HDMI cables for the best video quality and optical cables for the best audio quality. Additionally, make sure to label your cables to avoid confusion and make future adjustments easier.
Calibrating Your Home Theater System for Optimal Performance
Calibrating your home theater system is crucial for optimal performance. You’ll want to fine-tune the audio and video settings to match the characteristics of your room and your personal preferences. Use the AV receiver’s automatic calibration feature, or manually adjust the settings using test tones and a sound meter. Similarly, calibrate the TV or projector to match the color, brightness, and contrast levels that work best for you.
It’s also important to consider the lighting in your room when calibrating your home theater system. If there are windows or other light sources that can’t be blocked, you may need to adjust the brightness and contrast levels accordingly. Additionally, you may want to invest in ambient lighting that can be dimmed during movie viewing to enhance the overall experience. Taking the time to properly calibrate your home theater system will ensure that you get the most out of your investment and enjoy a truly immersive entertainment experience.
Troubleshooting Common Problems with Wired Home Theater Systems
Even with careful setup and calibration, you may encounter issues with your home theater system. Common problems include audio dropouts, video buffering, syncing issues, and compatibility problems. If you experience any issues, consult the user manual and the troubleshooting guide, and contact customer support if necessary.
One additional common problem with wired home theater systems is cable management. With multiple cables running from your TV, speakers, and other devices, it can be difficult to keep them organized and out of sight. To avoid this issue, consider using cable ties or a cable management system to keep your cables neat and tidy. This can also help prevent any accidental damage to the cables or devices.
Tips for Maintaining Your Wired Home Theater System
Maintaining your wired home theater system is crucial for long-term performance and durability. Regularly check and clean the components, replace worn-out cables, and adjust the settings as needed to ensure optimal performance. Keep the system away from moisture, dust, and extreme temperatures, and use a surge protector to prevent damage from power surges or outages.
In addition to these basic maintenance tips, it’s also important to keep your system up-to-date with the latest software and firmware updates. These updates can improve performance, fix bugs, and add new features to your system. Check the manufacturer’s website regularly for updates and follow the instructions carefully to ensure a smooth installation process.
Upgrading Your Wired Home Theater System: What to Consider
Over time, you may want to upgrade your wired home theater system to keep up with new technologies and trends. When considering upgrades, consider your budget, the compatibility with your existing components, and the impact on the overall performance. Consult the user manual and the manufacturer’s website for specific upgrade options and compatibility guidelines.
One important factor to consider when upgrading your wired home theater system is the type of cables you are using. Upgrading to higher quality cables can significantly improve the audio and video quality of your system. Look for cables that are compatible with your components and have a high bandwidth and low signal loss.
Another consideration is the placement of your speakers. Proper speaker placement can greatly enhance the overall sound quality of your system. Consider the size and shape of your room, as well as the location of your seating area, when determining the optimal placement for your speakers. You may also want to invest in speaker stands or wall mounts to ensure that your speakers are positioned correctly.
Comparing Wired and Wireless Home Theater Systems: Pros and Cons
While wired home theater systems are still popular, wireless systems have grown in popularity due to their convenience and ease of use. When comparing wired and wireless home theater systems, consider the pros and cons of each. Wired systems offer higher quality audio and video, don’t suffer from interference or connectivity issues, and provide more flexibility in terms of customization. However, they’re more challenging to install and require more maintenance and upkeep. Wireless systems, on the other hand, offer more convenience and easy setup, but may suffer from lag, interference and signal quality issues, and require strong wireless connectivity to work correctly.
Conclusion
Setting up a wired home theater system may seem daunting, but with careful planning and preparation, it’s a rewarding investment that can provide years of high-quality audio and video entertainment. Follow these steps, consider these factors, and consult the user manual and customer support as needed to ensure optimal performance and enjoyment.