If you’re someone who enjoys watching movies, TV shows, or playing video games, then you know the importance of having a home theater system that can give you a complete and immersive experience. This is where Omniphase Professional Home Theater System comes in as it offers a complete package that is designed to provide an exceptional audio and video performance that can transform your room into a theater. In this article, we’ll delve deep into how to set up Omniphase Professional Home Theater System to ensure you get the most out of it.
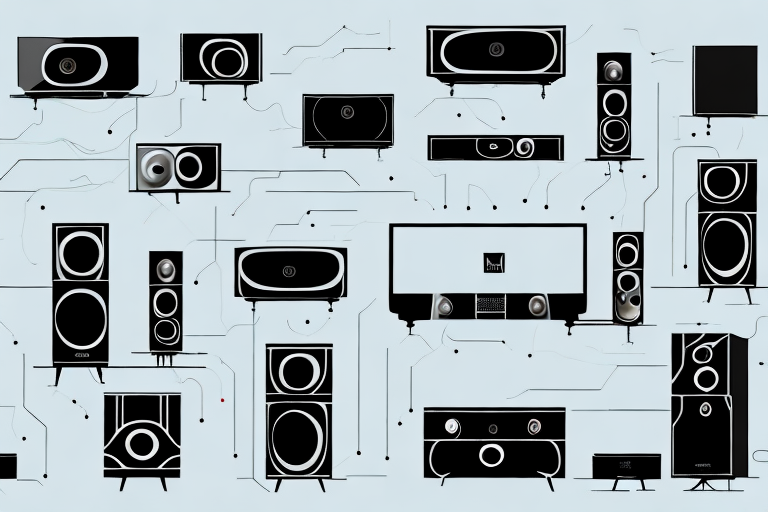
Understanding the Basic Components of Omniphase Professional Home Theater System
Before you start setting up Omniphase Professional Home Theater System, it’s important to understand the basic components of the system. This includes speakers, subwoofers, audio and video receivers, and a remote control. Let’s take a closer look at each component:
- Speakers: The speakers of the system are designed to provide a crisp and clear sound and are available in different shapes and sizes
- Subwoofers: The subwoofers are designed to deliver a deep and powerful bass that can provide an immersive audio experience
- Audio and video receivers: The audio and video receivers are the heart of the system and are responsible for decoding audio and video signals from different devices
- Remote control: The remote control allows you to control the system from a distance and access various features, such as volume control, input switching, and more.
In addition to the basic components, Omniphase Professional Home Theater System also includes advanced features that enhance the audio and video experience. These features include Dolby Atmos, which provides a three-dimensional sound experience, and HDR (High Dynamic Range) video, which delivers a wider range of colors and brightness levels for a more realistic picture.
Another important aspect of the system is the wiring and placement of the components. It’s important to follow the manufacturer’s instructions for wiring and placement to ensure optimal performance and safety. Additionally, proper calibration of the system is crucial for achieving the best possible audio and video quality.
Choosing the Best Location to Set Up Your Home Theater System
The next step is to choose the best location to set up your home theater system. You’ll want to select a room that is spacious enough to accommodate the system and has good acoustics. It’s important to find a location where the system’s sound can resonate without any hindrance. Additionally, you should position the components in such a way that they provide a clear view of the screen.
Another important factor to consider when choosing the location for your home theater system is the lighting in the room. You’ll want to avoid any sources of natural light that could cause glare on the screen. It’s best to choose a room with minimal windows or to install blackout curtains or shades to block out any unwanted light. Additionally, you may want to consider adding ambient lighting to the room to enhance the viewing experience and create a more immersive atmosphere.
Preparing the Room for Your Home Theater System Installation
Once you have chosen the location, the next step is to prepare the room for the installation of your home theater system. This includes removing any furniture or objects that may obstruct the system’s components and setting up the wiring. You’ll want to ensure that you have power outlets near the components so that you can connect them without any hassle. Moreover, you should avoid placing any electronic devices near the system as they can interfere with the performance of your system.
Another important factor to consider when preparing the room for your home theater system installation is the lighting. You’ll want to ensure that the room is dark enough to provide an optimal viewing experience. This can be achieved by installing blackout curtains or shades, or by using dimmer switches to control the lighting. Additionally, you may want to consider adding ambient lighting to enhance the overall atmosphere of the room. This can be achieved by installing LED strip lights or wall sconces that can be dimmed or adjusted to your liking.
Connecting the Speakers and Subwoofers of Omniphase Professional Home Theater System
With the room prepared, you can now connect the speakers and subwoofers of your Omniphase Professional Home Theater System. Start by connecting the speaker wires to the terminals on the back of the speakers and subwoofers. You’ll then need to connect the other end of the wires to the appropriate terminals on the audio and video receiver. Please refer to the instruction manual for specific details on how to do this.
It’s important to ensure that you connect the speakers and subwoofers correctly to avoid any damage to the system. Make sure that you match the positive and negative terminals on both the speakers and the receiver. You can do this by checking the color coding on the wires or the terminals themselves.
Once you have connected the speakers and subwoofers, you can test the system by playing some audio or video content. Make sure that the sound is balanced and that all the speakers are working correctly. You can adjust the volume and other settings on the receiver to optimize the sound quality according to your preferences.
Setting Up the Audio and Video Receivers of Your Home Theater System
Once you have connected the speakers and subwoofers, the next step is to set up the audio and video receivers. Start by plugging in the HDMI cable to the appropriate port on the receiver and then connect the other end of the HDMI cable to your TV’s HDMI port. You’ll then need to connect your other devices, such as a Blu-Ray player or gaming console, to the receiver’s HDMI inputs. You should also ensure that you have the appropriate audio and video cables to connect the devices.
After connecting all the devices, you need to configure the audio and video settings on the receiver. This includes selecting the appropriate input source for each device and adjusting the sound and picture quality settings. You may also need to calibrate the speakers and subwoofers to ensure optimal sound quality. Most receivers come with an automatic calibration feature that can help you with this process.
It’s important to note that some receivers may require firmware updates to ensure compatibility with the latest devices and technologies. You should check the manufacturer’s website for any available updates and follow the instructions carefully to avoid any potential issues. With the right setup and configuration, you can enjoy a truly immersive home theater experience with high-quality audio and video.
Calibrating Your Home Theater System for Optimal Audio and Video Performance
With the system set up, you’ll want to calibrate it for optimal audio and video performance. This involves adjusting the settings on the audio and video receiver and speakers to ensure that they work together seamlessly. Some systems come with an automatic calibration feature that can guide you through the calibration process, while others may require manual calibration. Please refer to the instruction manual for detailed instructions on how to calibrate your Omniphase Professional Home Theater System.
It’s important to note that the calibration process may take some time and patience, but the end result will be worth it. Proper calibration can greatly enhance your viewing and listening experience, allowing you to fully immerse yourself in your favorite movies and TV shows. Additionally, regular calibration can help maintain the longevity of your home theater system and prevent any potential damage or malfunctions. So take the time to calibrate your system and enjoy the full potential of your Omniphase Professional Home Theater System.
Installing and Configuring the Remote Control of Your Home Theater System
Once you have optimized the audio and video settings, the next step is to install and configure the remote control of your home theater system. You should ensure that you have the appropriate batteries for the remote control and that it is within the line of sight of the receiver. You’ll then need to program the remote control to match the settings of your audio and video receiver and your other devices. Please refer to the instruction manual for detailed instructions on how to install and configure the remote control.
It is important to note that some remote controls may require additional setup steps, such as connecting to a Wi-Fi network or downloading a specific app. Make sure to read the instruction manual thoroughly and follow all necessary steps to ensure that your remote control is fully functional. Additionally, if you encounter any issues during the installation or configuration process, don’t hesitate to contact the manufacturer’s customer support for assistance.
Troubleshooting Common Issues with Omniphase Professional Home Theater System
If you encounter any issues with your Omniphase Professional Home Theater System, you’ll want to troubleshoot the problems before calling in a professional. Some common issues can arise due to connectivity issues, incorrect settings, or a malfunctioning component. You should refer to the instruction manual for guidance on how to troubleshoot and resolve any issues you encounter.
One additional tip for troubleshooting your Omniphase Professional Home Theater System is to check the cables and connections. Sometimes, loose or damaged cables can cause issues with the system’s performance. Make sure all cables are securely plugged in and not frayed or damaged. If you find a damaged cable, replace it with a new one. This simple step can often resolve connectivity issues and improve the overall performance of your home theater system.
Tips and Tricks to Enhance Your Viewing Experience with Omniphase Professional Home Theater System
Now that you have successfully set up your Omniphase Professional Home Theater System and optimized its settings, you can enhance your viewing experience with some tips and tricks. Some suggestions include adjusting the lighting in the room to reduce glare, using high-quality cables for better audio and video performance, and upgrading your speakers or subwoofers for an even better audio experience.
Maintaining Your Home Theater System for Longevity and Optimal Performance
To ensure that your Omniphase Professional Home Theater System lasts for a long time and performs optimally, it’s important to maintain it. This includes regularly cleaning the components, checking the cables for any wear and tear, and avoiding any physical damage to the system. You should also ensure that you install any software updates as they become available to improve the functionality of your system.
Comparison of Omniphase Professional Home Theater System with Other Leading Brands
Finally, you may be wondering how Omniphase Professional Home Theater System stacks up against other leading brands. Compared to other systems in its class, Omniphase Professional Home Theater System provides exceptional audio and video performance at a competitive price. Additionally, it is easy to set up and comes with a comprehensive instruction manual that can guide you through the process.
With the above information in mind, you should now be able to set up your own Omniphase Professional Home Theater System with ease and enjoy a complete and immersive audio and video experience that can rival any professional theater.