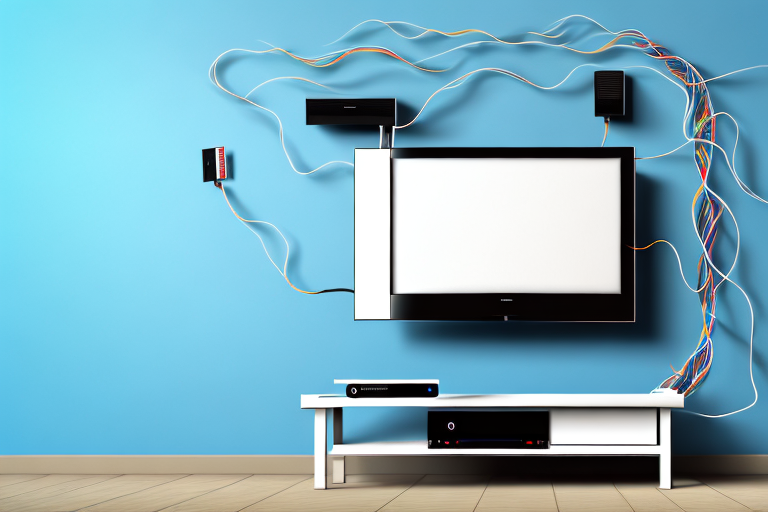
Wall mounting your TV is a great way to save space and give your living room a clean, modern look. Running cables to your wall mounted TV is an essential step in creating a clutter-free entertainment area. In this comprehensive guide, we will walk you through every step of running cables to your wall mounted TV, regardless of the complexity of your situation. Using the right tools and following the correct steps, you can easily hide the cables and get a clean, professional-looking installation. Read on for our complete guide to running cable to wall mount TV.
Choosing the Right Cable for Your Wall Mounted TV
The first step in running cable to wall mounted TV is choosing the right cable. The cable you choose will depend on the type of TV and the devices you want to connect to it. HDMI cables are the most common type of cable used for connecting devices to a wall-mounted TV. They carry high-definition video and audio over a single cable, making them ideal for home theater systems. Choose a cable that is long enough to reach from the TV to your devices without any strain or tension.
Another important factor to consider when choosing a cable for your wall-mounted TV is the quality of the cable. A high-quality cable will ensure that you get the best possible picture and sound quality from your devices. Look for cables that are made with high-quality materials and have gold-plated connectors, which provide a better connection and reduce signal loss. Additionally, consider the thickness of the cable, as thicker cables tend to provide better signal quality and are more durable. By choosing a high-quality cable, you can ensure that you get the most out of your home theater system and enjoy a superior viewing experience.
Measuring and Marking Out the Cable Route
Before you start drilling holes, it’s essential to map out the cable route. Measure and mark out the route using a tape measure, making sure to consider factors like furniture, floors, and other obstacles. It’s best to avoid running cables around doors or windows, as they can cause damage to the cables. Take some time to plan the route carefully to ensure a clean installation.
Another important factor to consider when measuring and marking out the cable route is the length of the cable. Make sure to measure the distance between the starting point and the endpoint accurately, and add a few extra feet to allow for any unexpected twists or turns. It’s always better to have a little extra cable than to come up short and have to start over. Additionally, if you’re running multiple cables, make sure to label them clearly to avoid confusion during installation.
Drilling Holes for the Cable
To create a clean and professional-looking installation, you’ll need to drill holes for the cables. Use a stud finder and drill bit to locate and drill into wall studs. If you have a concrete wall, you’ll need a hammer drill and masonry drill bit. Be sure to wear eye protection and take proper safety precautions when drilling.
Before drilling, it’s important to plan out the cable route and determine the best location for the holes. Consider factors such as the length of the cable, the location of the devices, and any potential obstacles in the wall. This will help ensure that the cables are neatly and efficiently installed.
After drilling the holes, use a fish tape or wire snake to guide the cables through the walls. This will help prevent any damage to the walls or cables. Once the cables are in place, use wall plates to cover the holes and create a finished look. With proper planning and installation, your cables will be hidden and your space will look clean and organized.
Running Cables Through Walls
Once you have drilled the holes, it’s time to run the cables. To make the process easier, use a fish tape to guide the cable through the wall. Lay the cable in the center of the tape and feed it through the hole in the wall. Pull the fish tape out of the wall, leaving the cable in place.
It’s important to ensure that the cables are not stretched or bent too tightly during installation, as this can cause damage to the wires and affect the quality of the signal. Additionally, it’s a good idea to label the cables at both ends to make it easier to identify them later on. This can be done using colored tape or labels, and will save you time and effort if you need to troubleshoot any issues with your network or home theater system in the future.
Fishing Cables Through Tight Spaces
If you encounter a tight space while running cables through walls, you can use a fish rod to guide the cable through the space. Fish rods are flexible and easy to maneuver, making them ideal for tight spaces.
When using a fish rod, it’s important to start by attaching the cable to the end of the rod securely. This will prevent the cable from slipping off the rod and getting stuck in the tight space. Additionally, it’s a good idea to use a lubricant on the cable to help it slide through the space more easily.
If you don’t have a fish rod, you can also use a wire coat hanger to guide the cable through the tight space. Simply straighten out the hanger and bend one end into a hook shape. Attach the cable to the hook and use the hanger to guide the cable through the space.
Concealing Cables in Wall Cavities
Once the cable is through the wall, it’s time to conceal it in the wall cavity. Use a wall plate to mount the cable to the plate and conceal it in the wall cavity. You can also use cable tracks or channels to conceal the cable along the wall.
It is important to ensure that the cable is not tightly packed in the wall cavity, as this can cause overheating and potential fire hazards. Leave enough space around the cable to allow for proper ventilation.
If you are unsure about how to properly conceal cables in wall cavities, it is recommended to consult with a professional electrician. They can provide guidance on the best methods for concealing cables and ensure that all safety measures are taken.
Securing Cables to Walls and Floors
To secure the cable to the wall or floor, use cable clips or anchors. These can be easily installed with a screwdriver, and they will help to keep the cable secure and in place.
When choosing cable clips or anchors, make sure to select the appropriate size for your cable. Using clips that are too small or too large can cause the cable to become loose or damaged over time.
It is also important to consider the placement of the cable. Avoid placing the cable in areas where it may be stepped on or tripped over, as this can cause damage to the cable and create a safety hazard. Additionally, be sure to secure the cable at regular intervals to prevent it from sagging or becoming tangled.
Testing the Cable Connection and Signal Strength
Once the cables are installed, test them to ensure they are working correctly. Use a signal tester to check the cable connection and signal strength. If there are any issues, troubleshoot them to identify and resolve the problem.
It is important to note that the quality of the cable connection and signal strength can be affected by various factors such as weather conditions, interference from other electronic devices, and the distance between the cable source and the receiver. Regularly testing and maintaining the cables can help prevent any potential issues and ensure optimal performance.
Tips for Troubleshooting Common Cable Installation Issues
If you encounter problems during the installation process, there are several troubleshooting tips you can try. These include checking connections, resetting devices, and adjusting settings. If you are unable to fix the issue, consider consulting a professional for assistance.
One common issue that people face during cable installation is poor signal quality. This can result in fuzzy or pixelated images on your TV screen. To troubleshoot this issue, try adjusting the position of your antenna or cable, or consider upgrading to a higher quality cable or antenna.
Another issue that can arise is slow internet speeds. This can be caused by a variety of factors, including outdated equipment, network congestion, or interference from other devices. To improve your internet speed, try resetting your modem and router, upgrading your equipment, or contacting your internet service provider for assistance.
Tools You Need to Run Cable to Wall Mount TV
To complete a cable installation, you’ll need a variety of tools, including a drill, stud finder, fish tape, fish rod, wall plate, cable clips, anchors, and a signal tester. These tools will make the installation process easier and more efficient.
Before you begin the installation process, it’s important to plan out the cable route and determine the length of cable needed. This will ensure that you have enough cable and that the cable is not stretched or pulled too tightly, which can cause signal loss or damage to the cable.
Additionally, it’s important to consider the type of cable needed for your specific TV and devices. HDMI cables are commonly used for high-definition video and audio, while coaxial cables are used for cable and satellite TV. Make sure to choose the appropriate cable for your setup to ensure the best possible signal quality.
The Cost of Running Cable to Wall Mount TV
The cost of running cable to wall mount TV will depend on the complexity of the installation and the tools you use. If you plan to do it yourself, the cost will be limited to the price of the tools and materials you need. If you need professional assistance, the cost will depend on the company you hire and the scope of the project.
How to Run Multiple Cables to Wall Mount TV
If you need to run multiple cables to wall mount TV, use a cable management system to keep them organized. There are several cable management systems available that allow you to hide the cables and keep them organized for a clean and professional-looking installation.
Preparing Your Home for a Clean and Professional-looking Cable Installation
To prepare your home for a clean and professional-looking cable installation, take some time to plan out the installation process. Measure and mark out the cable route and consider using a cable management system to keep the cables organized. Use the right tools and take proper safety precautions while drilling and running cables through walls. With the right planning and preparation, you can achieve a clean and professional-looking installation.
With this complete guide to running cable to wall mount TV, you can create a clean and clutter-free entertainment area in your home. Follow these steps carefully, use the right tools, and take proper precautions to achieve a clean and professional-looking installation. With some planning and preparation, you can enjoy your wall mounted TV without any cable clutter.