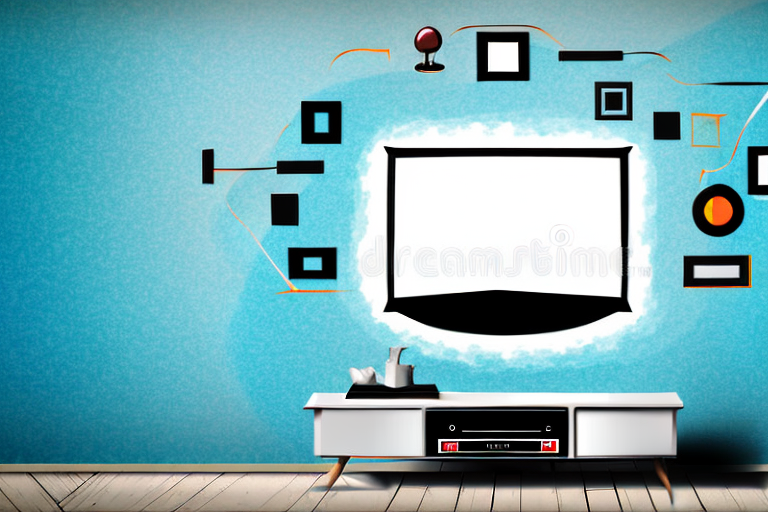
Are you tired of your TV taking up valuable floor space or cluttering up your entertainment center? Wall-mounting your TV is a great solution to save space and create a streamlined look in your home. In this guide, we’ll take you step-by-step through the process of mounting your TV on the wall. From choosing the right wall bracket to troubleshooting common issues, we’ve got you covered. Read on to learn how to mount your TV on the wall today.
Why Wall-Mounting Your TV is a Great Idea
Wall-mounting your TV is a smart choice for many reasons. It allows you to free up floor space and avoid cluttered cables and wires. Mounting your TV on the wall can also improve your viewing experience by allowing you to adjust the height and angle of your TV. With wall-mounting, you can achieve a sleek, modern look in your home and create a more immersive entertainment experience.
Additionally, wall-mounting your TV can also help to protect it from accidental damage. When your TV is mounted securely on the wall, it is less likely to be knocked over or bumped into, which can cause costly damage to the screen or internal components. This added protection can give you peace of mind and help to extend the lifespan of your TV.
Tools and Materials You’ll Need for Wall-Mounting Your TV
Before you get started, you’ll need a few essential tools and materials. These include a stud finder, a drill and drill bits, a level, a tape measure, and a pencil. You’ll also need a wall-mount bracket that is compatible with your TV’s size and weight. Be sure to read the manufacturer’s instructions carefully before purchasing a wall-mounted bracket to ensure that it will work with your TV.
In addition to the tools and materials mentioned above, you may also need a screwdriver, a socket wrench, and a power drill. It’s important to have these tools on hand to ensure that the wall-mounting process goes smoothly. Additionally, if you’re mounting your TV on a brick or concrete wall, you’ll need special masonry anchors and a hammer drill to make the necessary holes. Make sure to have all the necessary tools and materials before starting the project to avoid any delays or complications.
How to Choose the Right Wall Bracket for Your TV
Choosing the right wall bracket is critical to ensuring that your TV is securely mounted. The bracket you choose should be strong enough to support the weight of your TV and should be compatible with the VESA pattern on the back of your TV. The VESA pattern refers to the distance between the mounting holes on the back of your TV. To determine the VESA pattern for your TV, consult the manufacturer’s specifications or measure the distance between the mounting holes manually.
Another important factor to consider when choosing a wall bracket for your TV is the viewing angle. The bracket should allow you to adjust the angle of the TV to ensure that you have the best viewing experience. Some brackets offer tilt and swivel options, which can be particularly useful if you need to adjust the angle of the TV to reduce glare or to accommodate different seating positions in the room.
Measuring and Marking the Wall for TV Mounting
After you have chosen the right wall bracket for your TV, it’s time to measure and mark the wall for TV mounting. Begin by using a stud finder to locate the studs in the wall. For the most secure mounting, you should attach the bracket to at least two studs. Use a level and a pencil to mark the bracket’s placement on the wall, making sure it’s level and centered. Use a tape measure to determine the height you want your TV to be mounted.
Once you have marked the wall for the bracket, it’s important to double-check your measurements before drilling any holes. Use the level to ensure that the bracket is still level and centered, and measure the distance between the marks to make sure they are accurate. If you’re unsure about any of the measurements, it’s better to take the time to double-check than to risk having an uneven or unstable mount.
Before drilling any holes, it’s also a good idea to check for any electrical wires or plumbing behind the wall. You can use a stud finder with a built-in wire detector or a separate wire detector tool to do this. If you do find any wires or plumbing, it’s best to consult a professional before proceeding with the mount installation.
How to Locate Wall Studs for Secure Mounting
Locating wall studs is crucial to ensuring that your TV is securely mounted. Studs are vertical beams behind the drywall that provide support for heavy objects like wall-mounted TVs. You can use a stud finder to locate the studs or knock on the wall to listen for a solid sound, which indicates the presence of a stud. Make sure to mount the bracket to at least two studs for a secure installation.
It’s important to note that not all walls have studs in the same location. Studs are typically spaced 16 or 24 inches apart, but this can vary depending on the age and construction of the building. If you’re having trouble locating studs, try using a magnet to find the nails or screws that attach the drywall to the studs. You can also use a small drill bit to make a small hole in the wall to check for the presence of a stud. Remember to patch any holes you make in the wall after you’ve located the studs.
Drilling Holes in the Wall for Your TV Mount Bracket
Once you have located the studs and marked the bracket’s placement on the wall, it’s time to drill holes for the mount bracket. Use a drill bit that matches the size of the screws included with your bracket. Be sure to drill the holes into the stud.
It’s important to make sure that the holes are level and evenly spaced apart. You can use a level to ensure that the bracket will be straight once it’s mounted. Additionally, if you’re unsure about drilling into the wall yourself, it’s always a good idea to consult a professional to avoid any potential damage to your wall or injury to yourself.
Attaching the Mount Bracket to the Wall
After drilling the holes, use the screws provided with your wall mount bracket to attach the bracket to the wall. Be sure to tighten the screws securely and double-check the bracket’s level and placement.
It is important to ensure that the wall you are attaching the mount bracket to is strong enough to support the weight of your TV. If you are unsure, consult a professional or use a stud finder to locate the studs in the wall for added support.
Additionally, consider the placement of the bracket in relation to any nearby windows or light sources that may cause glare on the TV screen. It may be necessary to adjust the angle of the bracket or add curtains or blinds to reduce glare.
Securing the TV onto the Mount Bracket
With the wall mount bracket securely installed, it’s time to attach your TV. Most wall mount brackets feature an arm or plate that attaches to the back of your TV. Follow the manufacturer’s instructions carefully, ensuring that you’re attaching the mount bracket to the appropriate VESA pattern on your TV. Once the bracket is attached, carefully lift the TV into place and secure it to the bracket.
It’s important to note that the weight of your TV should be taken into consideration when selecting a wall mount bracket. Make sure that the bracket you choose is rated to support the weight of your TV. Additionally, it’s a good idea to have a second person assist you with lifting and securing the TV onto the bracket, as it can be a difficult and potentially dangerous task to do alone.
Cable Management Tips for Wall-Mounted TVs
Cable management is a crucial step in creating a clean, streamlined look for your wall-mounted TV. After attaching your TV, carefully route the cables and wires behind the wall or use cable ties to keep them organized. If you’re not comfortable with cutting holes in your drywall, you can use cable covers to hide the cables along the wall’s surface.
Another important aspect of cable management for wall-mounted TVs is to consider the length of your cables. Make sure to measure the distance between your TV and the nearest power outlet, cable box, or other devices. This will help you determine the appropriate length of cables you need to avoid any excess slack or tautness. Additionally, consider investing in high-quality cables to ensure a clear and reliable signal for your TV and other devices.
Adjusting the Viewing Angle of your Wall-Mounted TV
Once your TV is securely mounted, you can adjust the viewing angle to enhance your viewing experience. Some wall mount brackets allow you to tilt or swivel the TV, while others are fixed. Be sure to consult the manufacturer’s instructions to determine what adjustments you can make to your TV’s viewing angle.
It’s important to consider the placement of your TV when adjusting the viewing angle. If you have windows or light sources in the room, you may need to adjust the angle to reduce glare. Additionally, if you have seating at different heights, you may need to adjust the angle to ensure everyone has a clear view of the screen. Take some time to experiment with different angles to find the one that works best for your space and viewing preferences.
Troubleshooting Common Issues with Wall-Mounted TVs
Even with careful installation, issues can sometimes arise with wall-mounted TVs. The most common issues include a crooked mount, loose screws, or cables that become disconnected. If you experience any issues, consult the manufacturer’s instructions or seek professional assistance.
Another common issue with wall-mounted TVs is poor signal reception. This can be caused by a variety of factors, such as the distance between the TV and the antenna, interference from other electronic devices, or a weak signal from the broadcasting station. To improve signal reception, try repositioning the antenna or investing in a signal booster. If the issue persists, contact a professional for assistance.
Maintenance and Cleaning Tips for your Wall-Mounted TV
Maintenance and cleaning are essential to keep your wall-mounted TV looking and functioning great. Use a microfiber cloth to dust the TV regularly, and avoid harsh cleaning products that can damage the screen. If your TV becomes dirty or smudged, use a cleaner designed specifically for electronics.
Conclusion: Enjoy Your New, Space-Saving Setup!
Congratulations, you’ve successfully mounted your TV on the wall! Thanks to your efforts, you can now enjoy a clean, modern look in your home and free up valuable floor space. With the proper tools and techniques, wall-mounting your TV is a straightforward process that can be completed in just a few hours. Enjoy your new, space-saving setup, and happy viewing!