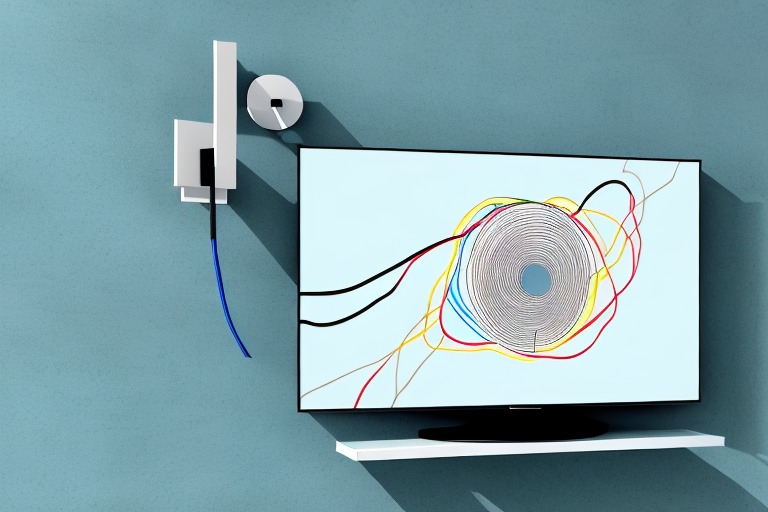
Many homeowners are now choosing to mount their TVs on the wall for a sleek and modern look. However, with the complexity of technology, wires and cables can easily become disorganized, leading to a tangled mess. This not only looks unsightly but can also be a safety hazard. If you are experiencing trouble with your TV wall mount and cables, it may be time to rewire them. In this article, we’ll show you how to rewire your TV wall mount and cables in simple steps, ensuring a neat and organized appearance while keeping safety as a top priority.
Understanding the Components of a TV Wall Mount and Cables
Before you start rewiring your TV wall mount and cables, you should have a basic understanding of the parts that make up the setup. Your TV wall mount likely consists of brackets or mount arms which are screwed to the wall. These brackets are connected to the TV or a mounting plate that holds the TV screen, giving it the ability to swivel or tilt. The cables that come with the TV setup include HDMI, coaxial, and power cords. Knowing the components will ensure that you have all the necessary tools and equipment for the job.
It is important to note that not all TV wall mounts are created equal. There are different types of mounts, such as fixed, tilting, and full-motion mounts. Fixed mounts keep the TV in a stationary position, while tilting mounts allow you to adjust the angle of the TV screen. Full-motion mounts offer the most flexibility, allowing you to swivel and tilt the TV in any direction. When choosing a mount, consider the size and weight of your TV, as well as the viewing angle and location of the mount.
In addition to the cables that come with your TV setup, you may need additional cables depending on your specific needs. For example, if you want to connect your TV to a soundbar or home theater system, you may need an optical audio cable or RCA cables. It is important to choose high-quality cables to ensure the best audio and video performance. When selecting cables, consider the length and type of connection needed, as well as the quality of the cable itself.
Safety Precautions to Take Before Rewiring Your TV Wall Mount and Cables
When it comes to handling cables and electronic equipment, one should always prioritize safety to avoid accidents. Turn off the TV and unplug it from the electrical socket to prevent electrocution. Remove the bracket gently, making sure not to damage the wall or surrounding areas. Wear protective gloves to avoid cuts from the sharp edges of the bracket or mount arms. Lastly, don’t forget the ladder, which should be stable and put in place securely before stepping on it.
It is also important to check the condition of the cables before rewiring. Look for any signs of wear and tear, such as frayed wires or exposed insulation. If you notice any damage, replace the cables before proceeding with the rewiring process. Additionally, make sure to use the appropriate tools for the job, such as wire cutters and strippers, to avoid damaging the cables or causing a short circuit. By taking these extra precautions, you can ensure a safe and successful rewiring of your TV wall mount and cables.
Tools and Equipment Required for Rewiring Your TV Wall Mount and Cables
Now that you have all the safety measures in place, you should have the necessary tools for rewiring your TV wall mount and cables. These include a drill, a screwdriver set, a wire stripper, cable ties, Velcro tape, and a stud finder. The stud finder is essential in locating the position of studs in the wall, where you’ll be attaching the mount brackets or arms.
Another important tool that you may need is a level. This will help you ensure that your TV is mounted straight and level on the wall. You may also need a measuring tape to measure the distance between the mount brackets or arms, and to ensure that they are evenly spaced.
It’s also a good idea to have a flashlight on hand, especially if you’re working in a dimly lit area. This will help you see what you’re doing and ensure that you’re connecting the right cables to the right ports. Additionally, you may want to have a cable tester to check the continuity of your cables and ensure that they’re working properly.
How to Remove Your TV from the Wall Mount Safely
With the safety measures and tools in place, you can start the rewiring process by removing your TV from the wall mount. Disconnect all the cables from the television, including the power cord, HDMI cables, and any other cables connected to it. Don’t forget to label each cable for easy identification. Removing the TV from the wall mount will give you space to access the cables and bracket easily. Be careful when removing the TV to avoid damaging it, so always have a partner to help you handle it.
Once you have removed the TV from the wall mount, it’s essential to clean the area thoroughly before rewiring. Dust and debris can accumulate behind the TV, and cleaning it will prevent any damage to the cables or the TV itself. You can use a soft cloth or a vacuum cleaner to remove any dirt or debris. Additionally, inspect the wall mount and the TV for any damages or wear and tear. If you notice any issues, it’s best to address them before mounting the TV back on the wall.
Tips for Organizing Your Cables Before Rewiring Your TV Wall Mount
Before rewiring your TV wall mount and cables, it’s essential to organize your cables. The easiest way to do this is by grouping them according to their type. HDMI cables, power cords, and coaxial cables should be put in separate groups, and each group should be tied using a cable tie. Velcro tape can also be used to hold the cables together, making it easier to route them through the wall mount. When labeling your cables, make sure you use a legible marker that won’t wear off easily over time.
Another important tip for organizing your cables is to measure the length of each cable before tying them together. This will help you avoid any unnecessary slack or tension in the cables, which can affect the quality of your TV signal. Additionally, it’s a good idea to use color-coded cable ties or labels to differentiate between cables that look similar, such as HDMI and DisplayPort cables.
Finally, if you’re unsure about how to organize your cables or how to rewire your TV wall mount, don’t hesitate to seek professional help. A qualified technician can ensure that your cables are properly organized and that your TV is mounted securely and safely. This can save you time, money, and frustration in the long run, and ensure that you can enjoy your TV without any technical difficulties.
Steps to Rewiring Your TV Wall Mount and Cables
Now that your cables and tools are well-organized, it’s time to start rewiring your TV wall mount and cables. This process involves three main steps: securing the mount brackets or arms to the wall, routing the cables through the wall mount, and finally, attaching the TV back to the wall mount. Before attaching the brackets, use a stud finder to locate the studs in the wall to ensure that the wall mount is fastened securely and won’t come loose.
Once you have located the studs, mark their positions on the wall with a pencil. Then, use a drill to make pilot holes for the screws that will hold the mount brackets or arms in place. Make sure the holes are deep enough to accommodate the screws, but not so deep that they go through the wall.
Next, feed the cables through the wall mount, making sure they are properly organized and secured. Use cable ties or clips to keep the cables in place and prevent them from getting tangled or damaged. Once the cables are in place, attach the TV back to the wall mount, making sure it is level and secure. Finally, test the TV to make sure it is working properly and that all the cables are connected correctly.
How to Properly Route Your Cables After Rewiring Your TV Wall Mount
Routing your cables after rewiring your TV wall mount is essential to ensure that the cables aren’t tangled or snarled. Make sure that the cables are easy to route and reach their designated devices without being too tight or too loose. Use cable ties or Velcro tape to hold the cables in place and prevent them from slipping out of their designated areas. Tidy up the cables once they are all in place, leaving a clean and organized look.
When routing your cables, it’s important to consider the length of the cables. Make sure that the cables are long enough to reach their designated devices without being too loose or too tight. If the cables are too short, you may need to purchase longer cables to ensure that they are properly routed.
Another important factor to consider when routing your cables is the location of your power outlets. Make sure that your cables are routed in a way that allows them to reach the power outlets without being stretched or pulled too tightly. If necessary, you may need to install additional power outlets to ensure that your cables are properly routed and connected.
Testing and Troubleshooting Your Newly Wired TV Wall Mount and Cables
After you’ve successfully rewired your TV wall mount and cables, it’s time to test it out. Connect the cables to their designated devices and plug your TV back into the electrical socket. Turn the TV on and check that all the cables are working perfectly. If you experience any issues, troubleshoot the problem before mounting the TV back on the wall.
Common Mistakes to Avoid When Rewiring Your TV Wall Mount and Cables
While rewiring your TV wall mount and cables, there are some common mistakes you should avoid to prevent accidents or damage to your equipment. Some of these mistakes include using the wrong size screws or not fastening the wall mount tightly, causing the TV to fall and breaking it. Another mistake is pulling cables too tight, cutting them or preventing them from working correctly. Lastly, not labeling cables correctly can make it challenging to locate them once they are hidden in the wall mount.
Benefits of Having a Neatly Wired TV Wall Mount and Cables Setup
There are numerous benefits to having a Neatly Wired TV wall mount, and cable setup. Firstly, a properly wired TV wall mount will give your room a clean and organized appearance, making it more visually appealing. Secondly, the tidy cables will eliminate any safety hazards, preventing anyone in the room from tripping over them. Lastly, a neatly wired TV wall mount and cables setup will make troubleshooting easier and less time-consuming, saving you time and money in the long run.
In conclusion, rewiring your TV wall mount and cables may seem like a daunting task, but with the right tools and knowledge, it can be easily accomplished. Follow the steps we’ve highlighted above, prioritizing safety and organization. The result of your rewiring task may surprise you with how much it improves your living space’s appearance and functionality.