If you are looking for a way to mount your TV that is both adjustable and high-quality, an Omnimount may be just the solution you need. This versatile and effective piece of equipment is designed to make mounting your TV simple and easy, with a range of benefits that make it a popular choice among homeowners and professionals alike. In this article, we will take a closer look at how to mount an adjustable TV Omnimount, from understanding the product to selecting the right height and avoiding common mistakes.
Understanding the Omnimount and Its Benefits
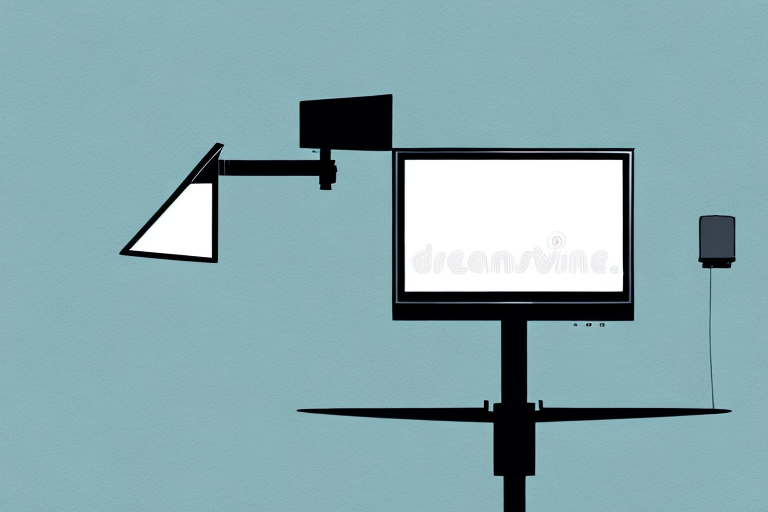
Before you begin mounting your TV Omnimount, it is important to understand what this product is and what it offers. Essentially, an Omnimount is a type of TV mount that is fully adjustable and allows you to easily move your TV up, down, left, and right to achieve the perfect viewing angle. This makes it ideal for rooms with multiple seating areas or for those who simply want to enjoy their favorite shows without having to awkwardly tilt their heads or adjust their posture.
One of the main benefits of an Omnimount is that it is incredibly easy to install, with no drilling or special tools required. Instead, it typically comes with all the hardware you need to mount it to your wall, including screws, washers, and brackets. Additionally, most Omnimounts are designed to work with a wide range of TV sizes and weights, making them incredibly versatile for any home or office.
Another advantage of an Omnimount is that it can help to free up valuable floor space in your home or office. By mounting your TV on the wall, you can eliminate the need for a bulky TV stand or entertainment center, which can be especially beneficial in smaller rooms or apartments. This can also help to create a more streamlined and modern look in your space.
Finally, an Omnimount can also help to improve the safety of your home or office. By securely mounting your TV to the wall, you can reduce the risk of it falling or tipping over, which can be especially important if you have young children or pets in your home. This can give you peace of mind and help to prevent accidents and injuries.
Preparing Your Mounting Space: Tips and Tricks
Before you begin installing your Omnimount, it is important to prepare your mounting space. This may involve clearing out any furniture or other obstacles in the area, as well as measuring the space to ensure that your TV will fit comfortably. Additionally, it is a good idea to check the wall where you plan to install your Omnimount for any studs or beams that can be used to anchor it in place.
One important tip when installing your TV Omnimount is to make sure that it is level. This can be done by using a level tool or by eyeballing it to ensure that it looks straight from all angles. Additionally, it is important to make sure that your Omnimount is securely attached to the wall, with all screws and brackets tightened down firmly.
Another important consideration when preparing your mounting space is to ensure that there are no electrical wires or plumbing pipes behind the wall where you plan to install your Omnimount. It is important to use a stud finder or other tool to locate any potential hazards before drilling into the wall. This will help prevent any damage to your home’s electrical or plumbing systems, as well as ensure that your Omnimount is securely attached to the wall.
Tools You’ll Need for the Job: A Comprehensive List
When installing your TV Omnimount, there are several tools you may need to use. These may include a drill, screwdriver, level, tape measure, and stud finder, among others. It is important to have all these tools on hand before you begin to ensure that the installation process goes smoothly and efficiently.
In addition to the tools mentioned above, you may also need a pencil, masking tape, and a cable management kit. The pencil will be useful for marking where you want to drill holes, while the masking tape can be used to mark the exact spot where you want to place the mount. The cable management kit will help you organize and hide any cords or cables that may be visible after installation. Having these additional tools will make the installation process even easier and ensure that your TV is securely mounted and looking great.
Step-by-Step Guide to Installing Your Omnimount
Once you have all your tools and have prepared your mounting space, it is time to begin the installation process. Here is a step-by-step guide to mounting your adjustable TV Omnimount:
- Locate the studs or beams in the wall and mark them with a pencil.
- Align the Omnimount with the studs or beams and mark where the screws will go.
- Drill pilot holes into the marked spots.
- Attach the brackets to the Omnimount using the screws and bolts provided.
- Attach the Omnimount to the wall by screwing it into the pilot holes.
- Position your TV on the Omnimount and adjust the angle to the desired viewing position.
It is important to note that the weight of your TV should not exceed the weight limit specified by the Omnimount. Exceeding the weight limit can cause the mount to fail and potentially damage your TV or injure someone. Make sure to check the weight limit before purchasing and installing your Omnimount.
Additionally, it is recommended to have a second person assist with the installation process, especially when lifting and positioning the TV onto the mount. This can help prevent accidents and ensure that the TV is securely mounted onto the Omnimount.
How to Choose the Right Height for Your TV Mount
One important consideration when installing your TV Omnimount is what height to mount it at. This can vary depending on a variety of factors, including the height of your ceiling and the size of your TV. Generally speaking, it is recommended to mount your TV at eye level when seated, which can help reduce neck strain and improve the overall viewing experience.
Another factor to consider when selecting the right height for your TV mount is the distance between your seating area and the TV. If your TV is too high, you may find yourself craning your neck or experiencing discomfort during long viewing sessions. Conversely, if it is too low, you may experience glare or other visual distractions that can detract from your enjoyment of the show.
It is also important to consider the layout of your room when choosing the height for your TV mount. If you have a large room with multiple seating areas, you may need to mount the TV higher to ensure that everyone has a clear view. On the other hand, if you have a smaller room with only one seating area, you may be able to mount the TV lower without sacrificing visibility.
Finally, it is worth noting that some TV mounts offer adjustable height options, which can be useful if you are unsure of the best height for your specific setup. These mounts allow you to easily raise or lower the TV as needed, giving you greater flexibility and control over your viewing experience.
How to Securely Attach Your TV to the Omnimount
Once your Omnimount is securely attached to the wall, it is important to make sure that your TV is also properly attached to the mount. This typically involves inserting mounting screws into the back of your TV and attaching them to the brackets provided with your Omnimount. It is important to follow the instructions carefully and make sure that your TV is properly balanced and centered on the mount to avoid any accidents or damage to your equipment.
Additionally, it is recommended to periodically check the tightness of the mounting screws to ensure that they have not loosened over time. This is especially important if you have a larger or heavier TV. It is also a good idea to avoid placing any heavy objects on top of your TV or applying excessive pressure to the screen, as this can cause the TV to become unbalanced and potentially fall off the mount.
Avoiding Common Mistakes in Mounting Your TV Omnimount
While mounting your TV Omnimount can be a fairly straightforward process, there are some common mistakes that you will want to avoid. One of the most common is failing to properly secure the Omnimount to the wall, which can result in it becoming loose or unstable over time. Additionally, it is important to make sure that all screws and brackets are tightened properly to avoid any wobbling or shifting of your TV or mount.
Maintaining and Troubleshooting Your Omnimount Over Time
Once your Omnimount is installed, it is important to continue to maintain it and troubleshoot any issues that may arise. This may involve periodically checking the tightness of screws and brackets, as well as adjusting the angle of your TV as needed. Additionally, if you notice any issues such as wobbling or instability, it may be necessary to make adjustments or seek professional assistance to address the problem.
Upgrading or Replacing Your TV Omnimount: What You Need to Know
If you find that your current TV Omnimount is no longer meeting your needs, or if you are upgrading your TV and require a new mount, it is important to carefully consider your options. This may involve researching different models to find one that is compatible with your TV size and weight, as well as taking into account any additional features or functions that may be important to you.
Choosing the Best Omnimount for Your Needs and Budget
When selecting an Omnimount, there are several factors to consider, including price, compatibility, and functionality. Depending on your needs and budget, there may be a range of options available, from basic mounts to more advanced models with built-in articulation and swiveling features. It is important to consider all of these factors carefully when making your selection to ensure that you get the best value for your money.
Comparing Different Types of TV Mounts: Which One Is Right for You?
Finally, when selecting a TV mount, it is important to compare different types to find the one that is right for you. Some popular types of TV mounts include fixed mounts, tilting mounts, full-motion mounts, and ceiling mounts, each with its own set of benefits and drawbacks. By carefully comparing these options and selecting the one that meets your specific needs, you can ensure a comfortable and enjoyable viewing experience for years to come.
Adding Additional Features to Your TV Mount
Finally, if you are looking to enhance your viewing experience even further, there are several additional features that you can add to your TV mount. These may include shelves or compartments for storing your media devices, cable management systems to reduce clutter and improve organization, and additional brackets or hooks for attaching other equipment or accessories.
Overall, mounting an adjustable TV Omnimount can be a simple and effective way to enhance your viewing experience and make the most of your TV investment. By following the steps outlined in this article and carefully selecting the right Omnimount for your needs, you can enjoy a comfortable and enjoyable viewing experience for years to come.