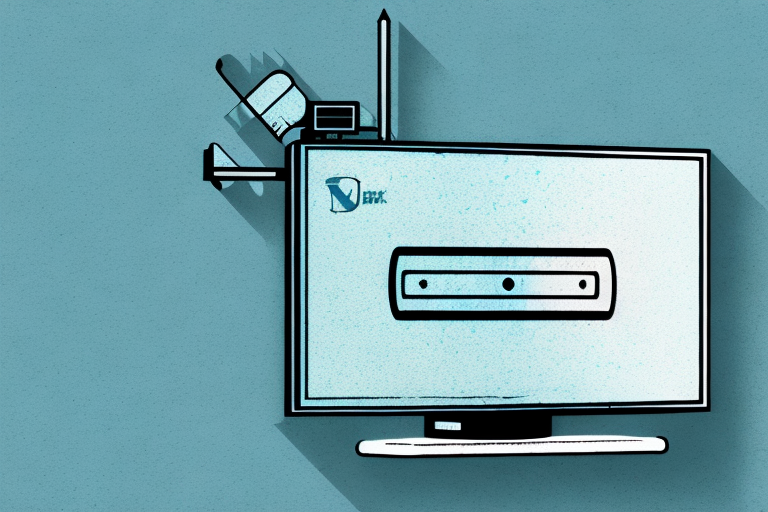
Are you ready to upgrade your home entertainment system with a Direct Tv receiver? Mounting a Direct Tv receiver is a simple process that can be completed by anyone with some basic tools and equipment. In this article, we’ll take you through every step of mounting a Direct Tv receiver, from choosing the right location to testing your signal strength and picture quality. So, let’s get started!
Choosing the Right Location for Your Direct Tv Receiver
The first step in mounting a Direct Tv receiver is choosing the right location. You want to find a spot that is easily accessible and offers a clear line of sight to the satellite. Ideally, this spot should be near a power outlet and have enough space to accommodate the receiver and any cables or cords. Avoid placing the receiver near any sources of heat, such as a fireplace or radiator, as this can cause damage to your equipment.
Another important factor to consider when choosing the location for your Direct Tv receiver is the proximity to other electronic devices. If you have other devices that emit electromagnetic interference, such as a microwave or a cordless phone, it is best to keep the receiver away from them. This can cause signal interference and affect the quality of your viewing experience.
Additionally, if you live in an area with extreme weather conditions, such as high winds or heavy rain, it is important to choose a location that is protected from the elements. This can help prevent damage to your equipment and ensure that you can enjoy uninterrupted viewing even during inclement weather.
Necessary Tools and Equipment for Mounting a Direct Tv Receiver
Before you begin the installation process, gather all the necessary tools and equipment. This includes a drill, screwdriver, stud finder, level, measuring tape, and cable ties. You’ll also need a Direct Tv receiver mounting kit, which typically includes a wall plate, bracket, and screws. Most kits will have instructions included, so be sure to review these carefully before beginning the installation process.
It is important to note that the location of the Direct Tv receiver is crucial for optimal signal strength. The receiver should be placed in an area with minimal obstructions, such as walls or furniture, and should be positioned in a way that allows for proper ventilation to prevent overheating. Additionally, it is recommended to use a surge protector to protect the receiver from power surges and electrical damage.
If you are unsure about the installation process or do not feel comfortable doing it yourself, it is always best to seek professional help. Direct Tv offers installation services for an additional fee, and their technicians are trained to ensure that the receiver is mounted correctly and functioning properly. This can save you time and potential frustration in the long run.
Preparing Your Mounting Surface for Installation
Once you’ve chosen the right location and gathered your tools and equipment, it’s time to prepare your mounting surface. Use a stud finder to locate the studs in the wall and mark them with a pencil. This will help you determine the best location to drill holes for the mounting bracket. Use a level to ensure that your bracket is straight and in the proper position before screwing it into the wall.
Before drilling any holes, it’s important to check for any electrical wiring or plumbing behind the wall. Use a stud finder that also detects electrical wires or hire a professional to ensure that you don’t accidentally drill into any wires or pipes. This can cause serious damage and even be dangerous.
If you’re mounting something heavy, like a TV or a shelf, it’s important to use the appropriate hardware. Look for mounting brackets and screws that are rated for the weight of the item you’re installing. If you’re unsure, it’s always better to err on the side of caution and choose a bracket that can support more weight than you think you’ll need.
Assembling Your Direct Tv Receiver Mounting Kit
Next, it’s time to assemble your Direct Tv receiver mounting kit. This typically involves attaching the bracket to the wall plate and ensuring that all screws and bolts are tightened securely. Refer to the instructions that came with your kit for detailed assembly instructions.
It is important to note that the location where you mount your Direct Tv receiver should be carefully chosen. Make sure that it is in a well-ventilated area and away from any heat sources. Additionally, ensure that the location has a clear line of sight to the satellite to ensure optimal signal strength. Once you have chosen the location, follow the assembly instructions carefully to ensure a secure and stable mount for your receiver.
Installing the Wall Plate and Bracket for Your Mount
With your mounting kit assembled, it’s time to install the wall plate and bracket for your mount. Use a drill to create pilot holes in the wall where you marked the studs. Then, attach the wall plate to the bracket using the screws provided. Be sure to tighten the screws securely to ensure that your mount is stable and secure.
It’s important to note that the weight capacity of your mount will depend on the strength of the wall and the size of the mount. Before installing the wall plate and bracket, make sure to check the weight capacity of your mount and ensure that it is appropriate for the size and weight of your TV or other device. If you have any doubts or concerns, consult a professional installer or contact the manufacturer for guidance.
Attaching the Direct Tv Receiver to the Mount Bracket
Now that your wall plate and bracket are installed, it’s time to attach the Direct Tv receiver to the mount bracket. Most kits will have clips or brackets that snap onto the receiver and connect to the mount. Carefully follow the instructions provided with your kit to ensure that your receiver is attached to the bracket securely.
It is important to note that the weight of the Direct Tv receiver should be taken into consideration when attaching it to the mount bracket. If the receiver is too heavy for the bracket, it may cause the bracket to become loose or even fall off the wall. To avoid this, make sure to use a mount bracket that is rated for the weight of your receiver. Additionally, double check that all screws and bolts are tightened properly to ensure a secure attachment.
Securing and Adjusting Your Direct Tv Receiver for Optimal Viewing
With your receiver attached to the mount, it’s time to secure and adjust it for optimal viewing. Use cable ties to organize and secure any cables or cords. Then, use a level to ensure that your receiver is perfectly straight. Finally, adjust the angle of your receiver to ensure that it is facing the satellite for optimal viewing.
It is important to note that the location of your Direct TV receiver can also affect the quality of your viewing experience. Make sure to place your receiver in a well-ventilated area to prevent overheating, which can cause signal disruptions. Additionally, avoid placing your receiver near other electronic devices that may interfere with the signal.
If you are experiencing issues with your Direct TV signal, there are a few troubleshooting steps you can take. First, check all cables and connections to ensure they are secure and undamaged. You can also try resetting your receiver by unplugging it from the power source for a few minutes and then plugging it back in. If these steps do not resolve the issue, contact Direct TV customer support for further assistance.
Connecting Cables and Wires to Your Direct Tv Receiver
Now that your Direct Tv receiver is securely mounted, it’s time to connect any necessary cables and wires. This typically includes an HDMI cable, power cord, and Ethernet cable for internet connectivity. Be sure to refer to the instructions provided with your receiver to ensure that you are connecting everything properly.
It is important to note that the quality of your cables can greatly affect the performance of your Direct Tv receiver. Investing in high-quality cables can improve the picture and sound quality of your television. Additionally, if you are experiencing any connectivity issues, it may be worth checking the cables and replacing them if necessary.
Another important consideration when connecting your Direct Tv receiver is the placement of the cables. Make sure that the cables are not twisted or bent, as this can cause signal interference and affect the performance of your receiver. It is also a good idea to keep the cables organized and labeled, so that you can easily identify which cable is which if you need to make any changes or adjustments in the future.
Testing Your Direct Tv Receiver Signal Strength and Picture Quality
With everything connected, it’s time to test your Direct Tv receiver signal strength and picture quality. Turn on your receiver and TV and use the remote to navigate to the signal strength and quality settings. Follow the on-screen instructions to adjust the settings for optimal performance. Be sure to test your signal strength and picture quality in different locations around your home to ensure that you have a consistent signal.
It is important to note that factors such as weather conditions, physical obstructions, and interference from other electronic devices can affect your Direct Tv signal strength and picture quality. If you notice any issues, try adjusting the position of your satellite dish or moving any objects that may be blocking the signal.
If you are still experiencing problems with your signal strength and picture quality, you may need to contact Direct Tv customer support for further assistance. They can help you troubleshoot any issues and provide recommendations for improving your signal strength and picture quality.
Troubleshooting Common Issues with Direct Tv Receivers During Installation
If you encounter any issues during the installation process, refer to the troubleshooting section of your Direct Tv receiver manual. Common issues may include signal loss, connectivity problems, or error codes. If you are unable to resolve the issue on your own, contact Direct Tv customer support for assistance.
It is important to note that before beginning the installation process, you should ensure that you have all the necessary equipment and cables. Double-check that you have the correct receiver model and that it is compatible with your TV. Additionally, make sure that your TV is set to the correct input source for the receiver. Taking these steps can help prevent common installation issues and make the process smoother.
Additional Tips for Maintaining and Upgrading Your Direct Tv System
Once your Direct Tv receiver is installed and working properly, be sure to keep it clean and free of dust and debris. Consider upgrading your system with additional accessories, such as an external hard drive for storing recorded content or a soundbar for enhanced audio quality. Refer to the Direct Tv website for information on new products and services that can enhance your viewing experience.
With these simple steps, you can easily mount a Direct Tv receiver and enjoy high-quality, uninterrupted entertainment in your home. Remember to follow all instructions carefully and seek professional assistance if needed. Happy viewing!