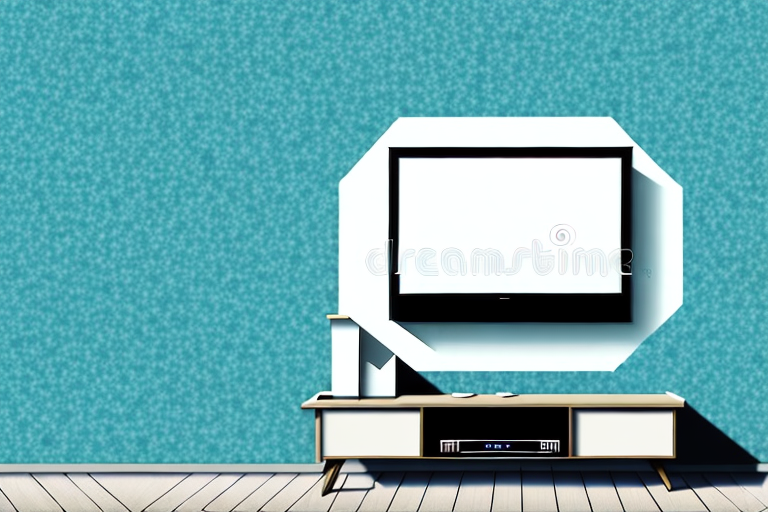
If you want to save space in your home entertainment area or simply desire a more modern look, mounting your TV on a tile wall is the way to go. However, installing a TV wall mount on tile can be a daunting task, especially for those without much DIY experience. The good news is that with the right tools and guidance, you can do it yourself! In this article, we’ll provide a detailed guide on how to install a TV wall mount on tile.
Gather the Necessary Tools and Materials
The first step in installing a TV wall mount on tile is to gather all the necessary tools and materials. You will need a drill, a ceramic tile drill bit, a hammer, a level, measuring tape, a pencil, a wrench, a screwdriver, wall anchors, and screws. Make sure that you have all the required tools and materials before proceeding to the next step.
It is important to note that the size and weight of your TV will determine the size and number of wall anchors and screws needed for the installation. It is recommended to consult the manufacturer’s instructions or a professional installer to ensure that you have the appropriate hardware for your specific TV and wall type. Using the wrong size or type of hardware can result in an unstable mount and potential damage to your TV or wall.
Choose the Right Wall Mount for Your TV and Tile
Once you have your tools and materials ready, the next step is to choose the right TV wall mount for your TV and tile. Consider the weight, size, and VESA pattern of your TV, as well as the type and thickness of your tile. You want to ensure that your wall mount can accommodate the weight and size of your TV, and that it is compatible with the VESA pattern on the back of your TV. Additionally, make sure that the wall mount is designed to be installed on tile.
It is also important to consider the viewing angle when choosing a wall mount. Think about where you will be sitting or standing when watching TV and make sure the wall mount allows for the best viewing experience. Some wall mounts offer tilting or swiveling options to adjust the angle of the TV. Take into account any glare or reflections that may affect the picture quality and choose a wall mount that can help minimize these issues.
Determine the Best Placement for Your TV on the Wall
Before you start drilling holes in your tile, make sure that you have determined the best placement for your TV on the wall. Consider the viewing angle, the height, and the distance from your seating area. Use a level to ensure that the wall mount is straight, and mark the spot with a pencil.
Another important factor to consider when determining the best placement for your TV on the wall is the lighting in the room. Make sure that there is no glare or reflection on the screen from windows or light fixtures. You may need to adjust the placement of your TV or install curtains or blinds to control the lighting.
Additionally, it is important to consider the weight and size of your TV when choosing a wall mount. Make sure that the mount is rated to support the weight of your TV and that it is the appropriate size for your TV. Improperly sized or rated mounts can lead to damage to your TV or even cause it to fall off the wall.
Measure and Mark the Mounting Holes on the Tile
Once you have determined the placement for your TV on the wall, the next step is to measure and mark the mounting holes on the tile. Use your measuring tape to determine the distance between the mounting holes on your wall mount and mark the corresponding spots on the tile with a pencil. Make sure that the markings are straight and level.
It is important to note that if you are mounting your TV on a tiled surface, you will need to use special drill bits designed for drilling through tile. These drill bits are typically made of carbide and are much harder than regular drill bits, allowing them to easily penetrate through the hard surface of the tile without cracking or chipping it.
Before drilling any holes, it is also a good idea to double-check the location of any electrical wires or plumbing pipes that may be hidden behind the tile. You can use a stud finder or a wire detector to locate any potential hazards and avoid damaging them during the installation process.
Drill Holes in the Tile for the Wall Anchors
Using your ceramic tile drill bit and drill, carefully drill holes into the tile at the marked spots. Make sure that you drill straight and don’t apply too much pressure to avoid cracking the tile.
It is important to choose the right size of drill bit for the wall anchors you will be using. If the drill bit is too small, the anchor may not fit properly and if it is too large, the anchor may not hold securely. Refer to the instructions provided with your wall anchors to determine the appropriate size of drill bit to use.
Insert Wall Anchors into the Tile Holes
Insert the wall anchors into the holes in the tile, using a hammer to gently tap them in place. Make sure that the anchors are flush with the tile surface.
Once the wall anchors are securely in place, you can then attach the mounting bracket to the wall. Use screws to attach the bracket to the wall anchors, making sure that it is level and secure.
Before hanging any heavy objects on the bracket, it is important to test its strength. Apply some pressure to the bracket to ensure that it can hold the weight of the object you wish to hang. If the bracket feels unstable, you may need to reinforce it with additional wall anchors or seek professional assistance.
Attach the Mounting Bracket to the Wall Anchors
Attach the mounting bracket to the wall anchors using the screws provided. Make sure that the screws are tight and the bracket is securely attached to the wall.
Before attaching the mounting bracket, ensure that the wall anchors are properly installed and secured. Use a level to make sure that the bracket is straight before tightening the screws. If the bracket is not level, it may cause the mounted object to hang crookedly.
If the wall surface is uneven or the bracket does not fit flush against the wall, use shims to fill any gaps. This will help to ensure that the bracket is securely attached and will prevent any wobbling or movement of the mounted object.
Securely Attach Your TV to the Mounting Bracket
Now it’s time to secure your TV to the mounting bracket. First, attach the mounting plate to the back of your TV using screws and a screwdriver. Then, carefully lift the TV and align the mounting plate with the bracket on the wall. Finally, use a wrench to tighten the screws that secure the TV to the mounting bracket.
It is important to ensure that your TV is securely attached to the mounting bracket to prevent any accidents or damage. Before mounting your TV, make sure that the bracket is properly installed on the wall and can support the weight of your TV. It is also recommended to have someone assist you in lifting and aligning the TV to avoid any strain or injury. Once the TV is securely attached, double-check that it is level and stable before enjoying your favorite shows and movies.
Test and Adjust Your TV Position on the Wall Mount
Once your TV is securely mounted on the wall, it’s time to test and adjust its position. Make sure that the TV is level and straight, and adjust its angle as necessary to achieve the desired viewing experience.
It’s important to also consider the lighting in the room when positioning your TV. Avoid placing the TV in direct sunlight or in a spot where there is a lot of glare. This can cause eye strain and make it difficult to see the screen. If you have windows in the room, consider installing curtains or blinds to control the amount of light that enters the space.
Tips for Hiding Unsightly Cables
If you want to achieve a clean and sleek look, it’s important to hide unsightly cables. You can use cable covers or raceways to conceal the cables along the wall, or drill a hole behind the TV and thread the cables through it.
Another option is to use a cord-hiding box or basket to store the cables. This is a great solution if you have multiple devices in one area, such as a home entertainment system. Simply place the box or basket on a shelf or under a table and neatly tuck the cables inside.
For a more permanent solution, consider installing an in-wall cable management system. This involves cutting a hole in the wall and running the cables through a conduit. While this option requires more effort and expertise, it provides a seamless and professional-looking finish.
Common Mistakes to Avoid When Installing a TV Wall Mount on Tile
When installing a TV wall mount on tile, there are some common mistakes you should avoid. These include using the wrong wall mount, failing to properly measure and mark the mounting holes, drilling too hard and cracking the tile, using the wrong size screws, and not properly securing the TV to the mounting bracket.
Another common mistake to avoid when installing a TV wall mount on tile is not using the appropriate tools. It is important to use a drill bit that is specifically designed for drilling into tile, as using the wrong type of bit can cause the tile to crack or break. Additionally, using a level to ensure that the mount is straight is crucial, as a crooked mount can cause the TV to hang unevenly and potentially fall off the wall.
It is also important to consider the weight of the TV when selecting a wall mount. Choosing a mount that is not strong enough to support the weight of the TV can result in the mount breaking and the TV falling off the wall. It is recommended to consult the manufacturer’s specifications for both the TV and the wall mount to ensure that they are compatible and can safely support the weight of the TV.
How to Remove a TV Wall Mount from Tile Without Damaging Your Tiles
If you ever need to remove a TV wall mount from tile, you want to make sure that you do it without damaging your tiles. The best way to do this is to use a hairdryer to apply heat to the wall mount adhesive or bracket. This will loosen the adhesive and make it easier to remove the mount without damaging the tiles.
There you have it – a comprehensive guide on how to install a TV wall mount on tile. With the right tools and materials, and by following the steps outlined in this article, you can successfully mount your TV on a tile wall and achieve a more modern, space-saving look in your home entertainment area.