Are you ready to experience cinema-quality sound and visuals in the comfort of your own home? Then the Nrg Acoustics Professional Home Theater System is the perfect choice for you. This system is designed to deliver a powerful and immersive audio-visual experience, with crystal-clear sound and stunning images that will transport you to another world. But before you can enjoy this experience, you need to know how to install it correctly. In this article, we’ll guide you through the process step-by-step, from understanding the components to troubleshooting common issues.
Understanding the Components of the Nrg Acoustics Professional Home Theater System
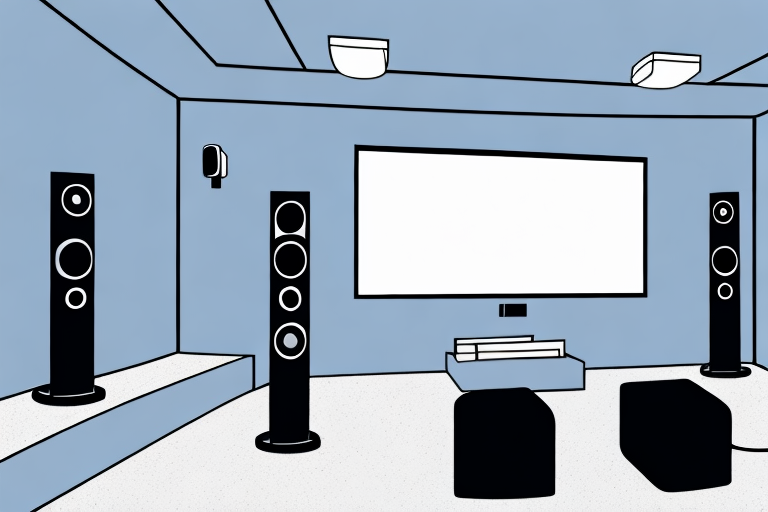
The Nrg Acoustics Professional Home Theater System consists of several components that work together to create a seamless audio-visual experience. These components include a receiver, speakers, a subwoofer, and cables. The receiver is the central unit that connects all the components together and controls the audio and video signals. The speakers are responsible for delivering the sound, while the subwoofer produces the low-frequency bass that adds depth and richness to the audio. The cables are used to connect the components together and transmit the signals.
One of the key features of the Nrg Acoustics Professional Home Theater System is its ability to support multiple audio formats. This means that you can enjoy a wide range of audio content, including music, movies, and TV shows, in high-quality sound. Additionally, the system is designed to be easy to set up and use, with intuitive controls and a user-friendly interface. Whether you’re a seasoned audiophile or a casual listener, the Nrg Acoustics Professional Home Theater System is a great choice for anyone looking to enhance their home entertainment experience.
Tools You’ll Need to Install Your Nrg Acoustics Professional Home Theater System
Before you begin installing your Nrg Acoustics Professional Home Theater System, you’ll need to gather a few tools to make the process easier. These tools include a drill, screws, a screwdriver, a level, cable ties, and a wire stripper. You’ll also need a measuring tape or ruler to ensure that you mount the speakers in the correct locations.
Additionally, it’s recommended that you have a stud finder to locate the studs in your walls for secure mounting of the speakers. If you plan on running wires through the walls, you may also need a fish tape or wire snake to help guide the wires through the walls. It’s important to have all the necessary tools before beginning the installation process to ensure a smooth and successful installation.
Unboxing Your Nrg Acoustics Professional Home Theater System: What to Expect
When you receive your Nrg Acoustics Professional Home Theater System, it will come in several boxes, each containing different components. Be sure to check that you have received all the components listed in the manual and that they are in good condition. You may want to take a few photos of the unboxing process to help you remember which components go where later on. It’s also a good idea to read through the manual carefully before you start installing the system to familiarize yourself with the process.
One important thing to note is that the Nrg Acoustics Professional Home Theater System is designed to be installed by a professional. While it may be tempting to try to install it yourself, it’s important to remember that improper installation can not only damage the system but also pose a safety risk. Therefore, it’s highly recommended that you hire a professional installer to ensure that your system is installed correctly and safely.
Preparing Your Room for Installation: Tips and Tricks
Before you start mounting the speakers and running wires, you need to prepare your room for the installation. First, choose the location where you want to install the system. This should be a room that is large enough to accommodate the speakers and where you can control the lighting and sound conditions. You may also want to consider installing blackout curtains or blinds to block out external light. If you have hardwood or tile floors, consider adding area rugs or carpeting to absorb the sound and prevent echoes.
Another important factor to consider when preparing your room for installation is the placement of furniture. Make sure that your seating arrangement is centered around the speakers and that there are no large objects blocking the sound waves. You may also want to experiment with different speaker placements to find the optimal position for the best sound quality. Additionally, if you plan on using a projector, make sure that the screen is positioned in a way that does not reflect light from windows or other light sources.
Mounting Your Nrg Acoustics Professional Home Theater System Speakers
Mounting the speakers in the correct locations is crucial for achieving optimal sound quality. The manual will provide detailed instructions on where to place each speaker for the best results. Use a level and measuring tape to ensure that each speaker is mounted at the correct height and distance from the listener. Once you have determined the correct locations, use a drill and screws to mount the speakers securely to the wall or ceiling. Use cable ties to keep the wires organized and out of sight.
It is important to note that the type of wall or ceiling material can affect the sound quality of your speakers. For example, mounting speakers on a concrete wall may result in a different sound than mounting them on a drywall surface. It is recommended to use appropriate anchors and screws for the specific type of wall or ceiling material to ensure the speakers are securely mounted and the sound quality is not compromised. Additionally, consider using speaker stands if mounting on the wall or ceiling is not an option, as this can also affect the sound quality and positioning of the speakers.
Running Wires and Cables for Your Nrg Acoustics Professional Home Theater System
Running the wires and cables for your Nrg Acoustics Professional Home Theater System can be a bit tricky, but it’s essential for getting the audio and video signals to the right components. First, identify the correct cables for each component and connect them to the corresponding ports on the receiver. Then, use cable ties to bundle the cables together and run them along the baseboard or behind furniture. Be sure to avoid running the cables near power cables or other sources of electromagnetic interference.
It’s also important to consider the length of the cables you’ll need. Measure the distance between each component and the receiver, and add a few extra feet to allow for flexibility in placement. If you’re running cables through walls or ceilings, be sure to use in-wall rated cables to comply with building codes and ensure safety. Additionally, labeling each cable can save you time and frustration in the future if you need to make any changes or troubleshoot any issues.
Setting Up Your Receiver for Optimal Performance with the Nrg Acoustics Professional Home Theater System
Setting up your receiver correctly is essential for getting the most out of your Nrg Acoustics Professional Home Theater System. Follow the instructions in the manual carefully to configure the audio and video settings and calibrate the speakers. Use a sound meter or microphone to measure the speaker levels and adjust them to ensure that the sound is evenly balanced. You may also want to experiment with different equalizer settings to find the sound that best suits your preferences.
Another important factor to consider when setting up your receiver is the placement of your speakers. Make sure that they are positioned correctly and facing the right direction to optimize the sound quality. You may also want to invest in high-quality speaker cables to ensure that the signal is transmitted efficiently and without interference.
Finally, don’t forget to regularly clean and maintain your Nrg Acoustics Professional Home Theater System to keep it in top condition. Dust and debris can accumulate on the speakers and other components, which can affect the sound quality. Use a soft cloth to wipe down the surfaces and avoid using harsh chemicals or abrasive materials that could damage the equipment.
Configuring Audio and Video Settings for Your Nrg Acoustics Professional Home Theater System
Once you have set up your receiver, it’s time to configure the audio and video settings. The manual will provide detailed instructions on how to adjust the settings, depending on your preferences. For example, you can adjust the brightness, contrast, and color settings to enhance the visuals. You can also adjust the sound settings to enhance the bass, treble, and other frequencies. Experiment with different settings until you find the ones that suit your preferences.
It’s important to note that the room in which you set up your Nrg Acoustics Professional Home Theater System can also affect the audio and video quality. Factors such as the size of the room, the placement of the speakers, and the amount of ambient light can all impact the overall experience. Consider consulting with a professional or doing some research on optimal room setup for home theater systems.
Additionally, if you plan on using your Nrg Acoustics Professional Home Theater System for gaming, you may want to adjust the settings accordingly. Some games may require different audio and video settings to fully immerse yourself in the gameplay. Be sure to check the game’s settings and adjust your home theater system accordingly for the best experience.
Troubleshooting Common Issues with Your Nrg Acoustics Professional Home Theater System Installation
If you encounter any issues during the installation or operation of your Nrg Acoustics Professional Home Theater System, don’t panic. The manual will provide troubleshooting tips for common issues, such as sound distortions or video glitches. Check the connections and cables to ensure that everything is connected correctly, and try adjusting the settings to see if that resolves the issue. If you still encounter issues, contact customer support for assistance.
Useful Accessories to Enhance Your Experience with the Nrg Acoustics Professional Home Theater System
There are several accessories that you can use to enhance your experience with the Nrg Acoustics Professional Home Theater System. These include soundproof curtains, bass traps, and acoustic panels, which can help to absorb sound and reduce echoes. You may also want to consider adding a universal remote control to simplify the operation of the system. Finally, consider investing in high-quality cables and connectors to ensure that you get the best audio and video signals.
How to Maintain and Care for Your Nrg Acoustics Professional Home Theater System
Once you have installed your Nrg Acoustics Professional Home Theater System, it’s important to maintain and care for it to ensure that it continues to deliver high-quality audio and video for years to come. Dust the components regularly to prevent buildup, and use a soft, damp cloth to clean any smudges or stains. Avoid exposing the components to extreme temperatures or moisture, which can damage the electronics. If you encounter any issues, refer to the manual for guidance on how to resolve them.
With these tips and tricks, you can install your Nrg Acoustics Professional Home Theater System with confidence, knowing that you will enjoy a powerful and immersive audio-visual experience in the comfort of your own home. Follow the instructions carefully, and don’t hesitate to contact customer support if you encounter any issues. With a little patience and attention to detail, you’ll be up and running in no time. Happy viewing!