If you love belting out your favorite tunes or hosting karaoke parties at home, connecting a microphone to your Sony home theater system can take your audio experience to the next level. Not only does it add an extra level of entertainment, but it can also improve the overall sound quality of your system. In this article, we’ll show you everything you need to know about connecting a microphone to your Sony home theater system, including troubleshooting tips, recommended microphones, and step-by-step guides.
The Benefits of Connecting a Microphone to Your Sony Home Theater System
There are several benefits to connecting a microphone to your Sony home theater system. First and foremost, it allows you to sing along to your favorite songs and add a bit of fun and personality to your listening experience. But beyond that, a microphone can actually improve the overall sound quality of your system. By adding a new audio source, you can fill out the sound and create a more immersive, dynamic listening experience. Additionally, microphones can be useful for video calls or online meetings, as they provide clearer, more direct audio than your computer’s built-in microphone.
Another benefit of connecting a microphone to your Sony home theater system is that it can enhance your karaoke experience. With a microphone, you can easily host karaoke parties at home and enjoy singing with your friends and family. Moreover, some Sony home theater systems come with built-in karaoke features that allow you to adjust the pitch and tempo of the music to match your singing style. This can make your karaoke sessions even more enjoyable and entertaining.
What You Need to Connect a Microphone to Your Sony Home Theater System
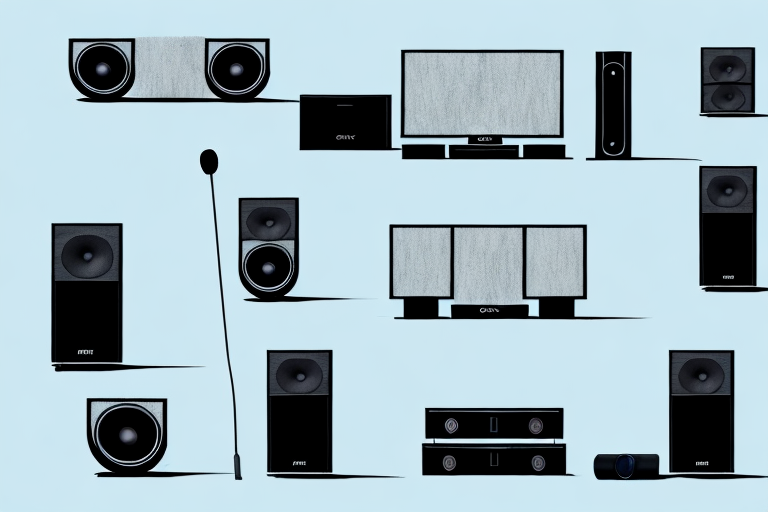
Before you start connecting your microphone to your Sony home theater system, you’ll need a few key pieces of equipment. The most important is, of course, the microphone itself. You can use either a wired or wireless microphone, depending on your preferences and needs. Additionally, you’ll need an audio cable (for a wired microphone), a receiver (for a wireless microphone), and a mixer (to adjust the volume levels and settings of your microphone). Standard 3.5mm audio jacks are also necessary for some microphones.
It’s important to note that not all Sony home theater systems are compatible with microphones. Before purchasing any equipment, make sure to check your system’s specifications to ensure that it can support a microphone. Some systems may require additional adapters or converters to connect a microphone.
Once you have all the necessary equipment, you can begin connecting your microphone to your Sony home theater system. Start by plugging in the audio cable or receiver to the appropriate input on your system. Then, connect the microphone to the cable or receiver. Finally, use the mixer to adjust the volume levels and settings to your liking. With these steps, you’ll be ready to use your microphone for karaoke, public speaking, or any other purpose you desire.
Step-by-Step Guide: How to Connect a Wired Microphone to Your Sony Home Theater System
The process of connecting a wired microphone to your Sony home theater system is relatively straightforward. First, locate the microphone port on your Sony receiver. Typically, this will be labeled as “MIC” or “MIC GAIN”. Next, plug one end of your audio cable into the microphone and the other end into the microphone port on your receiver. Make sure the cable is securely connected on both ends. Finally, adjust the volume levels and settings of your microphone using the mixer. You can now start using your microphone with your Sony home theater system!
It is important to note that not all Sony home theater systems have a microphone port. If your system does not have a microphone port, you may need to purchase an external mixer or audio interface to connect your microphone. These devices can be connected to your Sony receiver using an HDMI or audio cable.
Additionally, when using a wired microphone with your Sony home theater system, it is important to consider the length of your audio cable. If your microphone is located far away from your receiver, you may need to use a longer cable to ensure that the audio signal is strong and clear. It is also important to avoid running your audio cable near other electronic devices, as this can cause interference and affect the quality of your audio signal.
Step-by-Step Guide: How to Connect a Wireless Microphone to Your Sony Home Theater System
Connecting a wireless microphone to your Sony home theater system is slightly more complex than using a wired microphone, but it’s still a manageable process. First, plug the receiver into your Sony receiver using an audio cable. Then, turn on both the microphone and the receiver and wait for them to pair. Once they’re connected, you can adjust the volume levels and settings of your microphone using the mixer. It’s important to note that not all wireless microphones are compatible with all receivers, so be sure to check compatibility before purchasing.
Additionally, it’s important to consider the range of your wireless microphone. If you plan on using it in a large room or outdoor setting, make sure to choose a microphone with a longer range to ensure a clear and uninterrupted signal. It’s also a good idea to test the microphone and receiver in the actual setting where you’ll be using it, to ensure that there are no interference issues or other technical difficulties.
Troubleshooting Common Issues When Connecting a Microphone to Your Sony Home Theater System
Despite your best efforts, you may run into some issues when connecting your microphone to your Sony home theater system. One common issue is low volume levels or no sound at all. In this case, check to make sure all your cables are securely connected and that the volume levels on your mixer are turned up. If you’re still having issues, try switching to a different audio input on your receiver or checking the battery life on your wireless microphone. Another common issue is feedback or unwanted noise. To address this, try lowering the volume levels on your microphone or moving away from the speakers.
If none of these solutions work, it may be a problem with the microphone itself. Check to see if the microphone is compatible with your Sony home theater system and if it requires any specific settings or adjustments. You can also try using a different microphone to see if the issue persists. If you’re still having trouble, consider contacting Sony customer support for further assistance.
Best Microphones for Use with a Sony Home Theater System
When it comes to choosing the best microphone for use with your Sony home theater system, you have several options. From wired to wireless, dynamic to condenser, there are a variety of microphones available at various price points. Some popular options include the Shure SM58 (wired), Sennheiser XSW-D (wireless), and the Audio-Technica AT2020 (condenser). Ultimately, the best choice for you will depend on your specific needs and preferences.
If you are looking for a microphone that is easy to set up and use, a wireless option may be the best choice for you. The Sennheiser XSW-D is a popular wireless microphone that offers high-quality sound and a range of up to 250 feet. It also features automatic frequency management, which helps to prevent interference from other wireless devices.
If you are looking for a microphone that is versatile and can be used for a variety of purposes, the Audio-Technica AT2020 may be a good option. This condenser microphone is known for its clear and natural sound, making it ideal for recording vocals, acoustic guitars, and other instruments. It also features a cardioid polar pattern, which helps to reduce background noise and feedback.
Top Tips for Optimal Sound Quality When Using a Microphone with Your Sony Home Theater System
To get the most out of your microphone and improve the sound quality of your Sony home theater system, there are a few key tips to keep in mind. First, make sure your microphone is positioned correctly and facing away from your speakers to avoid feedback. Additionally, adjust the volume levels and settings on your mixer to find the optimal balance between your microphone and other audio sources. Finally, consider investing in a pop filter or windscreen to reduce unwanted noise and improve audio clarity.
Another important factor to consider when using a microphone with your Sony home theater system is the type of microphone you are using. Different microphones have different polar patterns, which determine how they pick up sound. For example, a cardioid microphone is ideal for picking up sound from a single direction, while an omnidirectional microphone can pick up sound from all directions. Choosing the right microphone for your needs can greatly improve the quality of your audio.
It’s also important to pay attention to the acoustics of the room you are recording in. If the room is too echoey or has a lot of background noise, it can negatively impact the quality of your audio. Consider using sound-absorbing materials, such as acoustic panels or blankets, to reduce unwanted noise and improve the overall sound quality of your recordings.
How to Adjust the Volume and Settings of Your Microphone on Your Sony Home Theater System
Adjusting the volume and settings of your microphone on your Sony home theater system is an important step in getting the best sound quality possible. To start, locate the microphone input on your mixer. Then, adjust the gain (input volume) as needed to prevent distortion or clipping. You can also adjust the EQ (equalization) settings to fine-tune the sound and remove unwanted frequencies. Finally, make sure the volume levels of your microphone are properly balanced with other audio sources.
How to Use the Karaoke Function on Your Sony Home Theater System
Many Sony home theater systems come with built-in karaoke functions, which can be a fun addition to your entertainment options. To use the karaoke function, simply connect your microphone and turn on the karaoke mode. You can select songs from a preloaded library or connect to external devices like CD+G players or smartphones. Adjust the volume levels, key, and tempo as needed to create a personalized karaoke experience.
How to Connect Multiple Microphones to Your Sony Home Theater System
If you plan on hosting karaoke parties or using multiple microphones for other purposes, connecting multiple microphones to your Sony home theater system is possible. However, it requires a bit more equipment and setup. First, you’ll need a mixer with multiple inputs and outputs. Then, you can connect each microphone to the mixer using the appropriate cables. Finally, adjust the settings on your mixer to balance the volume levels and settings of each microphone.
Overall, connecting a microphone to your Sony home theater system can enhance your audio experience and provide hours of entertainment. By following the steps outlined above and troubleshooting any issues, you can successfully connect your microphone and start enjoying all the benefits it has to offer.