Calibrating your Yamaha YHT-4950U 4K picture settings is an important step in optimizing your TV viewing experience. By fine-tuning the contrast, brightness, color, saturation, sharpness, and clarity settings, you can achieve the best possible picture quality that your TV and sound system are capable of delivering.
In this guide, we will explore why calibrating your picture settings matters, how to prepare your TV and sound system for calibration, how to set up your calibration equipment for accurate results, and how to adjust each of the picture settings to achieve optimal performance.
Why Calibrating Your Picture Settings Matters
When you purchase a new TV, the default picture settings are usually optimized for a store environment rather than a home theater setup. This means that the brightness, contrast, and color settings may be too high or too low for your viewing room, resulting in an inaccurate image that looks washed out, overly bright, or overly saturated.
Calibrating your picture settings allows you to adjust these settings to match the lighting conditions and color temperature of your viewing room, as well as your personal preferences. This can result in a more accurate and immersive viewing experience, with more vibrant colors, deeper blacks, and sharper details.
Another benefit of calibrating your picture settings is that it can help reduce eye strain and fatigue. When the brightness and contrast levels are too high, it can cause discomfort and make it difficult to watch for extended periods of time. By adjusting these settings to a more comfortable level, you can enjoy your favorite movies and shows without experiencing eye strain.
Additionally, calibrating your picture settings can also help extend the lifespan of your TV. When the brightness and contrast levels are too high, it can cause the TV to overheat and potentially damage the internal components. By adjusting these settings to a more appropriate level, you can help ensure that your TV lasts for many years to come.
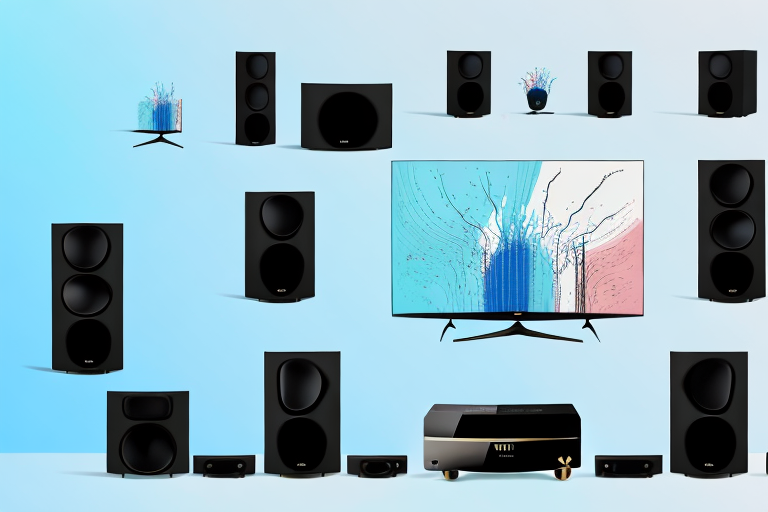
Understanding Your Yamaha YHT-4950U 4K Picture Settings
The Yamaha YHT-4950U 4K AV receiver comes with a variety of picture settings that can be adjusted to optimize your viewing experience. These include:
- Contrast
- Brightness
- Color
- Saturation
- Sharpness
- Clarity
- Gamma
- Black Level
Each of these settings can be adjusted to fine-tune the image quality on your TV. However, it’s important to note that making arbitrary adjustments to these settings can lead to inaccurate and inconsistent results. Therefore, it’s crucial to follow a calibration procedure to ensure accurate and repeatable results.
One important thing to keep in mind when adjusting your Yamaha YHT-4950U 4K picture settings is the lighting in your viewing environment. If you’re watching TV in a brightly lit room, you may need to adjust the brightness and contrast settings to compensate for the extra light. On the other hand, if you’re watching TV in a dark room, you may want to lower the brightness and contrast settings to avoid eye strain.
Another factor to consider when adjusting your picture settings is the type of content you’re watching. For example, if you’re watching a movie with a lot of dark scenes, you may want to adjust the black level setting to ensure that you can see all the details in the shadows. Similarly, if you’re watching a sports game with a lot of fast-moving action, you may want to adjust the clarity and sharpness settings to ensure that the image is crisp and clear.
Preparing Your TV and Sound System for Calibration
Before you start calibrating your picture settings, there are a few steps you need to take to ensure accurate results.
- First, make sure your TV and sound system are properly positioned and set up in your viewing room.
- Next, switch your TV mode to “Movie” or “Cinema” to ensure accurate color representation and contrast.
- Disable any features that may interfere with calibration, such as motion smoothing, noise reduction, or dynamic contrast.
- Turn off any room lights or other light sources that may affect the accuracy of your measurements.
By following these steps, you can eliminate any external factors that may affect your calibration procedure, resulting in more accurate and consistent results.
It is also important to let your TV and sound system warm up for at least 30 minutes before starting the calibration process. This allows the components to reach their optimal operating temperature, which can affect the accuracy of your measurements. Additionally, it is recommended to use a calibration disc or software to guide you through the process, as this can help ensure that you are adjusting the correct settings and values.
Setting Up Your Calibration Equipment for Accurate Results
To calibrate your picture settings, you will need a calibration disc or software and a colorimeter or spectrophotometer. These tools can help you measure and adjust each of the picture settings on your TV for accurate and repeatable results.
When setting up your calibration equipment, it’s important to follow the manufacturer’s instructions carefully to ensure accurate and consistent results. Place the calibration disc or software into your Blu-ray player or PC, and connect your colorimeter or spectrophotometer to your computer.
Once your equipment is set up, you can proceed with calibrating your picture settings.
It’s important to note that the calibration process can take some time, so be sure to set aside a few hours to complete the process. You may also want to consider calibrating your TV in a room with controlled lighting to ensure the most accurate results.
After you’ve completed the calibration process, it’s a good idea to save your settings so that you can easily apply them in the future. This will save you time and ensure that your TV is always displaying the most accurate and vibrant picture possible.
Adjusting Contrast and Brightness Settings
The first step in calibrating your picture settings is to adjust the contrast and brightness settings. These settings control the ratio between the white and black levels on your TV, and should be adjusted to match the ambient light level in your viewing room.
To adjust the contrast setting, use your calibration disc or software to display a white screen with a black rectangle in the center. Increase the contrast setting until the black rectangle is barely visible, then decrease the setting until the rectangle becomes fully visible.
Next, adjust the brightness setting by displaying a white screen with a black circle in the center. Decrease the brightness setting until the black circle disappears, then increase the setting until the circle becomes visible again.
By adjusting these settings properly, you can achieve a balanced and accurate image that represents the content as it was intended to be viewed.
It’s important to note that the optimal contrast and brightness settings may vary depending on the type of content you are viewing. For example, movies may require different settings than sports or video games. It’s a good idea to experiment with different settings and find what works best for your viewing preferences.
Fine-Tuning Color and Saturation Settings
After adjusting the contrast and brightness settings, the next step is to fine-tune the color and saturation settings. These settings control the intensity and purity of the colors on your TV, and should be adjusted to match the content you are viewing.
To adjust the color and saturation settings, use your calibration disc or software to display a range of test patterns that represent different color values and intensities. Adjust the color and saturation settings until the colors look rich and vibrant without being oversaturated or unrealistic.
It’s important to note that color calibration is a complex process that requires patience and attention to detail. Take the time to adjust the settings carefully, and double-check your results using different test patterns to ensure accuracy.
Optimizing Sharpness and Clarity Settings
The sharpness and clarity settings control the amount of detail and texture in your image, and can be adjusted to optimize the sharpness and clarity of your content without introducing artifacts or noise.
To adjust the sharpness and clarity settings, use your calibration disc or software to display test patterns that represent different textures and edges. Increase the sharpness and clarity settings until the textures and edges look crisp and well-defined, then decrease the settings until they become slightly blurred.
It’s important to find the right balance between sharpness and clarity to avoid introducing artifacts or noise that can detract from your viewing experience. Take the time to experiment with different settings to find the optimal balance.
Configuring Advanced Picture Settings for Your Yamaha YHT-4950U
The Yamaha YHT-4950U features a variety of advanced picture settings that can be adjusted to enhance your viewing experience even further. These include gamma, black level, and Hi-Bit HDR settings, among others.
To configure these settings, refer to the Yamaha user manual for detailed instructions. Depending on your personal preferences and viewing conditions, you may find that these advanced settings can significantly improve the quality of your image.
Creating Custom Presets for Different Viewing Scenarios
To make the most of your calibrated picture settings, consider creating custom presets for different viewing scenarios. For example, you may want to create a preset for daytime viewing with brighter lighting conditions, and another preset for nighttime viewing with darker lighting conditions.
To create custom presets, use the picture mode function on your TV or AV receiver to save your calibrated settings for different scenarios. This can save you time and effort in the future, and ensure that you are always optimizing your viewing experience no matter what conditions you are viewing in.
Testing and Verifying Your Calibration Results
Once you have calibrated your picture settings, it’s important to test and verify the results to ensure accuracy and consistency. This can be done by displaying test patterns and comparing them to reference images to check for accuracy and consistency.
You can also use your calibrated settings to view your favorite movies and TV shows, and evaluate the image quality to ensure that it matches your expectations and preferences.
Troubleshooting Common Calibration Issues with Your Yamaha YHT-4950U
If you encounter any issues or problems during the calibration process, refer to the Yamaha user manual for troubleshooting tips and solutions. You may also find helpful resources online, such as forums and communities devoted to home theater calibration and optimization.
Maintaining Optimal Picture Quality with Regular Calibrations
Finally, to maintain optimal picture quality on your TV and sound system, it’s important to perform regular calibrations and updates as needed. Calibrating your picture settings on a regular basis can ensure that your image quality remains accurate and consistent over time, and can help you keep up with advancements in technology and content.
Conclusion: Enjoying the Best Possible Picture Quality with Your Yamaha YHT-4950U
Calibrating your picture settings may seem like a daunting task, but with the right tools and techniques, it can be a rewarding and satisfying experience. By fine-tuning your contrast, brightness, color, saturation, sharpness, and clarity settings, you can achieve the best possible picture quality that your TV and sound system are capable of delivering, and enhance your viewing experience in ways you never thought possible.