Are you looking to bring cinema-quality sound and visuals into your home? A home theater system is just what you need! Connecting it to your TV is not as difficult as you may think. This step-by-step guide will walk you through everything you need to know so that you can enjoy the ultimate viewing experience right in your living room.
Understanding the basics of home theater systems
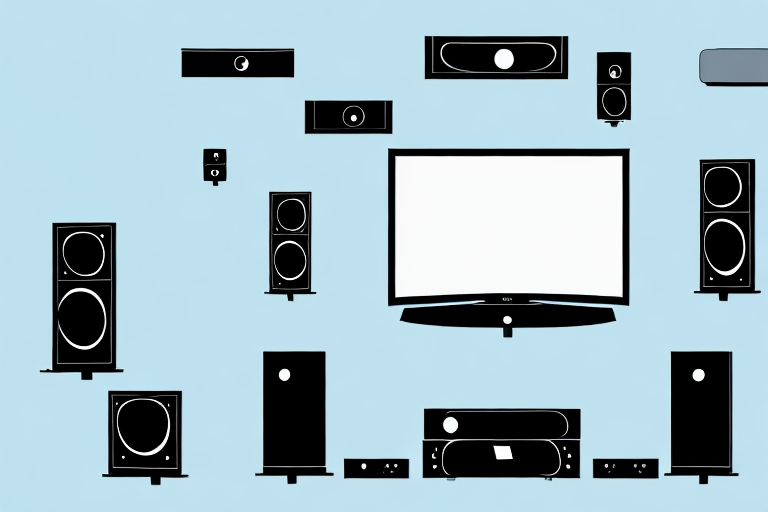
Before you dive in, it’s important to understand the basic components of a home theater system. A typical system includes a TV, a receiver, speakers, and a subwoofer. The receiver is the hub of your system; it connects to your TV and controls the audio signals to your speakers. The speakers and subwoofer create a surround sound experience, immersing you in the audio of your favorite movies and TV shows.
When choosing speakers for your home theater system, it’s important to consider the size of your room and the placement of the speakers. For a smaller room, bookshelf speakers may be sufficient, while larger rooms may require floor-standing speakers. Additionally, the placement of the speakers can greatly impact the sound quality. It’s recommended to place the front speakers at ear level and the surround speakers slightly above ear level for optimal sound distribution.
Choosing the right cables and connections for your home theater system
Once you’ve got all your equipment, it’s essential to make sure you have the right cables for them to connect. Your receiver and TV should have several input/output options, including HDMI, component, and RCA. For the best picture and sound quality, use HDMI cables whenever possible. They transmit both audio and visual signals in high definition. They can also carry multiple channels of audio, such as Dolby Digital and DTS, which are commonly found on DVDs and Blu-rays.
When selecting HDMI cables, it’s important to consider the length of the cable. Longer cables can result in signal degradation, which can lead to a loss of picture and sound quality. If you need to run a cable over a long distance, consider using an HDMI extender or a fiber optic HDMI cable, which can transmit signals over longer distances without loss of quality.
It’s also important to consider the quality of the cables themselves. While it may be tempting to opt for cheaper cables, higher quality cables can make a significant difference in the overall performance of your home theater system. Look for cables with gold-plated connectors, which can help prevent corrosion and ensure a more reliable connection.
Connecting your home theater system to your TV: Step-by-Step guide
Now that you have all your equipment and cables, it’s time to connect your home theater system to your TV. Follow these steps:
- Connect your HDMI cable to the “HDMI out” port on your receiver and the “HDMI in” port on your TV. Repeat this step if you have multiple devices, such as a Blu-ray player or game console.
- Turn on your TV and receiver.
- Select the HDMI input on your TV using your TV’s remote control. For example, if you connected the HDMI cable to the HDMI 1 input, select HDMI 1 on your TV’s input menu.
- Turn on your other devices, such as your Blu-ray player or game console. They should automatically be detected by your receiver.
- Test your system by playing audio through your speakers and video on your TV.
It’s important to note that if you encounter any issues with your home theater system, such as no sound or a blank screen, double-check that all cables are securely connected and that the correct input is selected on your TV. You may also need to adjust the audio and video settings on your devices to ensure optimal performance.
Configuring your audio settings for optimal sound quality
Now that your system is connected, it’s time to configure your audio settings. Your receiver should have a menu that allows you to adjust the audio settings to your liking. You can adjust the volume of each speaker and the subwoofer, as well as other audio settings, such as bass, treble, and equalization.
It’s important to note that the optimal audio settings may vary depending on the type of content you are listening to. For example, if you are watching a movie with a lot of action scenes, you may want to increase the volume of the subwoofer to enhance the bass and make the explosions more impactful. On the other hand, if you are listening to music, you may want to adjust the equalization to emphasize certain frequencies and make the vocals or instruments stand out.
Adjusting your video settings to enhance your viewing experience
Just as important as your audio setup is the video quality. Adjusting your TV’s video settings, such as contrast, brightness, and color, can improve the overall viewing experience. Additionally, check your receiver’s video settings to make sure they’re optimized for your TV’s resolution. If you’re using a game console, your settings may also need adjusting to match the resolution of your TV.
Another important factor to consider when adjusting your video settings is the lighting in your viewing area. If your room is too bright or too dark, it can affect the way colors and contrast appear on your screen. Consider using blackout curtains or dimmer switches to control the lighting in your room. You can also adjust the backlight settings on your TV to compensate for any ambient light in the room.
Troubleshooting common issues when connecting a home theater system to a TV
If you’re experiencing issues with your home theater system, such as no sound or poor video quality, there are some common solutions to try. Check your cables to make sure they’re connected properly, and make sure all your devices are turned on. Consult the user manual for your equipment if you’re still having trouble.
Another common issue that can arise when connecting a home theater system to a TV is compatibility. Make sure that your devices are compatible with each other and that they support the same video and audio formats. If they don’t, you may need to purchase additional equipment or use a different connection method.
Additionally, interference from other electronic devices can cause issues with your home theater system. Try moving your devices away from other electronics, such as routers or microwaves, and see if that improves the quality of your audio and video. If you’re still experiencing issues, you may need to invest in a power conditioner or surge protector to help filter out any interference.
Tips for maintaining and optimizing your home theater system
Now that your system is up and running, it’s important to maintain it so that it continues to perform at its best. Clean your speakers and subwoofer regularly, and keep them away from heat and moisture. Consider investing in a surge protector to protect your equipment from power spikes. Finally, stay up to date on software updates for your devices to ensure optimal performance.
Another important aspect of maintaining your home theater system is to regularly check and replace any worn out cables or connectors. Over time, cables can become damaged or frayed, which can lead to poor audio and video quality. It’s also a good idea to organize your cables and keep them tidy to prevent any tripping hazards or accidental disconnections. By taking care of your cables and connectors, you can ensure that your home theater system continues to provide high-quality audio and video for years to come.
Understanding the benefits of connecting your home theater system to your TV
A home theater system connected to your TV can transform your movie and TV watching experience. You’ll have access to cinematic sound and visuals in the comfort of your own home. You’ll also have greater control over the audio and video settings, allowing you to customize your viewing experience to your liking.
Additionally, connecting your home theater system to your TV can also enhance your gaming experience. With a larger screen and immersive sound, you can feel like you’re in the game. Some home theater systems even have gaming modes that optimize the audio and video settings for gaming, providing a more realistic and engaging experience.
How to set up and calibrate surround sound speakers for the best listening experience
To get the most out of your home theater system, it’s essential to set up and calibrate your speakers correctly. The position of your speakers and subwoofer can make a huge difference in your listening experience. Refer to the user manual for your speakers for the optimal placement, and use a calibration tool to fine-tune the audio settings.
Another important factor to consider when setting up your surround sound system is the size and shape of your room. A larger room may require more speakers to achieve optimal sound, while a smaller room may only need a few. Additionally, the shape of your room can affect the acoustics and may require adjustments to the speaker placement or calibration settings. It’s also important to consider any furniture or obstacles in the room that may affect the sound quality.
Understanding the difference between HDMI ARC and Optical connections
HDMI ARC and optical connections are two ways to connect your TV and receiver. HDMI ARC allows for higher-quality audio signals and also lets you control your TV and receiver with one remote. Optical connections, on the other hand, are typically less expensive and are still capable of delivering high-quality audio.
It’s important to note that not all TVs and receivers support HDMI ARC. In this case, an optical connection may be the only option. Additionally, HDMI ARC can sometimes be finicky and require troubleshooting to get it working properly. On the other hand, optical connections are generally more reliable and easier to set up.
How to troubleshoot common audio issues when connecting a home theater system to a TV
If you’re experiencing audio issues, such as popping or crackling sounds, there are some common solutions to try. Make sure your cables are connected properly, and consider upgrading to higher-quality cables if necessary. Additionally, check your audio settings and make sure they’re configured correctly.
Understanding different audio and video formats and how they impact the performance of your home theater system
Understanding different audio and video formats can help you optimize your home theater system. For example, Dolby Atmos is a newer audio format that allows for three-dimensional sound, while HDR video allows for greater color and contrast on your TV. Make sure your equipment is compatible with these formats to get the best possible performance.
Tips for selecting the best location for placing your speakers and subwoofer in relation to your TV
Placing your speakers and subwoofer correctly can greatly enhance your audio experience. Generally, your speakers should be placed at ear level when you’re sitting in your viewing position. The subwoofer should be placed near a corner of the room for optimal bass response. If you’re unsure about the best placement, consult the user manual for your equipment or seek advice from a professional.
With these tips and tricks, you’re ready to connect your home theater system to your TV and enjoy a truly immersive viewing experience right in your own home. Happy watching!