If you are looking to enhance your television viewing and gaming experience, the Yamaha YHT-4950U 4K Virtual Speaker System is an excellent choice. Not only does it provide high-quality sound, but it also offers customizable speaker settings. In this article, we will guide you through the step-by-step process of adjusting your Yamaha YHT-4950U 4K Virtual Speaker Settings for your TV.
Understanding the Yamaha YHT-4950U 4K Virtual Speaker System
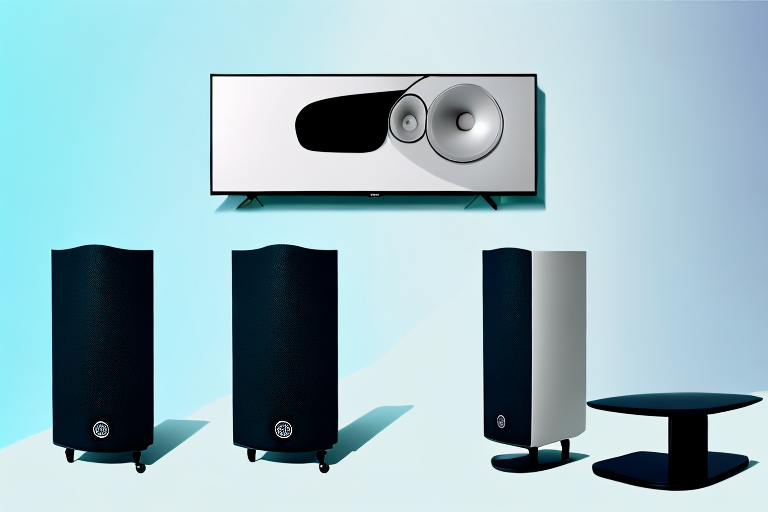
The Yamaha YHT-4950U 4K Virtual Speaker System is an advanced speaker system that simulates a 5.1 channel setup. It uses advanced sound optimization technology, including YPAO (Yamaha Parametric Acoustic Optimizer) and additional sound modes. By adjusting the speaker settings, you can tailor the sound output to your preferences and the acoustics of your room.
One of the key features of the Yamaha YHT-4950U 4K Virtual Speaker System is its compatibility with 4K Ultra HD video. This means that you can enjoy high-quality video and audio content simultaneously, without any loss in quality. Additionally, the system comes with a variety of connectivity options, including Bluetooth, Wi-Fi, and HDMI, making it easy to connect to your favorite devices.
Another advantage of the Yamaha YHT-4950U 4K Virtual Speaker System is its ease of use. The system comes with a user-friendly remote control, which allows you to adjust the volume, change the sound mode, and switch between different inputs. Additionally, the system is designed to be easy to set up, with clear instructions and intuitive controls that make it simple to get started.
Why Proper Speaker Settings are Important for Your TV
Having proper speaker settings is essential for getting the best possible sound quality from your TV. When you adjust the speaker settings, you can fine-tune the sound to your preferences, the type of content you’re watching, and the acoustics of your room. This way, you can experience a more immersive and realistic sound experience.
Another reason why proper speaker settings are important is that it can prevent damage to your speakers. If the settings are too high, it can cause distortion and even blow out your speakers. On the other hand, if the settings are too low, you may not be able to hear important details in the audio.
Additionally, having proper speaker settings can also enhance the dialogue clarity. This is especially important for movies and TV shows where dialogue is crucial to the plot. By adjusting the speaker settings, you can ensure that the dialogue is clear and easy to understand, even during action-packed scenes with lots of background noise.
Step-by-Step Guide to Adjusting Yamaha YHT-4950U 4K Virtual Speaker Settings
Here is a step-by-step guide to help you adjust your Yamaha YHT-4950U 4K Virtual Speaker Settings:
- Make sure your Yamaha YHT-4950U 4K Virtual Speaker System is correctly set up and connected to your TV and other devices.
- Press the “On/Standby” button on the main unit to turn on the system.
- Using the remote control, press the “Setup” button.
- Select “Speaker” from the options using the arrow buttons on the remote.
- Choose “Manual Setup” and press “Enter.”
- Select the speaker you want to adjust, such as “Front” or “Center/Dialogue.”
- Use the arrow buttons on the remote to adjust the settings for that speaker, such as “Level” or “Distance.”
- Repeat steps 6 and 7 for each speaker you want to adjust.
- When you are done, select “Finish” and press “Enter.”
It is important to note that adjusting the speaker settings can greatly enhance your audio experience. By adjusting the levels and distances of each speaker, you can create a more immersive and balanced sound.
Additionally, if you are unsure about how to adjust the settings or are experiencing any issues with your Yamaha YHT-4950U 4K Virtual Speaker System, it is recommended to consult the user manual or contact Yamaha customer support for assistance.
Getting Started: Setting up Your Yamaha YHT-4950U 4K Virtual Speaker System
Before you adjust your Yamaha YHT-4950U 4K Virtual Speaker Settings, you need to make sure your system is properly set up. Here are the steps to follow:
- Unpack and assemble the speakers, subwoofer, and other components of the system.
- Connect the speakers and subwoofer to the main unit using the supplied cables. Make sure you follow the instructions in the manual carefully.
- Connect your TV and other devices to the main unit using HDMI cables. Make sure you use the HDMI OUT port to connect your TV.
- Plug in the power cord and turn on the system.
Once your Yamaha YHT-4950U 4K Virtual Speaker System is set up, you can customize the settings to your liking. The system comes with a remote control that allows you to adjust the volume, bass, treble, and other audio settings. You can also choose from different sound modes, such as movie, music, and sports, to enhance your listening experience. Additionally, the system has Bluetooth connectivity, which allows you to stream music from your smartphone or other compatible devices. With these features, you can enjoy high-quality sound and immersive audio while watching movies, playing games, or listening to music.
Optimizing Audio Quality: Adjusting Speaker Levels and Crossovers
Once your Yamaha YHT-4950U 4K Virtual Speaker System is set up, you can start adjusting the speaker levels and crossovers to optimize the audio quality. Here’s how:
- Press the “On/Standby” button on the main unit to turn on the system.
- Using the remote control, press the “Menu” button.
- Select “Audio” from the options using the arrow buttons on the remote.
- Choose “Speaker Settings” and press “Enter.”
- Select the speaker you want to adjust, such as “Front” or “Center/Dialogue.”
- Use the arrow buttons on the remote to adjust the settings for that speaker, such as “Level” or “Crossover.”
- Repeat steps 5 and 6 for each speaker you want to adjust.
- When you are done, press the “Menu” button to exit.
It’s important to note that adjusting the speaker levels and crossovers can greatly impact the overall sound quality of your system. By adjusting the levels, you can ensure that each speaker is producing the correct volume and that the sound is balanced throughout the room. Additionally, adjusting the crossovers can help to eliminate any unwanted frequencies that may be causing distortion or muddiness in the sound.
When making adjustments to your speaker settings, it’s a good idea to listen to a variety of different types of music or audio to ensure that the changes you make are suitable for all types of content. You may also want to consider using a sound meter or SPL meter to measure the volume levels and ensure that they are within a safe range for your ears.
Customizing Sound: Using Yamaha’s Sound Optimization Technology
Another way to customize your sound output is to use Yamaha’s Sound Optimization Technology. Here’s how:
- Press the “On/Standby” button on the main unit to turn on the system.
- Using the remote control, press the “Menu” button.
- Select “Audio” from the options using the arrow buttons on the remote.
- Choose “YPAO” and press “Enter.”
- Follow the on-screen instructions to calibrate the sound output to your room’s acoustics and speaker placement.
- When you are done, press the “Menu” button to exit.
Yamaha’s Sound Optimization Technology is a powerful tool that can help you achieve the perfect sound for your home theater system. By analyzing the acoustics of your room and the placement of your speakers, this technology can automatically adjust the sound output to optimize the listening experience.
In addition to calibrating the sound output, Yamaha’s Sound Optimization Technology also includes a range of advanced features that allow you to fine-tune your sound to your exact preferences. For example, you can adjust the equalizer settings to boost or cut specific frequencies, or use the advanced bass extension feature to enhance the low-end response of your speakers.
Fine-Tuning Your Audio Experience: Adjusting EQ and Room Acoustic Settings
If you want to further fine-tune your audio experience, you can adjust the EQ and room acoustic settings. Here’s how:
- Press the “On/Standby” button on the main unit to turn on the system.
- Using the remote control, press the “Menu” button.
- Select “Audio” from the options using the arrow buttons on the remote.
- Choose “Advanced” and press “Enter.”
- Select “Parametric EQ” or “Room EQ” to adjust the settings.
- Use the arrow buttons on the remote to adjust the settings to your preference.
- When you are done, press the “Menu” button to exit.
Adjusting the EQ settings can help you fine-tune the balance of frequencies in your audio. For example, if you find that the bass is too overpowering, you can reduce the low frequencies using the EQ settings. On the other hand, if you want to enhance the vocals, you can boost the mid-range frequencies.
Room acoustic settings can also have a significant impact on your audio experience. These settings allow you to adjust the sound based on the characteristics of your room. For example, if you have a large room with high ceilings, you may need to adjust the settings to compensate for the echo and reverberation. Similarly, if you have a small room with lots of furniture, you may need to adjust the settings to prevent the sound from becoming too muffled.
Troubleshooting Common Issues with Yamaha YHT-4950U 4K Virtual Speaker System
If you encounter any issues while adjusting your Yamaha YHT-4950U 4K Virtual Speaker Settings, here are some common problems and solutions:
- If you can’t hear any sound, check if the speakers are correctly connected to the main unit and are turned on.
- If the sound is distorted or muffled, try adjusting the speaker levels and crossovers.
- If you hear unwanted noise or interference, try repositioning the speakers or checking for any electromagnetic interference in the room.
However, if you are still experiencing issues with your Yamaha YHT-4950U 4K Virtual Speaker System, there are a few other troubleshooting steps you can take. Firstly, try resetting the system to its default settings. This can often resolve any software-related issues that may be causing problems. Secondly, check if there are any firmware updates available for your system. Updating the firmware can often fix bugs and improve overall performance.
Another common issue with speaker systems is compatibility with other devices. If you are having trouble connecting your system to a particular device, check if the device is compatible with the Yamaha YHT-4950U 4K Virtual Speaker System. You can also try using a different cable or connection method to see if that resolves the issue.
Enhancing Your Movie and Gaming Experience with Yamaha YHT-4950U 4K Virtual Speaker System
The Yamaha YHT-4950U 4K Virtual Speaker System is an excellent choice for enhancing your movie and gaming experience. By adjusting the speaker settings, you can optimize the sound output to match the content you’re watching and make it more immersive and realistic. Follow the steps we have outlined above to get the best possible audio quality from your system.
Thank you for reading our guide on how to adjust Yamaha YHT-4950U 4K Virtual Speaker Settings for your TV. We hope you found it helpful in setting up and fine-tuning your speaker system.
One of the standout features of the Yamaha YHT-4950U 4K Virtual Speaker System is its ability to simulate a 5.1 channel surround sound experience using just two speakers. This is achieved through Yamaha’s proprietary Virtual CINEMA FRONT technology, which creates a virtual soundstage that mimics the effect of having multiple speakers placed around the room. This is especially useful for those who don’t have the space or budget for a full surround sound setup, but still want to enjoy a more immersive audio experience.