Screwing a projector into a tripod is a crucial step towards setting up an audio-visual system for meetings, presentations, or movie nights at home. It might seem like a simple process, but it requires a fair understanding of the parts that make up a tripod, the types of projectors they can hold, and the tools needed for a secure and stable installation. In this article, we cover all the essentials of screwing a projector into a tripod, including the basics, the tools, the steps, the common mistakes, the tips, and the benefits of using a tripod for your projector.
Understanding the basics of a projector tripod
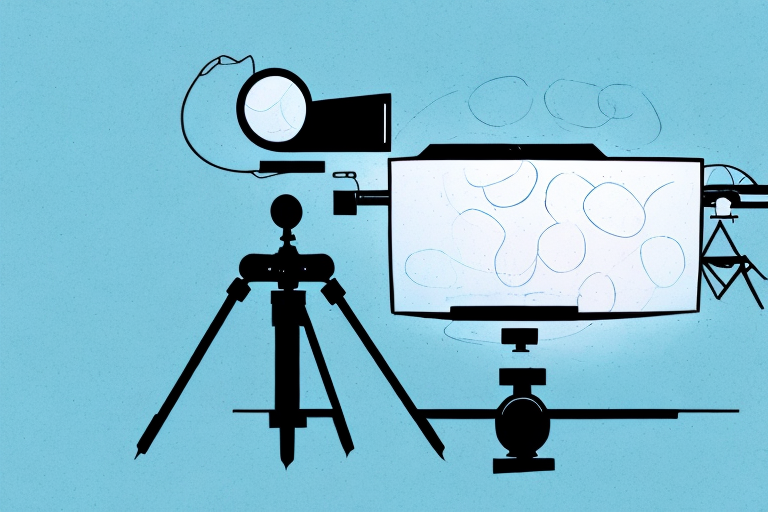
A tripod is a three-legged device that provides a stable platform for a camera, light, or projector. Projector tripods come in various shapes, sizes, and materials, but they all have the same basic components – the legs, the head, and the mounting plate. The legs are extendable to adjust the height and angle of the projector. The head is the part that connects the legs to the mounting plate and allows the projector to pan and tilt. The mounting plate is the flat surface on which the projector rests and to which it attaches with screws.
Choosing the right tripod for your projector
Before you screw a projector into a tripod, you need to make sure that the tripod is compatible with your projector, both in terms of weight and size. Projectors come in different sizes and shapes, and so do the mounting plates of tripods. Check the user manual of your projector to confirm its weight and dimensions, and compare them with the specifications of the tripod you plan to use. A tripod that is too weak or too small for your projector may wobble, tilt, or fall, causing damage to the projector or injury to people. On the other hand, a tripod that is too heavy or too big for your projector may be difficult to handle, transport, or store.
How to safely mount a projector onto a tripod
Safety should always come first when mounting a projector onto a tripod. Begin by preparing the tripod on a flat and stable surface, away from any obstacles or hazards. Adjust the height and angle of the legs as needed to align the center of the mounting plate with the center of the projection screen. Then, attach the mounting plate to the projector using the screws provided by the manufacturer. Make sure the screws are tight and secure, but not overtightened, as this may strip the threads or damage the mounting plate. Once the projector is attached to the mounting plate, slide it onto the tripod head and position it as desired. Use the pan and tilt controls on the tripod head to fine-tune the projection angle and focus.
The tools you’ll need to screw a projector into a tripod
The tools needed to screw a projector into a tripod are minimal, but essential. They include a screwdriver, preferably a Phillips head, and the screws provided by the manufacturer. Make sure the screwdriver fits snugly into the screw head and does not slip or damage the screws. If the screws are missing or damaged, replace them with screws of the same type, size, and thread pitch, available at hardware stores or online.
Step-by-step instructions for attaching a projector to a tripod
Here are the step-by-step instructions for attaching a projector to a tripod:
- Prepare the tripod on a flat and stable surface.
- Adjust the height and angle of the legs as needed.
- Check the user manual of your projector to confirm its weight and dimensions.
- Compare the specifications of the tripod you plan to use with those of your projector.
- Select the screws provided by the manufacturer or replacement screws of the same type, size, and thread pitch.
- Use the screwdriver to attach the mounting plate to the projector with the screws, making sure they are tight and secure.
- Slide the mounting plate onto the tripod head and align the center of the plate with the center of the projection screen.
- Use the pan and tilt controls on the tripod head to fine-tune the projection angle and focus.
- Test the stability and alignment of the projection by shaking the tripod gently and observing the image on the screen.
Common mistakes to avoid when mounting your projector on a tripod
Although screwing a projector into a tripod is not a complicated task, it is not immune to mistakes. Here are some common mistakes to avoid when mounting your projector on a tripod:
- Using the wrong screws or screwdriver, which can damage the mounting plate or the projector.
- Attaching the mounting plate to the projector too tight or too loose, which can affect the stability and alignment of the projection.
- Using a tripod that is too weak or too small for your projector, which can result in wobble, tilt, or fall.
- Choosing a location for the tripod that is too close to a wall, ceiling, or obstacle, which can limit the projection angle and cause distortion.
- Not testing the stability and alignment of the projection before the use, which can lead to embarrassment, inconvenience, or even injury.
Tips for adjusting and aligning your projector on a tripod
To get the best out of your projector and tripod setup, here are some tips for adjusting and aligning your projector on a tripod:
- Use a level tool to make sure the tripod legs are balanced and horizontal.
- Use the pan and tilt controls on the tripod head to center the projection image on the screen and adjust the focus.
- Adjust the height of the tripod legs so that the projection image is at the eye level of the audience.
- Minimize the ambient light in the room to enhance the contrast and vibrancy of the projection image.
- Use a keystone adjustment tool to correct any distortion or skewness caused by viewing angle or screen shape.
How to dismount your projector from the tripod
When the projection is over, it’s time to dismount the projector from the tripod. Here’s how to do it:
- Turn off the projector and unplug it from the power source.
- Use the pan and tilt controls on the tripod head to position the projection lens upwards.
- Loosen the screws on the mounting plate using the screwdriver.
- Gently slide the mounting plate off the tripod head and detach it from the projector.
- Pack the tripod and projector separately in their respective cases or bags, taking care not to damage any parts or components.
Maintaining the stability and security of your projector on the tripod
Maintaining the stability and security of your projector on the tripod is essential for its longevity and functionality. Here are some tips for keeping your projector and tripod in top condition:
- Regularly inspect the screws, nuts, and bolts of the tripod and tighten them if necessary.
- Clean the mounting plate and the projector regularly with a soft cloth or brush, and avoid using harsh or abrasive cleaning agents.
- Store the tripod and the projector in a cool and dry place, away from direct sunlight or moisture.
- Avoid exposing the tripod and the projector to extreme temperatures, humidity, or pressure, as this can cause distortion, corrosion, or cracking.
The benefits of using a tripod for your projector
Using a tripod for your projector has many benefits, such as:
- Providing a stable and adjustable platform for the projector, which enhances the image quality and clarity.
- Allowing the user to position the projector at various angles and heights, depending on the venue, audience, or purpose.
- Saving space and reducing clutter by eliminating the need for a dedicated table or stand for the projector.
- Promoting portability and convenience by enabling the user to easily dismount and pack the projector and tripod for transport or storage.
- Enabling creative and innovative uses of the projector and tripod, such as outdoor screenings, art installations, or live performances.
Creative ways to use your projector and tripod setup
If you’re looking for some inspiration on how to use your projector and tripod in creative ways, here are some ideas:
- Use the projector and tripod to host movie nights, game tournaments, or sports events in your backyard or balcony.
- Create an interactive art installation that combines projection mapping, sound effects, and motion sensors.
- Use the projector and tripod to create a DIY night light or disco ball by projecting colorful patterns on the walls or ceiling.
- Host a karaoke party by projecting the lyrics of popular songs on a screen or wall and using a microphone and speaker system.
- Create a virtual travel experience by projecting high-resolution photos or videos of exotic destinations on a screen or wall and using ambient soundscapes.
Frequently asked questions about mounting projectors on tripods
Here are some frequently asked questions and answers about mounting projectors on tripods:
- Q: Can I mount any type of projector on any type of tripod?
- A: No, not all projectors and tripods are compatible in terms of weight, size, and mounting plate. Check the user manual and specifications of both before attempting to mount them together.
- Q: Do all tripods come with mounting plates?
- A: No, not all tripods come with mounting plates. Some tripods require the user to purchase the mounting plate separately, while others come with a universal mounting plate that fits most projectors.
- Q: How do I choose the right mounting plate for my projector?
- A: You can consult the user manual or the manufacturer’s website of your projector to find the compatible mounting plate. Alternatively, you can use a universal mounting plate that fits most projectors, but make sure it can support the weight and size of your projector.
- Q: Can a tripod hold multiple projectors at once?
- A: It depends on the weight and size of the projectors and the tripod. Some tripods have a maximum weight limit and a single mounting plate, while others have multiple mounting plates or arms that can hold several projectors simultaneously.