A tripod-mounted light can be a powerful tool for capturing stunning photos and videos. But if you’re new to this type of setup, you may be wondering how to properly mount your light on a tripod. In this article, we’ll walk you through the step-by-step process of mounting a light on a tripod, including understanding different types of tripod heads, choosing the right light, and troubleshooting common issues.
Understanding the Types of Tripod Heads
Before you can mount a light on your tripod, it’s important to understand the different types of tripod heads. The most common types are ball heads, pan-tilt heads, and fluid heads.
Ball heads are the most flexible type, allowing for quick and easy adjustments in any direction. Pan-tilt heads are ideal for shooting static subjects and offer smooth panning and tilting movements. Fluid heads are perfect for shooting video, as they provide silky-smooth movement for panning and tilting.
It’s also important to consider the weight and size of your camera or equipment when choosing a tripod head. A ball head may not be able to support a heavy camera, while a fluid head may be too bulky for a lightweight setup. Additionally, some tripod heads come with built-in levels or bubble indicators to ensure your camera is perfectly level, which can be especially useful for landscape or architectural photography.
Choosing the Right Light for Your Needs
When it comes to choosing a light for your tripod setup, there are several factors to consider, including the type of shoot you’ll be doing, the size of the light, and whether you’ll need to adjust the light’s output.
For example, if you’re shooting in a studio, you may want a larger light that can provide more output. On the other hand, if you’re shooting on location, you may need a smaller, more portable light. Additionally, you may want a light with adjustable output levels, so you can fine-tune the brightness of your subject.
Another important factor to consider when choosing a light is the color temperature. Different lights have different color temperatures, which can affect the overall look and feel of your photos or videos. For example, a warmer color temperature can create a cozy, intimate atmosphere, while a cooler color temperature can create a more clinical, professional look.
Finally, it’s important to consider the power source of your light. Some lights are battery-powered, while others need to be plugged in. If you’re shooting on location, a battery-powered light may be more convenient, but if you’re shooting in a studio, a plugged-in light may be more reliable and consistent in its output.
Setting Up Your Tripod for Optimal Stability
One of the most important factors in a successful tripod-mounted lighting setup is stability. You want to make sure your tripod is sturdy and secure, so your light doesn’t wobble or move during your shoot.
Start by selecting a level surface for your tripod. Then, extend the legs and adjust them until they’re all at the same height. Next, center the tripod head on top of the legs and tighten it securely.
Another important aspect of tripod stability is the weight distribution. Make sure that the weight of your lighting equipment is evenly distributed on the tripod head. This will prevent the tripod from tipping over or becoming unbalanced.
Additionally, consider using a sandbag or weight on the tripod legs to further increase stability. This can be especially helpful if you’re shooting outdoors in windy conditions or on an uneven surface.
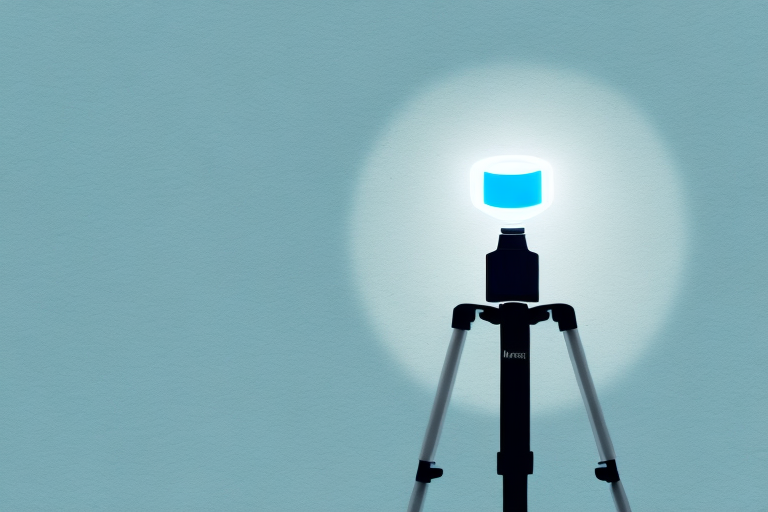
Attaching the Light to Your Tripod Head
Once your tripod is set up, it’s time to attach your light to the tripod head. Start by loosening the locking screw on the tripod head, then carefully screw the light’s mounting plate onto the head’s screw. Make sure it’s tight and secure, then tighten the locking screw.
It’s important to position the light correctly once it’s attached to the tripod head. Adjust the angle and height of the light to ensure it’s pointing in the right direction and illuminating your subject properly. You may need to make further adjustments as you start taking photos or recording video.
When you’re finished using the light, be sure to detach it from the tripod head carefully. Loosen the locking screw and unscrew the mounting plate from the head’s screw. Store the light and mounting plate in a safe place, and make sure the tripod head is locked securely in place before moving or storing the tripod.
Adjusting the Light Angle and Height
Now that your light is mounted, it’s time to adjust its angle and height. Most tripod-mounted lights have adjustable heads that can be tilted and rotated to achieve the desired lighting effect.
Start by adjusting the angle of the light to shine directly on your subject. Then, adjust the height of the light to achieve the desired brightness level. A good rule of thumb is to position the light at a 45-degree angle from your subject and about three feet above eye level.
It’s important to consider the type of lighting you want to achieve before adjusting the angle and height of your light. For example, if you want to create dramatic shadows, you may want to position the light at a steeper angle. On the other hand, if you want to create a softer, more diffused light, you may want to position the light at a shallower angle.
Additionally, you can experiment with the distance between the light and your subject to achieve different effects. Moving the light closer to your subject will create a more intense light, while moving it further away will create a softer, more natural-looking light.
Tips for Achieving Perfect Lighting with a Tripod-Mounted Light
There are several tips you can use to achieve the perfect lighting with your tripod-mounted light. First, consider using a diffuser or reflector to soften the light or bounce it off a surface. Additionally, you may want to experiment with different light temperatures and color gels to achieve a specific mood.
Another important tip is to pay attention to the ambient light in your shooting environment. If there is too much color or light pollution, it can affect the color and brightness of your subject. Consider using a color-correcting filter to balance the light.
It’s also important to consider the direction of your light source. Depending on the effect you want to achieve, you may want to position your light source at different angles. For example, if you want to create dramatic shadows, you may want to position the light source at a low angle. On the other hand, if you want to create a more even, natural-looking light, you may want to position the light source at a higher angle.
Finally, don’t be afraid to experiment and try new things. Lighting is a creative process, and what works for one shoot may not work for another. Take the time to play around with different lighting setups and see what works best for your subject and shooting environment.
Maintenance and Storage of Your Tripod and Lighting Equipment
To ensure your tripod and lighting equipment last for years to come, it’s important to properly maintain and store them. After each use, wipe down your tripod and light with a soft cloth to remove any dirt or debris. Store your equipment in a dry, cool place to prevent damage from moisture or heat.
Additionally, it’s important to regularly check your equipment for any signs of wear and tear. Inspect the legs of your tripod for any cracks or loose screws, and check the bulbs in your lighting equipment to ensure they are functioning properly. If you notice any issues, address them promptly to prevent further damage or potential safety hazards.
Common Mistakes to Avoid When Mounting a Light on a Tripod
There are several common mistakes that can affect the quality of your tripod-mounted lighting setup. One mistake is not properly securing the mounting plate to the tripod head, which can cause the light to wobble or move during shooting. Another mistake is placing the light too far away from your subject, which can create harsh shadows and unflattering lighting.
Another common mistake is not considering the color temperature of your light source. Different light sources have different color temperatures, which can affect the overall look and feel of your photos or videos. For example, a warm light source can create a cozy and inviting atmosphere, while a cool light source can create a more sterile and clinical look. It’s important to choose a light source with a color temperature that matches the mood and tone you want to convey in your work.
Troubleshooting Issues with Your Tripod-Mounted Lighting Setup
If you encounter issues with your tripod-mounted lighting setup, there are several troubleshooting steps you can take. For example, if your light is too bright or too dim, adjust the output level or move the light closer or further away from your subject. If your tripod is wobbling or moving, check to make sure all the legs are securely locked in place.
Another common issue with tripod-mounted lighting setups is shadows. If you notice harsh shadows on your subject, try adjusting the angle of the light or adding a diffuser to soften the light. Additionally, if you are using multiple lights, make sure they are all positioned correctly and not causing overlapping shadows.
If you are still experiencing issues with your tripod-mounted lighting setup, it may be helpful to consult the user manual or reach out to the manufacturer for assistance. They may be able to provide additional troubleshooting tips or suggest a solution to the problem.
Comparing Different Tripods and Lights for Different Shooting Scenarios
Depending on the type of shoot you’ll be doing, you may need different types of tripods and lights. For example, if you’re shooting a portrait, you may want a more powerful, larger light to create a more dramatic effect. However, if you’re shooting a landscape, a smaller, more portable light may be better suited.
Another important factor to consider when choosing tripods and lights is the location of the shoot. If you’re shooting outdoors, you may need a tripod that is more sturdy and can withstand wind and uneven terrain. Additionally, you may need a light that is weather-resistant and can handle different lighting conditions throughout the day. On the other hand, if you’re shooting indoors, you may want a tripod that is more compact and can easily fit in tight spaces. A smaller light may also be more appropriate for indoor shoots where you have more control over the lighting environment.
Creative Lighting Techniques for Captivating Photos and Videos
Finally, there are several creative lighting techniques you can use to capture captivating photos and videos with a tripod-mounted light. Consider using backlighting to create silhouettes, or experimenting with different colored gels to create a unique mood. Remember, the possibilities are endless!
By now, you should have a good understanding of how to mount a light on a tripod. Remember to take your time, select the right equipment for your needs, and experiment with different techniques to achieve stunning results.