Hanging a projector from the ceiling is an excellent way to add the feeling of a home theater to any room. However, before diving in, there are a few things to consider. In this article, we will go into detail about how to hang a projector from the ceiling, including tips and tricks for a clean and simple installation. By the end, you’ll be able to enjoy your new home theater setup!
Step-by-step guide to hanging a projector from the ceiling
The first step in hanging a projector from the ceiling is to decide where you want to mount it. This will depend on the size of the room and the desired viewing experience. Once you have determined the location, you will need to gather a few tools and equipment before proceeding with the installation process.
Next, you will need to ensure that the ceiling is strong enough to support the weight of the projector and the mount. It is recommended to use a stud finder to locate the ceiling joists and mount the projector directly onto them. If the joists are not in the desired location, you can use a ceiling mount kit that includes toggle bolts or anchors to secure the mount to the ceiling. Make sure to follow the manufacturer’s instructions carefully and double-check that the mount is level before attaching the projector. Once the mount is securely in place, you can attach the projector and adjust the angle and focus to achieve the best viewing experience.
Choosing the right projector mount for your setup
Before purchasing a mount, you need to consider the weight and size of your projector. You don’t want the mount to fail and cause damage or injury. Additionally, you need to ensure that the mount is compatible with your specific projector model. There are various types of mounts, including flush, tilting, and articulating. Each serves a unique purpose, and the mounting position could also influence the type of mount you choose. Research the different options to determine the one that meets your needs.
Another important factor to consider when choosing a projector mount is the location of the projector. If you plan to mount the projector on a high ceiling, you may need a mount with an extension arm to lower the projector to a comfortable viewing height. On the other hand, if you plan to mount the projector on a wall, a flush mount may be the best option to keep the projector close to the wall and out of the way. It’s also important to consider the distance between the projector and the screen, as this could affect the type of mount you choose. Take the time to evaluate your setup and determine the best mounting solution for your specific needs.
Locating the best spot on the ceiling to mount your projector
When it comes to mounting a projector on the ceiling, you need to ensure that you are mounting it in the right spot. You should take the time to measure and mark the location accurately. The position should be such that the projector can project a clear and focused image on the screen. Additionally, it should be in a location that is easily accessible and allows for easy maintenance.
Another important factor to consider when locating the best spot on the ceiling to mount your projector is the distance between the projector and the screen. This distance will affect the size and clarity of the projected image. It is recommended to consult the projector’s manual or use an online calculator to determine the optimal distance for your specific projector model. By taking into account both the location and distance, you can ensure that your projector will provide the best possible viewing experience.
Required tools and equipment for hanging a projector from the ceiling
Before starting, you’ll need to gather some tools and equipment. The list of essentials includes a drill, stud finder, screwdriver, level, power drill, screws, and anchors. Depending on the specific requirements, you may need additional tools such as a wire stripper, wire connectors, or a cable management system.
It’s also important to consider the weight of the projector and the type of ceiling you’ll be mounting it on. For heavier projectors, you may need to use a ceiling mount kit that includes a bracket and support rods. If you’re mounting the projector on a drop ceiling, you’ll need additional hardware such as a ceiling tile support brace. It’s always a good idea to consult the manufacturer’s instructions and guidelines to ensure you have all the necessary tools and equipment for a safe and secure installation.
Measuring and marking out the mounting location accurately
Once you have the tools and equipment ready, the next step is to measure and mark out the mounting location on the ceiling. Use a tape measure and a level to ensure that the measurements are accurate. If necessary, mark the location with a pencil so that you can use it as a guide while drilling.
It is important to consider the weight of the object you are mounting and choose appropriate hardware accordingly. For heavier objects, such as ceiling fans or heavy light fixtures, it may be necessary to use toggle bolts or anchors to ensure a secure installation. Always follow the manufacturer’s instructions and weight limits for the hardware you are using to avoid any safety hazards.
Preparing the ceiling for mounting a projector
Before attaching the projector mount to the ceiling, you need to prepare the area. If there is any debris or dust on the ceiling, remove it with a damp cloth. This will ensure that the mount sticks properly to the ceiling, providing a stable and secure platform for your projector.
Once the ceiling is clean, you should locate the ceiling joists. These are the wooden beams that support the ceiling and provide a sturdy base for the mount. You can use a stud finder to locate the joists, or you can tap the ceiling with a hammer to listen for a solid sound, which indicates the presence of a joist.Once you have located the joists, mark their position on the ceiling with a pencil. This will help you to align the mount correctly and ensure that it is securely attached to the ceiling. It is important to make sure that the mount is attached to the joists, rather than just the drywall, as this will provide the necessary support for your projector.
Installing the projector mount on the ceiling
The process of installing the mount is straightforward if you have followed the previous steps correctly. Follow the manufacturer’s instructions to mount the bracket to the ceiling accurately. It is essential to ensure that the mount is level and flush with the ceiling.
Before mounting the bracket, make sure to locate the ceiling joists to ensure that the mount is securely attached to the ceiling. You can use a stud finder to locate the joists. If you cannot locate the joists, you may need to use toggle bolts or other hardware to secure the mount to the ceiling.
After mounting the bracket, attach the projector mount to the bracket according to the manufacturer’s instructions. Make sure to use the appropriate screws and hardware to secure the mount to the bracket. Once the mount is securely attached, you can then attach the projector to the mount and adjust it as needed to achieve the desired image size and focus.
Attaching the projector to the mount securely
Once the mount is securely in place, it’s time to attach the projector to the mount. Ensure that the projector is centered and level before attaching it. Use the manufacturer’s instructions to connect the projector and secure it to the mount in a way that doesn’t damage the projector.
It’s important to note that the weight of the projector should also be taken into consideration when attaching it to the mount. Make sure that the mount is rated to hold the weight of your specific projector model. If the mount is not rated for the weight of your projector, it could potentially fall and cause damage or injury. Always double-check the weight capacity of the mount before attaching the projector.
Adjusting the positioning of your projector for optimal viewing
With the projector attached to the mount, it’s time to adjust its positioning. You want to ensure that the image projection is clear and focused on the screen. Experiment with the projector’s positioning until you find the optimal viewing and projection angle for your setup.
It’s important to consider the lighting in the room when positioning your projector. Too much ambient light can wash out the image, while too little can make it difficult to see. If possible, try to dim the lights or use blackout curtains to create a darker environment. Additionally, be mindful of any obstructions in the room that may block the projector’s beam, such as furniture or decor. By taking these factors into account, you can ensure that your projector is positioned for the best possible viewing experience.
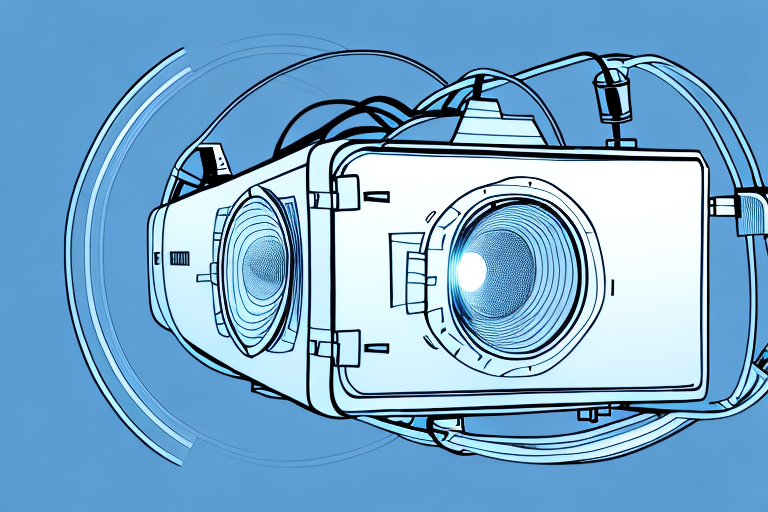
Hiding cables and wires for a clean installation
With the projector securely in place, it’s time to tidy up the cables and wires. An installation that is neat and tidy enhances the overall look and feel of the space. You can hide the cables within a conduit or invest in a cable management system. Regardless of your method, ensure that the cables are tucked away neatly.
One important consideration when hiding cables and wires is accessibility. Make sure that you can still access the cables easily in case you need to make any adjustments or repairs in the future. It’s also important to label the cables and wires so that you can easily identify them if you need to make any changes.
Another option for hiding cables and wires is to use wireless technology. Many projectors now come with wireless capabilities, allowing you to connect to your devices without the need for cables. This can be a great option if you want a completely cable-free installation, but keep in mind that wireless technology can sometimes be less reliable than wired connections.
Troubleshooting common issues when hanging projectors from ceilings
If you experience any issues when installing the projector, you should refer to the manufacturer’s instructions. Not all projectors and mounts are the same, and some will require different approaches. Troubleshooting may take some time, and you should be patient and meticulous. Ultimately, the goal is to have a functioning and stable installation.
Tips and tricks for maintaining and cleaning your mounted projector
Cleaning and maintaining your projector is important to ensure that it lasts for a long time. Ensure that the filters are clean and free of debris. Wipe the lens clean and avoid touching it with bare hands. Ensure that the wires are neat and tidy and dust the area around the projector regularly. By doing this, you’ll avoid dust buildup and lengthen the life of the equipment.
Conclusion: Enjoying your home theater setup with a mounted projector
Hanging a projector from the ceiling is a rewarding experience that can enhance your home theater setup. You can create a fantastic viewing experience for yourself, friends, and family. Remember to take your time, do your research, and follow the installation instructions carefully. With proper care and maintenance, your projector will provide you with a beautiful viewing experience for many years to come.