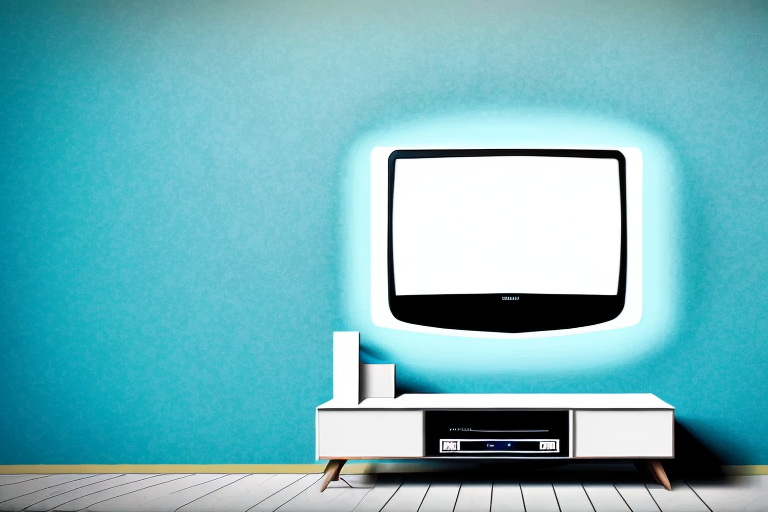
Wall mounting a TV on drywall can be a great way to save space and achieve a sleek, modern look for your entertainment center. But it’s important to do it right to ensure the safety of your TV and prevent any damage to your walls. In this article, we’ll walk you through every step of the process, from measuring and marking the wall to anchoring the mount and concealing wires.
Tools and Materials Needed for Wall Mounting a TV on Drywall
Before beginning your wall-mounting project, gather all the necessary tools and materials. You’ll need a stud finder, a drill with various drill bits, a screwdriver, a level, a tape measure, and a pencil. You’ll also need a TV mount that’s appropriate for your TV’s size and weight. Make sure to read the manufacturer’s instructions on the mount to make sure it’s compatible with drywall, as some mounts are designed for use on different types of walls.
Once you have all the necessary tools and materials, it’s important to locate the studs in your wall. This will ensure that your TV mount is securely attached to the wall and can support the weight of your TV. Use a stud finder to locate the studs and mark their location with a pencil.
Before drilling any holes, double-check the placement of your TV mount to make sure it’s at the desired height and level. Once you’ve confirmed the placement, use a drill to make pilot holes in the studs. Then, attach the TV mount to the wall using screws and a screwdriver. Finally, attach the TV to the mount according to the manufacturer’s instructions.
Measuring and Marking the Wall for the TV Mount
The first step to wall mounting your TV is to measure and mark the wall where you want your mount to go. Use a tape measure to determine the height you want your TV to be mounted at, and mark the center point with a pencil. Use a level to ensure that your mark is straight and centered.
It’s important to also consider the viewing angle when measuring and marking the wall for your TV mount. Take into account the distance between the TV and the seating area, as well as any potential obstructions or glare from windows or lights. You may need to adjust the height or placement of the mount to ensure optimal viewing for everyone in the room.
Finding the Studs in Your Drywall
The next step is to find the studs in your drywall. Using a stud finder, run it along the wall to locate the vertical studs behind the drywall. Mark the location of the studs with a pencil.
It is important to find the studs in your drywall before hanging heavy objects, such as shelves or mirrors, to ensure they are properly secured. If you do not have a stud finder, you can also try tapping the wall lightly with a hammer to listen for a solid sound, indicating the presence of a stud. However, using a stud finder is the most accurate method and can save you from damaging your walls or objects from falling due to improper installation.
Drilling Holes into Your Drywall
Once you have located the studs in your wall, it’s time to drill holes for the mount. Using a drill bit that matches the size of your mount’s screws, drill pilot holes into the studs you’ve marked. This will provide the necessary support to hold your TV mount in place.
It’s important to make sure that you are drilling straight into the stud and not at an angle. If you drill at an angle, the screw may not hold properly and could cause damage to your wall or even cause your TV to fall. To ensure that you are drilling straight, use a level to mark a straight line where you want to drill.
After drilling the pilot holes, you can then attach the mount to the wall using the screws provided. Make sure to tighten the screws securely, but be careful not to over-tighten them as this could also cause damage to your wall. Once the mount is securely attached, you can then mount your TV onto the bracket and enjoy your newly mounted TV!
Anchoring the TV Mount to Your Drywall
With the pilot holes drilled, it’s time to attach the mount to the wall. Hold the mount up to the wall, aligning the screw holes with the pilot holes you’ve drilled, and screw the mount into place using the included screws.
It’s important to make sure that the screws are securely fastened into the drywall and not just the wall studs. You can use a stud finder to locate the studs and mark them on the wall before drilling the pilot holes. If the mount doesn’t align with the studs, you can use drywall anchors to provide additional support.
Before mounting your TV, make sure to check the weight limit of the mount and compare it to the weight of your TV. It’s also a good idea to have someone assist you with lifting and mounting the TV to ensure it’s done safely and securely.
Attaching the TV to the Wall Mount
Once the mount is securely fixed to your wall, it’s time to attach your TV to the mount. Typically, the mount will have brackets that attach to the back of your TV with screws or bolts. Once attached, carefully lift your TV and slide the brackets into the mount until they click into place. Double check that all connections are tight and secure before letting go of your TV.
It’s important to note that the weight and size of your TV will determine the type of wall mount you need. For larger TVs, it’s recommended to use a mount with multiple brackets for added support. Additionally, make sure to follow the manufacturer’s instructions for weight limits and installation guidelines to ensure the safety of your TV and those around it.
Concealing Wires and Cables Behind the Wall
To achieve a clean look for your TV setup, it’s important to properly hide the cords and cables behind the wall. There are a few options for doing this, including using a cable cover that attaches to the wall or cutting a hole in the drywall and fishing the cords through to hide them. If you’re unsure about how to do this, consider consulting with a professional or doing some research for the best solution for your specific TV and setup.
Another option for concealing wires and cables behind the wall is to use a power bridge kit. This kit allows you to run the cords through a small opening in the wall and then connect them to a power outlet that is installed behind your TV. This not only hides the cords but also eliminates the need for unsightly power strips and cords running along the floor. However, it’s important to note that installing a power bridge kit may require some electrical knowledge and should be done with caution.
Testing Your Mounted TV for Stability and Safety
Once you’ve completed all the steps above, it’s time to test your mounted TV for stability and safety. Double check that the mount is securely anchored to the wall and the TV is properly attached to the mount. Gently push and pull on the TV to make sure it’s not wobbling or coming loose. If you notice any issues, review the steps above to make sure all steps were properly completed.
Another important factor to consider when testing your mounted TV is the weight capacity of the mount. Make sure that the weight of your TV does not exceed the weight capacity of the mount. This information can usually be found in the product manual or on the manufacturer’s website. Exceeding the weight capacity of the mount can lead to instability and potential safety hazards.
It’s also a good idea to test your mounted TV for stability and safety periodically, especially if you have children or pets in the home. Make it a habit to check the mount and TV for any signs of wear and tear, such as loose screws or bolts. If you notice any issues, it’s best to address them immediately to prevent any accidents or damage to your TV.
Troubleshooting Common Issues When Wall Mounting a TV on Drywall
Despite your best efforts, you may run into some issues when wall mounting a TV on drywall. Some common issues include the TV being too heavy for the mount, the mount not being securely anchored to the wall, or wiring issues. If you’re having trouble, consider consulting with a professional TV installer or reaching out to the manufacturer for additional support.
Another common issue when wall mounting a TV on drywall is finding the right location to mount it. You want to make sure the TV is at a comfortable viewing height and angle, and that it’s not too close or too far from the seating area. It’s also important to consider the location of electrical outlets and cable connections.
If you’re mounting a TV in a room with high humidity, such as a bathroom or kitchen, you may also encounter issues with moisture damage. In this case, it’s important to choose a mount that is specifically designed for damp environments and to take extra precautions to protect the TV and wiring from moisture.
Tips for Choosing the Right Wall Mount for Your TV Size and Type
Choosing the right wall mount is key to a successful wall mounting project. Make sure to select a mount that’s appropriate for your TV’s size and weight, and read the manufacturer’s instructions carefully to make sure it’s compatible with drywall. Look for a mount that allows for adjustability so you can achieve the perfect viewing angle.
Wall mounting a TV on drywall can be a great way to upgrade your entertainment setup and achieve a sleek, modern look for your space. By following the steps and tips outlined above, you can ensure that your mounted TV is safe and secure for years to come.
It’s also important to consider the type of TV you have when choosing a wall mount. If you have a curved TV, for example, you’ll need a mount that’s specifically designed to accommodate the curve. Similarly, if you have a larger TV, you may want to consider a mount with a tilting feature to help reduce glare and improve viewing angles. Take the time to research and choose the right mount for your specific TV to ensure the best possible viewing experience.