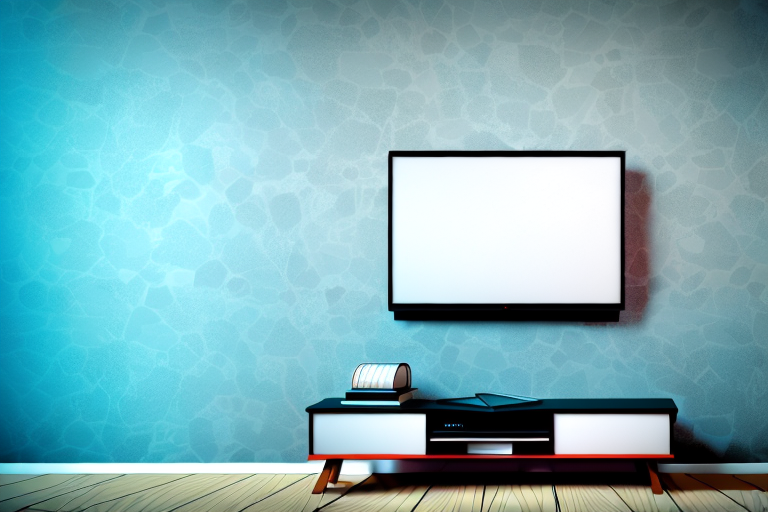
Wall mounting your TV can transform your viewing experience by freeing up space in your living room and giving you a better viewing angle. If you’re ready to make the switch, then this guide will walk you through the step-by-step process of wall mounting a 65″ TV. Follow these instructions and you’ll have your TV securely mounted on your wall in no time.
Why Wall Mounting Your TV is a Great Idea
Wall mounting a TV is an excellent idea for several reasons. Firstly, it saves space in your room and clears up clutter created by TV cabinets and tables. Secondly, it provides a better viewing experience by offering a comfortable eye level and angle. Lastly, a wall-mounted TV looks elegant and sophisticated.
In addition to the above benefits, wall mounting your TV can also improve the safety of your home. By securely mounting your TV on the wall, you eliminate the risk of it falling over and causing injury or damage to your property. This is especially important if you have young children or pets in your home.
Another advantage of wall mounting your TV is that it allows you to create a more immersive home theater experience. By positioning your TV at the optimal height and angle, you can enjoy a more cinematic viewing experience that rivals that of a movie theater. This is particularly true if you pair your wall-mounted TV with a high-quality sound system.
Tools and Materials You’ll Need for the Job
Before you begin, make sure you have the right tools and materials for the job. You will need a stud finder, drill, level, mounting bracket and screws, screwdriver, measuring tape, and a cable management kit. Ensure that all your tools are in working order and that you have the necessary equipment to secure the TV on the wall.
It’s also important to consider the weight and size of your TV when selecting the appropriate mounting bracket and screws. Make sure to check the manufacturer’s recommendations for the maximum weight and size that the bracket can support. Additionally, if you are mounting the TV on a plaster or drywall surface, you may need to use anchors to ensure a secure installation. Always follow the instructions carefully and take the necessary precautions to ensure a safe and successful installation.
Choosing the Right Wall Mount for Your TV
The first and most crucial step is selecting the correct wall mount for your TV. Make sure it supports the size and weight of your TV. Consider how much it tilts, and its adjustability features. Selecting a wall mount that provides a good amount of tilt and swivel is ideal for a 65″ TV.
Another important factor to consider when choosing a wall mount for your TV is the VESA pattern. This refers to the distance between the mounting holes on the back of your TV. Make sure the wall mount you choose is compatible with your TV’s VESA pattern. Additionally, consider the placement of the wall mount and the viewing angle. Mounting your TV too high or too low can cause discomfort and strain on your neck. Aim to mount your TV at eye level when seated for optimal viewing experience.
Preparing Your Wall for Installation
Clean your wall surface, and remove any objects that might interfere with the installation. Use a stud finder to locate the wall studs on which you intend to mount the bracket. Once you’ve found the studs, mark them with a pencil. This step is critical since you’ll need to install the bracket securely on the wall studs.
It’s also important to consider the weight of the object you’ll be hanging on the bracket. If it’s a heavy item, you may need to use additional hardware, such as toggle bolts, to ensure that the bracket is securely attached to the wall. Make sure to read the manufacturer’s instructions carefully and follow their recommendations for weight limits and hardware requirements.
Marking the Wall to Ensure Proper Placement
Measure and mark where you want to place your TV on the wall. Ensure that the placement is level and at a suitable height for optimal viewing comfort. Use a measuring tape and level to ensure accurate placement. With the level, mark the spots where you intend to drill holes for the bracket.
Before drilling any holes, it’s important to check for any electrical wires or plumbing behind the wall. Use a stud finder to locate the studs in the wall, and avoid drilling into them. If you’re unsure about the location of any wires or plumbing, consult a professional before proceeding.
Once you’ve marked the spots for the bracket, use a drill bit that’s slightly smaller than the screws you’ll be using to attach the bracket to the wall. This will help ensure a secure fit. After drilling the holes, insert wall anchors if necessary, and then attach the bracket to the wall using screws and a screwdriver or drill.
Drilling Holes in the Wall for the Mounting Bracket
With a drill and appropriate drill bit, make two pilot holes into your marked points. Be sure to drill through the wall studs. Once done, place the bracket on the wall, line up the holes, and insert screws through the bracket until they are secure.
It is important to ensure that the bracket is level before drilling the pilot holes. Use a level to ensure that the bracket is straight and adjust as necessary. Additionally, if you are unsure about the location of the wall studs, use a stud finder to locate them before drilling. This will ensure that the bracket is securely attached to the wall and can support the weight of the object being mounted.
Attaching the Mounting Bracket to the Wall
With your wall mount in place, secure the mounting bracket to the wall by tightening the screws until it’s level. Then, test the bracket by pushing it softly to ensure it holds your TV weight securely.
It’s important to make sure that the wall you’re attaching the mounting bracket to is strong enough to support the weight of your TV. If you’re unsure, consult a professional or use a stud finder to locate the studs in the wall for added support. Once you’ve confirmed the wall’s strength, use a level to ensure the bracket is straight before tightening the screws.
Securing the Mounting Plate to Your TV
Next, attach the mounting plate to your TV, ensuring it matches your TV’s screw holes. With someone holding the TV up, attach screws to the television until they are snug but not over-tightened. Over-tightening can result in damaging the television and the wall mount.
It is important to note that not all TVs are compatible with wall mounts. Before purchasing a wall mount, check your TV’s specifications to ensure it is VESA compliant. VESA (Video Electronics Standards Association) is a standard used for TV mounting patterns, and ensures that your TV will fit securely onto the wall mount. Failure to use a VESA compliant wall mount can result in damage to your TV or even injury.
Lifting and Attaching Your TV to the Wall Mount
With the plate attached to the TV, it’s now time to mount your TV onto the wall mount. With someone’s help, lift the TV and line up the mounting plate on the TV to the bracket on the wall. Lock the plate on the bracket by tightening the screws until they are adequately tightened.
It’s important to ensure that the wall mount is securely attached to the wall before lifting and attaching the TV. Use a stud finder to locate the studs in the wall and attach the bracket to the studs for maximum stability. If you’re unsure about the installation process, it’s recommended to seek professional help to avoid any accidents or damage to your TV or wall.
Adjusting Your TV’s Position on the Wall
Once your TV is mounted, test the angle and the tilt. Adjust the bracket and the TV until it’s at your desired eye level and angle. If you’re finding it challenging to do it yourself, consider seeking assistance from a professional.
It’s important to also consider the lighting in the room when positioning your TV. Avoid placing it in direct sunlight or in a spot where there is a lot of glare. This can cause eye strain and make it difficult to see the screen. Additionally, make sure there is enough space around the TV for proper ventilation to prevent overheating.
Concealing Wires and Cables for a Clean Look
With your TV mounted, it’s essential to take steps to conceal any visible cords and cables for a neat and tidy appearance. Use a cable management kit to tuck away any loose electronics wires or cords. This way, your wall-mounted TV will look clean and organized.
Not only does concealing wires and cables improve the appearance of your wall-mounted TV, but it also has safety benefits. Loose cords and cables can be a tripping hazard, especially if you have children or pets in the home. By using a cable management kit, you can keep your cords organized and out of harm’s way. Additionally, hiding cords and cables can prevent them from becoming tangled or damaged, which can affect the performance of your electronics.
Troubleshooting Common Issues During Installation
Some common problems people face during the installation include: difficulty locating studs, installing the mount at an incorrect height, and damaging the television or the wall. Be sure to do your research and ask for professional help if you have any questions or run into difficulties.
Another common issue during installation is not having the proper tools. Make sure you have all the necessary tools before starting the installation process. This includes a stud finder, level, drill, screws, and anchors.
It’s also important to consider the weight and size of your television when choosing a mount. If the mount is not strong enough to support the weight of your TV, it can result in the mount breaking or the TV falling off the wall. Always check the weight limit of the mount and make sure it is compatible with your TV before purchasing.
How to Maintain Your Wall-Mounted TV
Once you have your TV mounted on the wall, you’ll want to keep it clean and dust-free. Avoid spraying water or any cleaning liquids directly on the TV. Instead, use a soft and dry microfiber cleaning cloth to wipe the screen gently. A wall-mounted TV can last a long time if taken care of properly.
Tips to Improve Your Viewing Experience
To improve your TV viewing experience, try seating yourself at the right distance. Sitting too close to a big TV screen can damage your eyes and cause headaches. A distance of twice the diagonal length of your TV is ideal. Invest in a good surround sound system and comfortable seating for movie and TV marathons.
Now you have everything you need to wall mount a 65″ TV. With these step-by-step instructions, you can save space, improve your viewing experience, and add elegance to your living room, all in one go!