If you are looking to enhance your home entertainment experience, setting up a Sony home theater system to your TV can bring cinematic sound and video quality right to your living room. However, getting started with a complex system like this can be challenging. In this article, we will guide you on how to setup a Sony home theater system to your TV, step-by-step.
Understanding the Components of a Sony Home Theater System
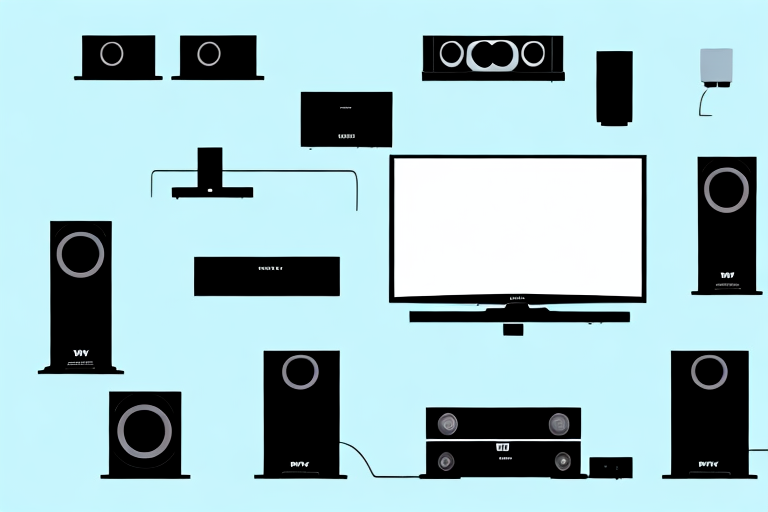
Before setting up your Sony home theater system to your TV, you need to understand the different components that come with it. These can include a receiver, speakers, subwoofer, and cables. It’s important to unbox and identify each component piece carefully and note the specifications for each.
The receiver is the central hub of your Sony home theater system. It receives audio and video signals from your TV, Blu-ray player, or other devices and distributes them to your speakers. The speakers are responsible for producing the sound, while the subwoofer adds depth and bass to the audio. It’s important to position your speakers correctly for optimal sound quality. Additionally, make sure to use high-quality cables to connect your components for the best possible audio and video performance.
Choosing the Right Cables for Your Sony Home Theater System
One of the most critical steps in setting up your Sony home theater system to your TV is ensuring to choose the right cables to connect the different components. For example, you may need an HDMI cable to connect the receiver to your TV, an optical cable for surround sound, or speaker wires for the speakers. Make sure to select high-quality cables to ensure excellent picture and sound quality.
When selecting cables for your Sony home theater system, it’s essential to consider the length of the cable you need. If your components are far apart, you may need longer cables to connect them. However, keep in mind that longer cables can result in signal loss, which can affect the quality of the picture and sound. Therefore, it’s crucial to choose the appropriate length of cable for your setup.
Another factor to consider when choosing cables for your Sony home theater system is the type of connectors. Different components may require different types of connectors, such as RCA, HDMI, or optical. Make sure to check the specifications of your components to ensure you choose the right type of connector for each cable. Using the wrong connector can result in poor picture and sound quality or even damage to your equipment.
Step-by-Step Guide to Connecting Your Sony Home Theater System to Your TV
The most crucial part of setting up your Sony home theater system is making the correct connections between your TV and the components. Follow these steps to connect your Sony home theater system to your TV:
- Unpack and connect the power cables to each component of your home theater system
- Connect your HDMI or Optical cables to the correct ports on the back of the receiver.
- Connect the other end of your HDMI or Optical cables to the corresponding port on your TV.
- Connect your speakers according to the labels on the receiver, and be sure to configure the speaker settings to match where you placed them.
- Once all components are connected successfully, connect the power source.
- Start your Sony home theater system to verify the connections.
It is important to note that if you are using an older TV that does not have HDMI or Optical ports, you may need to use RCA cables to connect your Sony home theater system to your TV. In this case, connect the RCA cables to the corresponding colored ports on the back of the receiver and the TV. Additionally, if you encounter any issues with the connections, refer to the user manual or contact Sony customer support for assistance.
Setting Up Your Sony Home Theater System Speaker Configuration
After the physical connection, the speaker configuration is the next step. It’s essential to place your speakers in the right position for best results. Once you have labeled each speaker according to the receiver, adjust the bypass channels and levels to avoid sound distortion.
When positioning your speakers, it’s important to consider the acoustics of the room. Avoid placing speakers too close to walls or corners, as this can cause sound reflections and distortions. Instead, aim to position them at ear level and equidistant from the listening area.
Another factor to consider is the type of content you’ll be playing. If you’re watching a movie with surround sound, you’ll want to ensure that your rear speakers are placed behind the listening area for optimal effect. On the other hand, if you’re listening to music, you may want to adjust the balance of your speakers to emphasize the vocals or instruments.
Configuring Audio and Video Settings on Your Sony Home Theater System
After you finish with the physical connectivity, it’s time to configure the Audio and Video settings. Adjust the video settings such as brightness, contrast, and color temperature for your TV. For audio, configure the correct audio formats such as DTS Master Audio or Dolby Digital. Remember, these settings must match the specifications of your components.
Another important aspect to consider when configuring your Sony Home Theater System is the speaker placement. Make sure that the speakers are placed in the correct position to optimize the sound quality. You can refer to the user manual for guidance on speaker placement.
Additionally, you can also customize the sound settings according to your personal preferences. Sony Home Theater Systems come with various sound modes such as cinema, music, and sports. You can choose the sound mode that best suits your needs and adjust the settings accordingly.
Troubleshooting Common Issues When Setting Up a Sony Home Theater System
If you encounter any difficulties when setting up your Sony Home Theater System to your TV, here are some common issues and troubleshooting tips:
- Ensure all connections are secure and correctly placed as per instructions.
- Check the source input settings on your TV and receiver to ensure they match.
- If you experience problems with sound, ensure the speaker configuration matches the receiver’s output settings.
Another common issue that may arise when setting up a Sony Home Theater System is the inability to connect to the internet. If this happens, check your network settings and ensure that your system is connected to the correct Wi-Fi network. You may also need to update the firmware on your system to ensure it is compatible with your network.
If you are experiencing issues with the picture quality on your TV, there are a few things you can try. First, check the resolution settings on your TV and ensure they match the output settings on your receiver. You may also need to adjust the picture settings on your TV to optimize the display for your specific setup. If these steps do not resolve the issue, you may need to contact Sony customer support for further assistance.
Tips and Tricks to Maximize Your Sony Home Theater System Experience
Once your Sony Home Theater System is up and running, it’s essential to note some tips to enjoy optimal performance. Firstly, update your system to the latest firmware to get the most out of your device. Also, try different placement options for the speakers, and experiment with different audio and video settings.
Another tip to maximize your Sony Home Theater System experience is to invest in high-quality cables. The quality of the cables can significantly impact the audio and video performance of your system. Consider using HDMI cables for the best audio and video quality.
Additionally, make sure to properly calibrate your system. Calibration ensures that your speakers are correctly balanced, and the audio and video settings are optimized for your room’s acoustics. You can use calibration tools like the Sony STR-DN1080’s built-in calibration system or hire a professional to calibrate your system for you.
Enhancing Your Viewing Experience with Additional Accessories for Your Sony Home Theater System
You can further enhance your home theater experience by purchasing additional accessories, such as a universal remote control, an AV surge protector, and a sound calibration microphone. These accessories can take your cinematic experience to the next level.
One of the most popular accessories for a Sony home theater system is a subwoofer. A subwoofer is a speaker that is designed to reproduce low-frequency sounds, such as explosions and deep bass notes. Adding a subwoofer to your home theater system can greatly enhance the overall sound quality and make your viewing experience more immersive.
Another accessory that can improve your home theater experience is a projector screen. While many people use their walls as a makeshift screen, a dedicated projector screen can provide a clearer and more vibrant image. Additionally, a projector screen can be easily mounted and removed, making it a convenient addition to your home theater setup.
Maintaining and Cleaning Your Sony Home Theater System for Optimal Performance
To enjoy optimal performance from your Sony home theater system, maintenance and cleaning play an essential role. Ensure the system is kept dust-free and clean to prevent any interference while it’s in operation. Also, read through your user manual to understand the recommended best practices for maintenance of your system.
With this comprehensive guide, setting up your Sony home theater system to your TV should now be a breeze. Enjoy your cinematic viewing experience with outstanding sound and picture quality in the comfort of your own home.
Regularly cleaning your Sony home theater system not only ensures optimal performance but also prolongs its lifespan. Use a soft, dry cloth to wipe the exterior of the system and avoid using any abrasive materials that may scratch the surface. For hard-to-reach areas, use a soft-bristled brush to gently remove any dust or debris.
In addition to cleaning, it’s essential to keep your system up-to-date with the latest firmware updates. These updates often include bug fixes and performance improvements that can enhance your viewing experience. Check the Sony website regularly for any available updates and follow the instructions provided to install them.