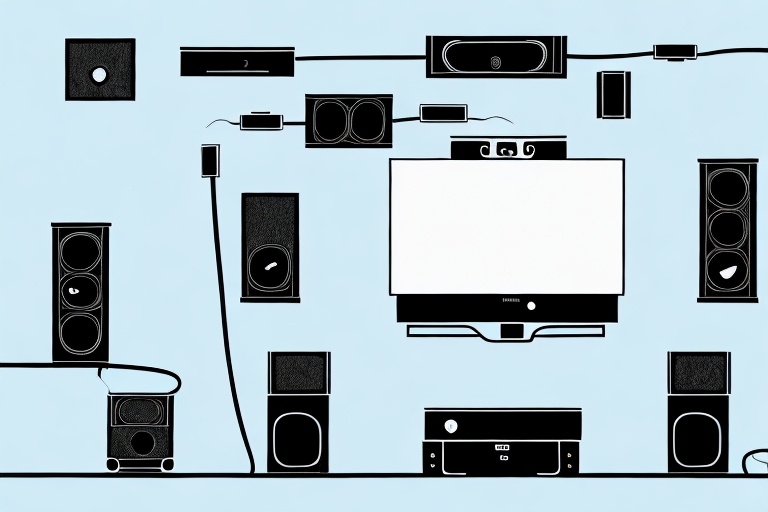
Congratulations on getting your own home media theater system! As you set it up, you’ll need to understand the basics of cable connections, different types of cable connectors, choosing the right cable for your system, proper cable management, how to set it all up step-by-step, and troubleshooting common issues. In this article, we’ll cover all of these topics and more, so you can enjoy your home theater to the fullest.
Understanding the Basics of Cable Connections
Before diving into different types of cables, it’s important to understand the basic cable connections. Your media theater system will have input and output ports, which you’ll need to connect with cables. HDMI cables are the most common cables for audio and video output, while optical cables are used for digital audio output. Coaxial cables are used to connect your cable box to your media theater system, while ethernet cables are used for internet connectivity. Don’t worry if you don’t know all of these cables right away. We’ll discuss them in detail as we move forward with this article.
It’s important to note that not all cables are created equal. The quality of the cable can have a significant impact on the overall performance of your media theater system. Higher quality cables can provide better sound and picture quality, while lower quality cables may result in distortion or interference. When selecting cables for your system, it’s important to consider the quality of the cable and the specific needs of your setup.
Different Types of Cable Connectors and their Uses
As mentioned earlier, HDMI cables are the most common cables used for audio and video output. They have a broad range of connectors, including A, C, and D connections. You’ll need to ensure that the HDMI cable you’re using has the right connector for your media theater setup. Optical cables are used for digital audio output, and they have square-shaped connectors. Coaxial cables, on the other hand, have a round connector that screws into place, and is used for connecting cable boxes to the media theater system.
Another type of cable connector that is commonly used is the VGA connector. VGA cables are used for video output and have a 15-pin connector that is typically blue in color. They are commonly used to connect computers to monitors or projectors. DisplayPort cables are another type of video cable that is becoming more popular. They have a rectangular-shaped connector and are used for high-definition video output. It’s important to ensure that you have the right cable and connector for your specific device and media setup to ensure optimal performance.
Choosing the Right Cable for Your Home Theater System
When selecting the right cable for your home theater system, there are a few things to consider. First, you’ll need to know the distance between your media theater system and the equipment you’re connecting it to. A shorter HDMI cable might be appropriate for a small room, while a longer HDMI cable might be needed for a larger room. Additionally, if you have a 4K or HDR display, ensure that the HDMI cable is capable of handling the high-quality video and audio content. As a general rule, it’s better to invest in high-quality cables, as they’ll deliver a better performance than standard or low-quality ones.
Another important factor to consider when choosing the right cable for your home theater system is the type of equipment you’re connecting. For example, if you’re connecting a Blu-ray player or gaming console, you may want to consider an HDMI cable with Ethernet capabilities, which allows for internet connectivity between devices. On the other hand, if you’re connecting a soundbar or receiver, you may want to consider an optical audio cable, which delivers high-quality audio signals.
It’s also important to consider the durability and flexibility of the cable. Look for cables with sturdy connectors and a thick, durable outer layer to prevent damage from bending or twisting. Additionally, consider the color and design of the cable, as it may need to blend in with your home theater setup. By taking these factors into account, you can ensure that you choose the right cable for your home theater system, delivering the best possible audio and video experience.
The Importance of Proper Cable Management
Proper cable management is crucial to ensure that your home theater system setup looks neat and tidy. You can use cable ties to keep cables organized and prevent unnecessary tangling. Additionally, it’s important to ensure that the cables are not left loose and hanging behind the TV, receiver, or speakers. Loose cables not only look terrible, but can cause damage to the equipment or become a hazard.
Another benefit of proper cable management is that it can improve the performance of your home theater system. When cables are organized and not tangled, it can reduce interference and signal loss, resulting in better audio and video quality. This is especially important for high-end systems that require a lot of cables.
Furthermore, proper cable management can make it easier to troubleshoot any issues that may arise with your home theater system. When cables are organized and labeled, it’s easier to identify which cable is connected to which device. This can save you time and frustration when trying to diagnose and fix any problems.
Step-by-Step Guide to Setting up Your Home Media Theater System
Setting up your home media theater system may seem intimidating, but it’s actually quite straightforward. The first step is to connect the TV to the media receiver or to your gaming console via HDMI cable. If you have a soundbar, connect it to the TV or receiver via HDMI or optical cable. Next, connect your cable box to the media receiver using a coaxial cable. Finally, connect the media receiver to the speakers using speaker wire. Don’t forget to turn on all of the equipment and adjust the audio and video settings to your liking.
Once you have your home media theater system set up, you can start enjoying your favorite movies, TV shows, and video games in high definition. You can also enhance your viewing experience by adding additional components such as a subwoofer for deeper bass or a streaming device for access to online content.
It’s important to regularly maintain your home media theater system to ensure optimal performance. This includes dusting the equipment, checking and replacing cables if necessary, and updating firmware and software. By taking care of your system, you can extend its lifespan and continue to enjoy high-quality entertainment for years to come.
Troubleshooting Common Issues with Cable Setup
Despite your best efforts, sometimes things don’t seem to work out as planned. If you’re experiencing no audio or video output, ensure that all cables are properly connected in their respective ports. If you’re experiencing audio distortion or no surround sound, make sure that the appropriate audio settings are enabled on the media receiver or TV. Finally, if you’re experiencing a lag in the audio output, check that the HDMI cable is properly connected to the TV and media receiver. If all else fails, consult the user manual or seek technical support.
Another common issue with cable setup is the presence of interference or noise in the audio or video output. This can be caused by a variety of factors, such as nearby electronic devices or poor quality cables. To troubleshoot this issue, try moving any electronic devices away from the cables or replacing the cables with higher quality ones.
In some cases, the issue may not be with the cables themselves, but with the media receiver or TV. If you’re experiencing issues with only one device, try connecting it to a different TV or media receiver to see if the issue persists. If the issue is still present, it may be a problem with the device itself and you should contact the manufacturer for assistance.
Tips for Improving Audio and Video Quality in Your Home Theater Setup
If you want to take your home theater experience to the next level, there are a few tips you can follow to improve the audio and video quality of your setup. For audio quality, invest in high-quality speakers and subwoofers. Additionally, position your speakers correctly to improve sound quality. For video quality, ensure that your media theater system is set to the proper resolution, and use HDR or UHD settings if available. Finally, adjust the brightness and contrast settings on your TV to optimize video quality.
Another way to improve audio quality is to use acoustic panels or soundproofing materials to reduce echoes and outside noise. This can help create a more immersive and enjoyable audio experience. Additionally, consider using a soundbar or surround sound system to further enhance the audio quality of your home theater setup.
When it comes to video quality, it’s important to have a high-quality HDMI cable to ensure that the signal is transmitted properly. You can also use a video calibration tool to adjust the color and sharpness settings on your TV. Finally, make sure that your media player is up to date and that you have a fast internet connection to avoid buffering or lagging issues.
How to Optimize Your Cable Settings for Best Performance
Optimizing cable settings is crucial to ensure that your media theater system is performing at its best. Ensure that the resolution of the source device is matched with the resolution of the destination device. If you have a 4K or HDR display, ensure that your HDMI cable is capable of handling the high-quality video and audio content. Finally, adjust the audio settings to optimize the surround sound experience.
Another important factor to consider when optimizing your cable settings is the length of the cable. Longer cables can result in signal degradation, which can lead to a loss in picture and sound quality. It is recommended to use the shortest cable possible to maintain the best performance.
In addition, it is important to ensure that your cables are properly connected and secured. Loose connections can cause interference and signal loss, which can negatively impact the performance of your media theater system. Make sure to check all connections and tighten any loose cables to ensure optimal performance.
Upgrading Your Cable Setup: What You Need to Know
If you’re considering upgrading your cable setup, there are a few things to keep in mind. First, you’ll need to ensure that your media theater system can handle the new cables. Additionally, you may need to upgrade your media receiver or TV to ensure compatibility. Finally, ensure that the new cables are capable of providing the quality of audio and video content that you need.
With all of these tips and tricks, we hope that you find setting up your home media theater system a breeze. Remember to keep everything neat and tidy, choose high-quality cables, and optimize your settings for the best performance. With a little bit of effort, you’ll be enjoying your favorite movies and TV shows in stunning audio and video quality in no time!