Welcome to the ultimate guide for setting up your Regent Home Theater System! In this article, we’ll walk you through each of the steps needed to properly connect your soundbar, subwoofer and additional devices to achieve the optimal home entertainment setup. Whether you’re a tech novice or a seasoned audio enthusiast, we’ve got all the information you need to get the most out of your Regent Home Theater System.
Unboxing the Regent Home Theater System: What’s Inside the Box?
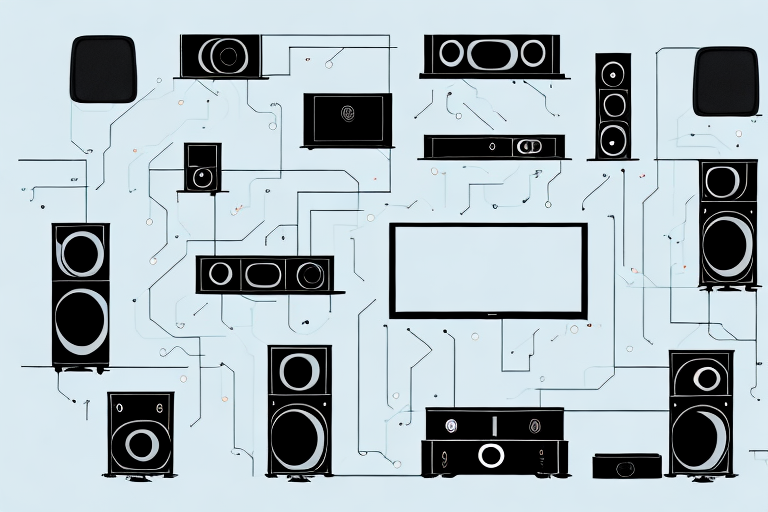
The first step in setting up your Regent Home Theater System is to unbox all of the components. The standard package includes the soundbar, subwoofer, remote control, power cords, and a user manual. Each piece is carefully packed and protected with foam to ensure that nothing gets damaged during shipping. Take your time to unwrap everything, and make sure that everything has been accounted for before proceeding with the setup.
Once you have everything out of the box, it’s important to find the right location for each component. The soundbar should be placed directly in front of your TV, while the subwoofer can be placed anywhere in the room for optimal sound quality. Make sure that the power cords are plugged in securely, and that all of the cables are connected properly.
Before you start using your Regent Home Theater System, it’s a good idea to familiarize yourself with the remote control. The remote control allows you to adjust the volume, change the sound settings, and switch between different inputs. Take some time to read through the user manual, and experiment with the different settings to find the perfect sound for your home theater experience.
Getting Started: Understanding the Connections and Cables
Once you have everything unboxed, you need to get familiar with all of the connections required to hook up your Regent Home Theater System. First is the power source. Plug in the power cord to the outlet, and connect it to the soundbar and the subwoofer.
You’ll also need to connect various devices to your Regent Home Theater System. You’ll need an HDMI cable to link your audio and video signals from your TV to the soundbar. If you’re looking to connect a gaming console or Blu-Ray player, then you’ll also need an additional HDMI cable that can facilitate the transfer of audio data from those sources as well. Lastly, you’ll need a digital optical cable, which is responsible for carrying sound data between your devices and the Regent Home Theater System.
It’s important to note that not all HDMI cables are created equal. When selecting an HDMI cable, make sure to choose one that is compatible with 4K resolution and HDR (High Dynamic Range) if your TV and devices support it. This will ensure that you get the best possible picture quality from your Regent Home Theater System.
Setting Up the Soundbar: Placement and Mounting Options
The soundbar is arguably the most important part of your Regent Home Theater System. It’s responsible for outputting all of your sound effects and dialogue from your favorite movies, TV shows, and more. When setting up your soundbar, it’s important to choose the optimal placement location. You want to ensure that the soundbar is mounted at the appropriate height to avoid distortion and that the sound is evenly balanced.
You should mount your soundbar close to your TV or projector screen to ensure optimal audio and video synchronization. Ideally, the bottom edge of the soundbar should be installed around your eye level. Avoid placing it too high or too low, as it may cause you to strain your neck or force you to look away from the screen.
Another important factor to consider when setting up your soundbar is the room’s acoustics. The soundbar’s performance can be affected by the room’s size, shape, and furnishings. For example, if your room has a lot of hard surfaces, such as tile or hardwood floors, the sound may bounce around and create echoes. To combat this, you can add soft furnishings, such as curtains or rugs, to absorb some of the sound. Additionally, if your room is large, you may need to consider adding additional speakers or a subwoofer to enhance the sound quality and fill the space.
Configuring the Subwoofer: Finding the Best Position for Optimal Bass
The subwoofer is responsible for producing rumbling bass sounds, which can add an extra layer of depth to thundering explosions or engrossing music scores. However, finding the optimal spot for your subwoofer is crucial for achieving this kind of sound quality.
The subwoofer’s size and ability to create deep, low-frequency sounds allow it to produce ultra low-end bass tones. It’s generally suggested that you place the subwoofer in an open room environment which can boost the low-frequency bass effect. If it feels dull, you can put it in a corner near the soundbar where you want to achieve the peak bass effect.
Another factor to consider when positioning your subwoofer is the distance from the walls. Placing the subwoofer too close to a wall can result in excessive bass, while placing it too far away can result in weak bass. It’s recommended to place the subwoofer at least a foot away from any walls to achieve a balanced bass sound.
Connecting Your Devices: How to Link Your TV, Blu-Ray Player, and Gaming Console to the System
Connecting your devices to your Regent Home Theater System involves a few simple steps. The first step is to connect an HDMI cable from your TV to the Regent Home Theater soundbar HDMI port. Secondly, connect an HDMI cable from your devices to the Regent Home Theater System. Lastly, you need to connect the power cord to the outlets.
It is important to note that some devices may require additional settings to be adjusted in order to work properly with the Regent Home Theater System. For example, if you are connecting a gaming console, you may need to adjust the audio settings to ensure that the sound is coming through the home theater speakers and not the TV speakers. Additionally, some Blu-Ray players may require you to change the audio output settings to ensure that the sound is being transmitted through the HDMI cable to the home theater system. Be sure to consult the user manual for each device to ensure that you have properly configured the settings for optimal performance.
Understanding the Remote Control: Key Functions and Customization Options
The Regent Home Theater System’s remote control is your gateway to controlling all aspects of your sound system. It’s designed with a user-friendly interface, so navigating between menus and options is effortless. The remote control allows you to adjust the volume, bass, treble, and select different equalizer modes that match different music genres so you can get the best sound quality.
In addition to the basic functions, the remote control also has advanced customization options. You can program the remote control to control other devices in your home theater system, such as your TV or Blu-ray player. This means you can control all your devices with just one remote control, making your home theater experience even more convenient.
Another useful feature of the remote control is the ability to create custom presets. You can save your favorite settings for different types of music or movies, and easily switch between them with just a few clicks. This allows you to quickly adjust the sound to match your preferences, without having to manually adjust the settings every time.
Adjusting Audio Settings: Fine-Tuning Your Sound Experience with EQ and Audio Modes
Once you’ve got everything set up, you can begin to fine-tune your Regent Home Theater System audio settings to achieve the sound output of your preference. Thanks to your system’s equalizer options, selecting your preferred sound profile can be as simple as clicking a button. Whether you’re listening to music or watching a movie, you can quickly customize the sound to better suit your audio preferences.
Additionally, the Regent Home Theater System offers various audio modes that can enhance your listening experience. These modes include cinema, music, sports, and game. Each mode is designed to optimize the audio output for the specific type of content you are consuming. For example, the cinema mode will provide a more immersive audio experience for movies, while the sports mode will enhance the commentary and crowd noise for live sports events. Experimenting with these audio modes can help you find the perfect setting for your audio preferences.
Troubleshooting Common Issues: Tips for Avoiding Audio Dropouts, Sync Issues, and More
If you’re experiencing any issues with your Regent Home Theater System, there are a few simple troubleshooting steps you can take to get things sorted without calling in professional audio help. Common issues include audio sync problems or dropouts, distorted sound effects or dialogue, or any kind of overall sound malfunctions. A simple restart, checking loose cable connections, or simply turning the system off and back on again can fix most issues.
However, if these basic troubleshooting steps don’t work, there may be more complex issues at play. One possible cause of audio dropouts is interference from other electronic devices in the room. Try moving any nearby devices away from the home theater system to see if that helps. Another potential issue is outdated firmware or software. Check for any available updates for your system and install them if necessary.
If you’re still experiencing issues after trying these steps, it may be time to call in professional help. A trained audio technician can diagnose and fix any more complex issues with your Regent Home Theater System, ensuring that you can enjoy your favorite movies and TV shows without any interruptions or malfunctions.
Enhancing Your Home Theater Experience: Accessories and Upgrades to Consider
While your Regent Home Theater System comes with everything you need to enjoy quality sound and an immersive viewing experience, there are many accessories you can add to enhance your setup. These include Wi-Fi adapters, soundbar mounts, wireless subwoofers, HDMI boosters for extended cable runs, and TV stands designed to hold large-screen displays.
In addition to these accessories, there are also several upgrades you can consider to take your home theater experience to the next level. One popular upgrade is a projector screen, which can provide a larger and more cinematic viewing experience. Another option is to upgrade your sound system with a Dolby Atmos setup, which adds height channels for a more immersive audio experience. You can also consider adding smart home automation to your theater room, allowing you to control your lights, sound, and other devices with just your voice or a smartphone app.
Maximizing Performance for Music Playback: Using Bluetooth, Wi-Fi, or Physical Inputs to Stream Music from Any Device
Your Regent Home Theater System is versatile in that it can handle not just your favorite movies and TV shows but also your favorite music. By using Bluetooth or Wi-Fi connections, you can stream music from any compatible device right to your soundbar. Alternatively, physical inputs like an audio jack or auxiliary port can be used if you’d prefer to play music directly from your phone or other devices.
So, now you’re in possession of a Regent Home Theater System, you can follow these easy steps to have an immersive, cinema-like audio experience at home. With a little time and effort, you can create a setup that rivals any cinema hallow. Remember to keep your system maintained and updated to protect your investment and enjoy unparalleled home entertainment.