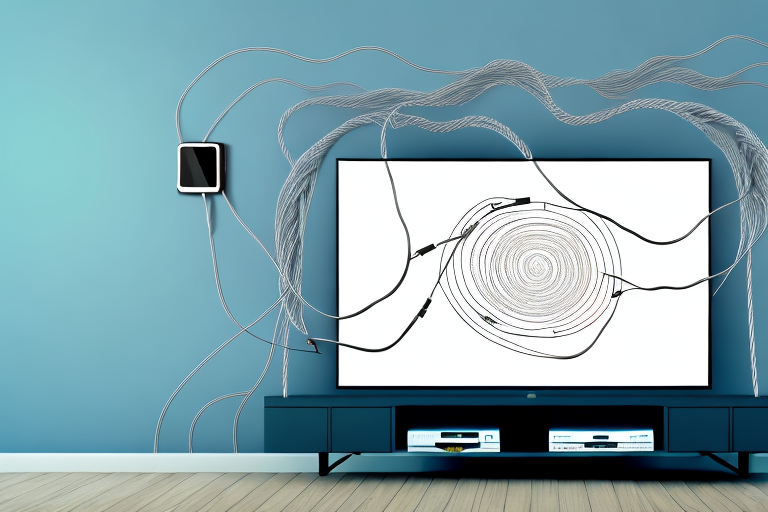
If you’re planning to mount your TV on the wall, running cables is, without a doubt, one of the most important aspects of the process. Not only does it ensure that your TV looks neat and tidy, but it also guarantees that your media devices remain safely tucked away. In this article, we’ll guide you through the process of running cables for a wall-mounted TV, from choosing the right cables to troubleshooting common issues.
Why you need to run cables for a wall-mounted TV
If you’re going to mount your TV on the wall, running cables is not an option – it’s a necessity. When you hang your TV, you don’t want cables hanging loose and creating an unsightly mess. Furthermore, it’s a safety hazard to have those cables dangling where they can be accidentally tugged or caught on something. Proper guide and installation will ensure that your cables are well-organized and hidden out of sight, keeping your space uncluttered and safe.
Another reason why running cables for a wall-mounted TV is important is to ensure that you have the best viewing experience possible. When cables are not properly organized, they can cause interference and signal loss, resulting in poor picture and sound quality. By running cables through the wall, you can eliminate these issues and enjoy a clear and uninterrupted viewing experience.
Additionally, running cables for a wall-mounted TV can increase the value of your home. A clean and organized entertainment setup can make a big difference when it comes to selling your home. Potential buyers will appreciate the attention to detail and the added safety measures that come with a properly installed wall-mounted TV with hidden cables.
Choosing the right cables for your wall-mounted TV
Choosing the appropriate cables for your wall-mounted TV is critical. You don’t want to skimp on cables and end up with a less-than-perfect viewing experience, do you? Choosing the appropriate cables guarantees that you will receive the best possible sound and image quality.
For HD video and audio transmission, HDMI cables have become the standard. However, not all HDMI cables are created equal – you’ll want to choose a high-speed cable that can handle 1080p video (or even 4K or 8K, depending on your TV), HDR, and other high-resolution formats.
Aside from HDMI cables, you may need speaker cables, ethernet cables, and coaxial cables, depending on your TV’s features and the devices you connect to it.
When choosing cables for your wall-mounted TV, it’s important to consider the length of the cables you need. Longer cables can result in signal loss, which can affect the quality of your audio and video. To avoid this, measure the distance between your TV and the devices you plan to connect to it, and choose cables that are just long enough to reach. If you need to use longer cables, consider using signal boosters or repeaters to maintain the quality of your audio and video.
Planning your cable routing before installation
Birmingham, we have good news – planning your cable routing is not as challenging as it seems. All you need to do is locate the devices you’ll be connecting to your TV and determine where they will be placed in relation to the TV.
Once you’ve established a general idea of how the cables will run, take note of any potential roadblocks or obstructions that may prevent you from running the cables in a straight line. For instance, a stud or fire block in the wall may obstruct the path. Plan accordingly by drilling through the material or using a cable cover or conduit to work around it.
Another important factor to consider when planning your cable routing is the length of the cables. Make sure to measure the distance between the devices and the TV to ensure that the cables are long enough to reach. It’s always better to have cables that are slightly longer than needed, as this will give you more flexibility in terms of placement and future adjustments.
Lastly, it’s a good idea to label your cables as you install them. This will make it easier to identify which cable goes where, especially if you need to troubleshoot any issues in the future. You can use colored tape or labels to differentiate between the different cables, or even create a diagram to keep track of everything.
Tools and materials needed to run cables for a wall-mounted TV
To run cables for your wall-mounted TV, you’ll need a few tools and materials, including a measuring tape, stud finder, drill, drill bits, drywall saw or hole cutter, fish tape, and a cable cover or conduit.
While most of these things are likely to be already owned by you, investing in a fish tape or cable cover/conduit is recommended for straightforward cable installations. These inexpensive tools/cover will make it easier to run your cables around roadblocks and through tight spaces.
It’s important to note that the type of cable you use will also impact the quality of your TV’s picture and sound. For the best results, use high-quality HDMI cables that are rated for 4K and HDR content. These cables will ensure that your TV displays the highest quality picture and sound possible.
Measuring and marking your cable path on the wall
Before drilling any holes, it’s crucial to determine where your cables will run from your TV to your media devices.
Decide on the paths you want to follow, take careful measurements, and pre-mark the spots where the holes for cable routing will go. As mentioned earlier, it’s essential to check for obstructions such as studs, fire blocks, or pipes that could get in the way of the paths you want.
Mark your path along the wall using a pencil; this will serve as your guide when drilling holes or making cuts in the drywall.
It’s also important to consider the length of your cables and the placement of your devices. Make sure your cables are long enough to reach from your TV to your media devices without being too loose or too tight. Additionally, consider the placement of your devices and how they will be connected to each other. It’s best to keep your devices close together to minimize the length of your cables and reduce the risk of tripping over them.
Drilling holes and running cables through walls or ceilings
With your cable path marked out, it’s time to start drilling holes. You’ll want to drill a hole behind your device’s mounting location and another near the outlet.
First, use a stud finder to locate the studs and mark their location. Drill the hole(s) for the cables through the wood at a slight angle to keep them hidden away from view. Make sure the holes don’t pass through multiple studs, as this can weaken the wood and potentially cause structural damage. For metal framing, use a metal drilling bit to avoid dulling the drill bit.
Feed the cable through the drilled holes with a fish tape or cable cover. Be sure to keep the excess cable inside the wall while pushing it through the hole or conduit, leaving enough slack on the other side to mount your devices.
It’s important to note that before drilling any holes, you should check for any electrical wiring or plumbing that may be hidden behind the wall. If you’re unsure, it’s best to consult with a professional to avoid any potential hazards. Additionally, if you’re drilling through a ceiling, make sure to use a ladder or scaffolding that is sturdy and secure to prevent any accidents.
Tips for avoiding common mistakes when running cables for a wall-mounted TV
While running cables for a wall-mounted TV may seem simple, there are several common errors to watch out for:
- Running wires through flammable materials
- Not accounting for bends in the wire
- Pulling on cable too forcefully, risking impairment
- Not labeling what cables go where
- Running power and signal cables in the same conduit
One additional mistake to avoid when running cables for a wall-mounted TV is not leaving enough slack in the cables. It’s important to leave enough slack to allow for any adjustments or movements of the TV without putting strain on the cables. Additionally, not securing the cables properly can lead to them becoming loose or tangled over time.
Another important tip is to use the right type of cable for each purpose. For example, HDMI cables are best for transmitting high-quality video and audio signals, while Ethernet cables are best for internet connectivity. Using the wrong type of cable can result in poor performance or even damage to your devices.
Hiding cables using cable covers or conduit
If you prefer to keep your cables hidden from sight, using a cable cover or conduit is the way to go. Using a cover, for instance, is an excellent way to camouflage wires along wall edges, while conduit is ideal for hiding cables that run along the ceiling or floor. Both options are easy to set up, affordable options that will give your home a polished look.
It is important to note that when using conduit, you should choose the appropriate size for the cables you are hiding. If the conduit is too small, it can cause damage to the cables, and if it is too large, it can look unsightly. Additionally, when using cable covers, make sure to choose a color that matches your wall or floor to ensure a seamless look. By taking these factors into consideration, you can effectively hide your cables while maintaining the aesthetic of your home.
Testing your cable connections and troubleshooting common issues
After installation, it’s essential to test your cable connections to ensure that everything is working correctly. To check your audio/video quality, use your TV, audio system, or game console to ensure the video and audio are in sync. Verify that all cables are securely and correctly connected, ensuring that every device is correctly revealing.
If you’re encountering issues or poor results, there may be a problem with your cables or devices. Make necessary adjustments or call a professional installer to fix the problem.
It’s also important to note that certain environmental factors can affect the quality of your cable connections. For example, if your cables are exposed to extreme temperatures or moisture, it can cause interference and disrupt your signal. Additionally, if you have multiple devices connected to the same cable, it can cause signal degradation and affect your overall audio and video quality. To avoid these issues, try to keep your cables in a cool, dry place and use separate cables for each device.
The Bottom Line
Running cables for wall-mounted TVs might seem daunting at first, but fear not – with a little planning, effort, and the right tools, even novices can handle the task. A well-executed cable management job will not only ensure your space looks and feels more polished, but you’ll also have peace of mind knowing your family is safe from unwelcome accidents.
One important thing to keep in mind when running cables for wall-mounted TVs is to make sure you have enough length to reach the necessary outlets. It’s always better to have a little extra length than to come up short and have to start over. Additionally, consider investing in cable ties or clips to keep the cables organized and prevent them from becoming tangled or creating a tripping hazard.
If you’re unsure about how to run cables safely and effectively, don’t hesitate to consult a professional. They can provide guidance on the best methods and tools to use, as well as ensure that everything is installed correctly and up to code. With a little effort and the right resources, you can have a clean, organized, and safe setup for your wall-mounted TV.