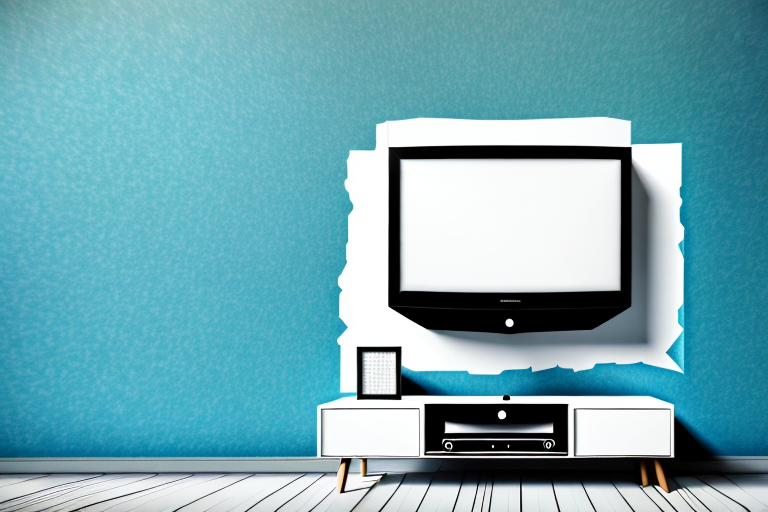
Mounting a TV can be a daunting task, especially when it comes to corner placement. However, with the right tools and techniques, it can be done with relative ease. In this step-by-step guide, we’ll walk you through the process of mounting your TV in the corner using Pro Pedals and offer helpful tips along the way. So, let’s get started!
Why Choose a Corner Mount for Your TV?
Choosing to mount your TV in a corner has several advantages. Firstly, it saves wall space, which can be particularly useful in smaller rooms. Secondly, it allows you to position the TV in such a way that it is visible from different angles, making it easier to watch from multiple seating positions. Finally, it can add a touch of style to your room, giving it a unique look.
In addition to these benefits, corner mounts also provide a safer option for households with children or pets. By mounting the TV in a corner, it is less likely to be accidentally knocked over or pulled down, reducing the risk of injury or damage. Additionally, corner mounts often come with adjustable brackets, allowing you to tilt or swivel the TV for optimal viewing angles. This feature is particularly useful for rooms with windows or bright lights, as it can help reduce glare on the screen.
Tools Needed to Mount Your TV in the Corner
You will need some basic tools to mount your TV in the corner. These include a drill, drill bits, a stud finder, a level, a measuring tape, a pencil, and of course, your Pro Pedals TV mount. If you don’t have any of these tools, they can easily be purchased at your local hardware store or online.
It’s important to note that the size and weight of your TV will also determine the type of tools you need. For larger TVs, you may need a heavier duty mount and additional tools such as a socket wrench or screwdriver. It’s always a good idea to check the manufacturer’s instructions for specific requirements before beginning the installation process.
Finding the Best Location for Your Corner Mount TV
The first step is to find the best location for your TV mount. Some factors to consider include the viewing angle, the distance from the seating area, and the location of power outlets and cables. Use a stud finder to locate the studs in the wall where you plan to mount your TV so you can ensure maximum strength and stability.
Another important factor to consider when choosing the location for your corner mount TV is the lighting in the room. Avoid placing the TV in an area with direct sunlight or bright overhead lighting, as this can cause glare and make it difficult to see the screen. Instead, opt for a location with softer, indirect lighting or consider installing blackout curtains or shades to control the amount of light in the room.
Measuring and Marking for Your TV Mounting Bracket
Once you have identified the location of the stud, use a measuring tape and pencil to mark where you want your mounting bracket to be placed. Use a level to ensure that your bracket is perfectly straight.
It is important to also consider the height at which you want your TV to be mounted. A good rule of thumb is to have the center of the TV screen at eye level when seated. Measure the distance from the floor to the desired height of the center of the TV and mark this on the wall as well. This will ensure that your TV is mounted at the optimal height for comfortable viewing.
How to Install Your TV Mounting Bracket
The next step is to install your mounting bracket. Before doing so, make sure to follow the manufacturer’s instructions carefully. Typically, this involves pre-drilling holes and attaching the bracket to the wall using screws and anchors. Again, use a level to ensure that your bracket is perfectly straight and secure.
Once your bracket is securely attached to the wall, it’s time to mount your TV. This step will vary depending on the type of bracket you have and the size and weight of your TV. Make sure to carefully read the instructions and use the appropriate hardware to attach your TV to the bracket. It’s also a good idea to have a second person assist you with this step to ensure that the TV is properly aligned and secured.
After your TV is mounted, take a step back and admire your work! But before you start binge-watching your favorite shows, make sure to test the stability of the mount and ensure that everything is securely in place. It’s also a good idea to periodically check the mount and hardware to make sure that everything remains secure over time.
Preparing Your Pro Pedals for your Mounting Bracket
Once your mounting bracket is secure, you can begin preparing your Pro Pedals for mounting. Most Pro Pedals come with detailed instructions, and these should be followed closely to ensure maximum safety and stability. This typically involves attaching the brackets to the back of the TV using screws.
Before attaching the brackets to the back of the TV, it is important to ensure that the surface is clean and free of any dust or debris. This will help to ensure a secure and stable attachment. Additionally, it is recommended to use a level to ensure that the Pro Pedals are mounted evenly and at the correct angle.
Once the Pro Pedals are securely attached to the mounting bracket, it is important to test them out before use. This can be done by gently pressing down on the pedals to ensure that they are stable and do not wobble or move. If there are any issues with stability or movement, adjustments may need to be made to the mounting bracket or the attachment of the Pro Pedals.
Attaching Your Pro Pedals to the Wall
With both the mounting bracket and Pro Pedals in place, it’s time to attach your TV to the wall. This is typically done by sliding your TV onto the Pro Pedals and securing it using screws. Make sure to follow the manufacturer’s instructions closely to ensure maximum safety and stability.
It’s important to note that the weight of your TV should not exceed the weight limit specified by the Pro Pedals manufacturer. If your TV is too heavy, it may cause the Pro Pedals to become unstable and potentially fall off the wall. Additionally, it’s recommended to have a second person assist with the installation process to ensure the TV is properly aligned and secured.
Securing Your TV to the Mounting Bracket
With your TV in place, it’s time to ensure that it is securely attached to the mounting bracket. Most mounting brackets come with safety screws that can be tightened to prevent the TV from accidentally being knocked off the bracket. Make sure to tighten these screws to prevent any accidents.
Another important step in securing your TV to the mounting bracket is to check the weight limit of the bracket. Each bracket has a specific weight limit, and it’s important to make sure that your TV does not exceed this limit. If your TV is too heavy for the bracket, it can cause the bracket to break and your TV to fall.
Additionally, it’s important to periodically check the screws and bolts that hold the bracket to the wall. Over time, these screws can become loose and cause the bracket to become unstable. Make sure to tighten any loose screws and bolts to ensure that your TV remains securely attached to the wall.
Testing and Adjusting your Mounted TV
Before finishing, make sure to test your mounted TV to ensure that it is secure and level. Make any necessary adjustments, such as ensuring it is level, before attaching any cables or wires. This will make sure that your TV is in the perfect position for viewing.
It is also important to consider the weight of your TV and the type of wall mount you are using. If your TV is particularly heavy, you may need to use a mount that is specifically designed to support its weight. Additionally, if you are mounting your TV on a plaster or drywall surface, you may need to use anchors to ensure that the mount is securely attached to the wall.
Tips for Hiding Cables and Wires
To achieve a neat, professional finish, it’s important to hide any cables or wires. One way to do this is to use cable management clips or covers, which can be attached to the wall or TV to keep cables out of sight. Additionally, you could consider running cables behind the wall for an even more seamless look.
Another option is to use decorative elements to conceal cables. For example, you could use a decorative box or basket to hide power strips and cords. This not only keeps cables out of sight but also adds a decorative touch to your space.
It’s also important to consider safety when hiding cables. Make sure to use cable ties or clips to secure cables and prevent them from becoming a tripping hazard. Additionally, avoid running cables through walls or ceilings unless you have the proper tools and knowledge to do so safely.
Common Mistakes to Avoid When Installing a Corner TV Mount
When installing a corner TV mount, there are several common mistakes that can be easily avoided. These include not properly checking the weight limit of the mount, not properly securing the brackets, and failing to ensure that cables are properly organized and hidden. By avoiding these simple mistakes, your mounted TV will be safe, secure, and stylish.
By following these steps and taking your time, mounting a TV in the corner using Pro Pedals can be achieved with ease. Not only will it look great, but it will also free up valuable space in your room. So, what are you waiting for? Go ahead and get started on mounting your TV in the corner today!
It is also important to consider the viewing angle when installing a corner TV mount. Make sure that the TV is positioned at a comfortable height and angle for optimal viewing. You may need to adjust the mount or the placement of furniture in the room to achieve the best viewing experience. Taking the time to properly position the TV will ensure that you can enjoy your favorite shows and movies without any discomfort or strain on your neck or eyes.