Are you looking to enhance your TV-watching experience with a Sonos Playbar sound system? It’s a great idea, especially if you’re a fan of immersive sound quality and crisp audio. In this article, we’ll take you through all the steps involved in mounting a Sonos Playbar to your TV. We’ll also look at the tools you’ll need, where to place the Playbar for optimal sound quality, and tips for hiding wires. Ready to get started? Let’s dive in!
Why Mounting Sonos Playbar to Your TV is a Great Idea
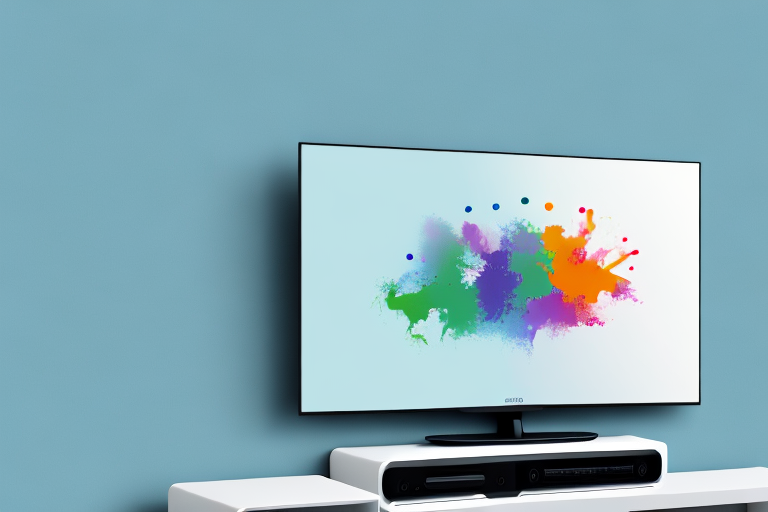
If you’re a fan of movies, TV shows, and music, having a Sonos Playbar sound system attached to your TV can make all the difference in your viewing experience. With immersive sound quality, you get to hear every little detail of the dialogue, music and sound effects in a way that will leave you feeling like you’re part of the action. The Sonos Playbar delivers a powerful and all-encompassing sound that will leave you pumped!
Another great advantage of mounting your Sonos Playbar to your TV is that it saves space. Instead of having a separate sound system taking up valuable space in your living room, the Playbar can be mounted directly under your TV, creating a sleek and streamlined look. This is especially beneficial for those with smaller living spaces or those who prefer a minimalist aesthetic.
Additionally, the Sonos Playbar is incredibly easy to set up and use. With just a few simple steps, you can connect it to your TV and start enjoying high-quality sound in no time. The Playbar also comes with a user-friendly app that allows you to control the sound system from your phone or tablet, making it even more convenient to use.
Steps to Mounting Your Sonos Playbar to Your TV
Now that you understand why you need to mount your Sonos Playbar to your TV, let’s get started with the installation process. Here are the essential steps you need to follow:
- Position your TV on a flat surface and identify where you want to mount your Sonos Playbar.
- Attach the Sonos Mount Assembly to the bottom of your TV using the provided screws. Ensure that the assembly is installed correctly and that the Playbar can fit into the grooves.
- Place the Playbar into the grooves and secure it by tightening the screws.
- Connect your Sonos Playbar to your TV by using an HDMI or optical cable.
- Turn on your TV and Sonos Playbar to test whether the installation was successful.
It is important to note that the Sonos Playbar is designed to work with TVs that are at least 42 inches in size. If your TV is smaller than this, you may need to consider an alternative mounting option or a different Sonos speaker.
Additionally, if you are mounting your Sonos Playbar to a wall instead of your TV, you will need to purchase a separate wall mount kit. This kit will include all the necessary hardware and instructions for mounting your Playbar securely to the wall.
Tools You’ll Need to Mount Your Sonos Playbar to Your TV
The installation process of your Sonos Playbar to your TV will require a few essential tools to make the process smoother. Here are the tools you’ll need:
- Phillip head screwdriver
- Drill (if required for drilling holes into the wall)
- Level to ensure the assembly is straight
- Tape measure to measure the distance between your TV and the proposed mounting location
It’s important to note that the specific tools you’ll need may vary depending on the type of wall you’re mounting the Playbar to. For example, if you’re mounting the Playbar to a concrete or brick wall, you may need a masonry drill bit and anchors. On the other hand, if you’re mounting the Playbar to a wooden wall, you may only need wood screws. Make sure to research the specific requirements for your wall type before beginning the installation process.
Where to Place Your Sonos Playbar for Optimal Sound Quality
When mounting your Sonos Playbar to your TV, it is important to position it correctly to ensure optimal sound quality. Here’s what you need to keep in mind:
- The Sonos Playbar should be centered directly beneath the TV to ensure that the sound is accurately directed from the screen towards you.
- The Sonos Playbar should be between 1 and 2 feet from the TV.
- Avoid placing the Playbar in a corner or against a wall as this can impact the quality of the sound.
Another important factor to consider when positioning your Sonos Playbar is the height at which it is mounted. Ideally, the Playbar should be mounted at ear level to ensure that the sound is directed towards you and not above or below your ears.
It is also important to take into account the layout of your room when positioning your Sonos Playbar. If your room has a lot of hard surfaces, such as hardwood floors or bare walls, you may need to adjust the placement of the Playbar to avoid any unwanted echoes or reverberations.
Tips for Hiding Wires When Mounting Your Sonos Playbar to Your TV
Once you have installed your Sonos Playbar to your TV, hiding the wires will give your setup a clean and polished look. Here are some tips to help you:
- Use zip-ties to bundle the wires together beneath the TV and Playbar.
- Invest in a cable cover for a more polished look.
- Hide the wires behind the TV stand or utilize wall brackets.
- Consult with a professional installer who can recommend the best way to hide your wires.
Another option for hiding wires is to use adhesive cable clips to secure the wires to the back of the TV or the wall. This will keep the wires organized and out of sight.
If you have a larger entertainment system with multiple devices, consider using a wire management system. These systems can be mounted to the wall and allow you to hide all of your wires and cables in one place.
How to Ensure Your Sonos Playbar is Properly Aligned with Your TV
Aligning your Sonos Playbar with your TV is essential to ensure that the sound is correctly directed towards you. Here’s how to do it:
- Measure the distance between your Playbar and your TV.
- Ensure that the distance is equal on both sides to ensure that the sound is directed straight from the TV towards you.
- Use a level to check that the Playbar is straight with the TV
- Adjust the position accordingly to get the perfect alignment.
It’s important to note that the height of your Playbar can also affect the sound quality. Ideally, the Playbar should be placed at ear level when you’re seated in your usual viewing spot. If the Playbar is too high or too low, the sound may not be directed towards you properly, resulting in a less than optimal listening experience. Take the time to adjust the height of your Playbar as well as its position to get the best possible sound quality.
Troubleshooting Common Issues when Mounting your Sonos Playbar
Installation of your Sonos Playbar can be tricky, and there are a few common issues that you may experience. Here’s how to troubleshoot:
- If you’re having connectivity issues with the HDMI cable, ensure that the cable is correctly inserted at both ends.
- If there’s no audio coming from the Playbar, make sure it’s turned on, and the volume is turned up.
- If your Sonos App shows a pending update, ensure that you install the update to avoid any issues.
Another common issue that you may experience when mounting your Sonos Playbar is that it may not be properly aligned with your TV. To fix this, ensure that the Playbar is centered with your TV and that it’s mounted at the correct height.
If you’re experiencing issues with the sound quality, it may be due to the acoustics of the room. Try adjusting the placement of the Playbar or adding acoustic panels to improve the sound quality.
How Does Mounting a Sonos Playbar Affect the Appearance of your Living Room?
Mounting a Sonos Playbar not only enhances the sound quality of your TV but also gives your living room a stylish and sleek look. By investing in a wall-mounted assembly, you get to have an uncluttered space with cords hidden from view. The Sonos Playbar looks great on a wall, and you no longer have to worry about unsightly cords strewn behind your TV.
In addition to the aesthetic benefits, mounting a Sonos Playbar can also improve the functionality of your living room. With the Playbar mounted on the wall, you can free up space on your TV stand or entertainment center for other items, such as gaming consoles or decorative items. This can help to create a more organized and visually appealing space.
Furthermore, mounting a Sonos Playbar can also improve the overall viewing experience in your living room. By positioning the Playbar at the optimal height and angle, you can ensure that the sound is directed towards the viewer, creating a more immersive and enjoyable experience. This is especially important for movie nights or when watching sports events, where the quality of the sound can greatly enhance the overall experience.
The Benefits of Using a Professional Installer for Mounting Your Sonos Playbar
Although it’s possible to mount your Sonos Playbar to your TV by yourself, hiring a professional installer provides added benefits. A professional installer ensures that the installation process is seamless and that your Playbar is correctly installed for optimal sound quality. Additionally, a professional installer can give recommendations on the right placement for your Playbar and provide valuable insights on how to maintain it to last longer.
Furthermore, a professional installer can also help you with any troubleshooting or technical issues that may arise during or after the installation process. They have the expertise and experience to identify and resolve any problems quickly and efficiently, saving you time and frustration. Additionally, many professional installers offer warranties or guarantees on their work, giving you peace of mind and protection in case anything goes wrong. Overall, investing in a professional installer for your Sonos Playbar can save you time, money, and hassle in the long run.
How to Connect the Sonos Sound System with the Mounted TV
Once you’ve mounted your Sonos Playbar to your TV, connecting it with your TV is the next essential step. Here are the steps to follow:
- Locate the HDMI or optical audio output on your TV.
- Connect one end of the HDMI or optical cable to the Sonos Playbar and the other end to the TV’s HDMI or optical output.
- Turn on your TV and Sonos Playbar to test whether the connection is strong.
By following these steps outlined in this article, you’ll be able to mount your Sonos Playbar to your TV with ease. Enjoy your enhanced audio experience!
However, if you encounter any issues during the connection process, there are a few troubleshooting steps you can take. Firstly, ensure that both your TV and Sonos Playbar are updated to the latest software versions. Additionally, check that the cables are securely connected and that the correct input source is selected on your TV.
It’s also worth noting that the Sonos Playbar can be connected to other devices besides your TV, such as your smartphone or tablet. This allows you to stream music or other audio content directly to your Sonos system, providing a versatile and convenient audio solution for your home.