If you have recently purchased a Sanus Tv Mount, you might have noticed that it comes with a range of features that make it an excellent choice for mounting your television. One of the most important aspects of the Sanus Tv Mount is its ability to be leveled, which can help to ensure a perfect viewing experience every time. In this article, we will provide you with a comprehensive guide to leveling your Sanus Tv Mount, including why it’s important, the tools you need, step-by-step instructions, and tips for troubleshooting.
Introduction to Sanus Tv Mounts
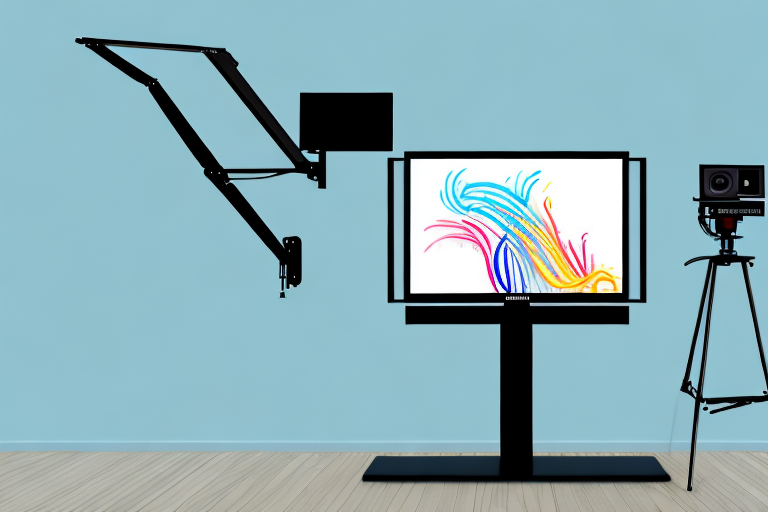
The Sanus Tv Mount is a versatile and durable product that can be used to mount a variety of television models, ranging from small screens to large 70-inch displays. Sanus Tv Mounts are known for their high-quality materials and sturdy construction, designed to withstand the weight and size of modern televisions. The mount is designed to be attached to different surfaces such as walls and ceilings, making it suitable for any space.
In addition, Sanus Tv Mounts come with a range of features that make them easy to install and adjust. The mount includes a built-in bubble level, which ensures that the television is perfectly level when mounted. It also has a quick-release mechanism, allowing for easy removal and reattachment of the television. The mount can be tilted and swiveled, providing optimal viewing angles for any room. With its sleek design and practical features, the Sanus Tv Mount is the perfect solution for mounting your television securely and stylishly.
Importance of Leveling Your Sanus Tv Mount
Leveling your Sanus Tv Mount is important because it ensures that your television is perfectly aligned, allowing you to enjoy a comfortable viewing experience. The level of your mount is critical because if it is uneven, your TV may appear tilted or skewed. This can cause eye strain, headaches, and discomfort when watching your favorite shows or movies. Additionally, an uneven mount can lead to damage to the mount, the wall, or the TV itself over time.
Furthermore, a level Sanus Tv Mount can also improve the overall aesthetic of your room. A tilted or skewed TV can be an eyesore and detract from the overall look and feel of your space. By ensuring that your mount is level, you can create a more polished and professional appearance.Another benefit of leveling your Sanus Tv Mount is that it can improve the sound quality of your TV. When your TV is tilted or skewed, the sound waves can be distorted, resulting in poor audio quality. By leveling your mount, you can ensure that the sound waves are traveling in the correct direction, providing you with a better audio experience.
Tools Required for Leveling Your Sanus Tv Mount
Before you start to level your Sanus Tv Mount, you need the right tools for the job. You will need a level, a screwdriver, a drill, a stud finder, and a tape measure. You may also need additional screws and anchors, depending on the surface you are mounting the TV on.
In addition to the tools mentioned above, it is important to have a helper to assist you with the installation. Mounting a TV can be a two-person job, especially if the TV is large and heavy. Having a helper can make the process easier and safer.It is also important to read the instructions carefully before starting the installation process. The instructions will provide you with important information on how to properly mount the TV and ensure that it is level. Failure to follow the instructions can result in damage to your TV or injury to yourself or others.
Step-by-Step Guide to Leveling Your Sanus Tv Mount
Now that you have the tools you need, it’s time to level your Sanus Tv Mount. Here are the steps:
- Start by determining where to mount your TV, making sure that you have enough space and that the mount is attached to the wall or ceiling securely. Use a stud finder to mark where the studs are in your ceiling or wall.
- Once you have found the studs, use the template provided with the mount to mark where the screws will go.
- Drill holes into the stud marks using a drill, and then install the screws into the holes.
- Attach the mounting bracket to the back of the TV, then use the screws provided to attach the bracket to the wall or ceiling mount.
- Use a level to ensure that the mount is level. Adjust the mount as necessary to ensure that the TV is straight.
- Once the mount is level, secure the TV to the bracket using the screws provided.
- Double-check everything to make sure it’s secure and level, then enjoy your freshly mounted TV!
It’s important to note that the weight of your TV should be taken into consideration when choosing a Sanus Tv Mount. Make sure to select a mount that can support the weight of your TV to avoid any accidents or damage to your wall or ceiling. Additionally, if you are unsure about any of the steps or have any questions, consult the instruction manual or contact Sanus customer support for assistance.
How to Measure the Height of Your Sanus Tv Mount
One important aspect of leveling your Sanus Tv Mount is ensuring that you have the correct height. Measuring the height may seem simple, but it’s crucial. You will need a tape measure and a level to measure the height effectively. Start by measuring the distance from the floor to the center of the TV screen. Then, use the level to ensure that the TV is exactly vertical. If it is not, adjust the mount until it is.
It’s important to note that the height of your Sanus Tv Mount should be comfortable for your viewing experience. A good rule of thumb is to have the center of the TV screen at eye level when seated. This will prevent neck strain and provide a more enjoyable viewing experience. Additionally, if you have a soundbar or other audio equipment, make sure to measure the height of those as well and adjust the mount accordingly to ensure they are all at the same level.
Another factor to consider when measuring the height of your Sanus Tv Mount is the placement of the mount itself. If you have a fireplace or other focal point in the room, you may want to center the TV on that instead of measuring from the floor. This can create a more aesthetically pleasing look and draw attention to the focal point. Ultimately, the height of your Sanus Tv Mount should be based on your personal preferences and the layout of your room.
Tips for Adjusting the Tilt of Your Sanus Tv Mount
Another essential aspect of leveling your Sanus Tv Mount is adjusting the tilt. A tilted TV can cause eye strain and discomfort. To adjust the tilt, use the provided screws to loosen the bracket on the back of the TV to increase or decrease the tilt. Once you have adjusted the tilt to your desired angle, re-tighten the screws to secure the tilt.
It is important to note that the ideal tilt angle for your TV will depend on your viewing distance and the height of your TV mount. A general rule of thumb is to tilt the TV slightly downwards, so that the center of the screen is at eye level when you are seated.Additionally, if you have a large TV or if it is mounted in a high traffic area, it may be beneficial to invest in a tilting mount that allows you to adjust the tilt angle easily. This will allow you to make adjustments as needed, without having to loosen and tighten screws every time.
Common Mistakes to Avoid When Leveling Your Sanus Tv Mount
Leveling your Sanus Tv Mount can be a simple process if you follow the correct steps. However, there are a few common mistakes that people make that can prevent you from achieving a perfectly leveled mount. These include not measuring the height of your mount, not using a level to ensure it’s straight, using the wrong screws to attach the mount to the wall, and not securing the TV properly to the mount.
Another common mistake to avoid when leveling your Sanus Tv Mount is not taking into account the weight of your TV. If your TV is too heavy for the mount, it can cause the mount to tilt or even fall off the wall. Make sure to check the weight limit of your mount and ensure that your TV falls within that range.
Additionally, it’s important to consider the location of your mount. If you’re mounting your TV in a high-traffic area, such as a hallway or above a fireplace, you may want to consider using a tilting mount. This will allow you to adjust the angle of the TV to reduce glare and ensure optimal viewing from different angles.
Troubleshooting Tips for Uneven Sanus Tv Mounts
If you follow the above steps, you should be able to achieve a perfectly leveled Sanus Tv Mount. However, sometimes there may be roadblocks that prevent you from achieving a level mount. For instance, a warped mount or a warped TV could prevent you from getting your mount to be leveled correctly. In this case, you may need to consult with a professional installer or contact Sanus customer service for help.
Benefits of a Properly Leveled Sanus Tv Mount
Having a properly leveled Sanus Tv Mount can enhance your viewing experience much more than you would think. A level mount can reduce eye strain and discomfort, improve the sound quality, provide a more aesthetically pleasing appearance, and reduce the risk of injury to both you and your equipment. It’s a worthwhile investment in your overall viewing experience, and your eyes and neck will thank you.
Maintenance and Care Tips for Your Sanus Tv Mount
Now that your Sanus Tv Mount is successfully mounted and leveled, it’s important to take care of it to avoid damage or wear and tear over time. You should clean the mount and the TV regularly, using a soft cloth and mild detergent or soap. Avoid using abrasive materials or harsh chemicals that could damage the mount or the TV. Also, check the mount periodically to ensure that it is still secure and level, and make adjustments as necessary. Finally, read the user guide to determine any other specific maintenance requirements for your Sanus Tv Mount.
In conclusion, leveling your Sanus Tv Mount is crucial for achieving an optimal viewing experience. With the right tools and a step-by-step process, you should be able to achieve a perfectly level mount in no time, enhancing your overall viewing experience. Before you know it, you’ll be kicking back and relaxing while enjoying your favorite shows or movies.