Installing a home theater system can be a challenging but rewarding experience, allowing you to enjoy immersive audio and video entertainment in the comfort of your own home. With the right planning, preparation, and equipment, you can create a cinematic experience that rivals those found in commercial theaters. In this article, we’ll guide you through the installation process, from planning your setup to upgrading your system over time.
Planning Your Home Theater System Setup
The first step in installing a home theater system is to plan your setup. Consider the size and layout of your room, your budget, and your desired audio and video quality. Decide on the type of home theater system you want, whether it’s a soundbar, a 5.1 or 7.1 surround sound system, or a full-blown Dolby Atmos setup. Make a list of all the necessary components, such as a receiver, speakers, TV or projector, and cables. Plan the layout of your speakers and TV, taking into account factors such as distance, height, and angle.
Once you have planned your setup, it’s important to consider the acoustics of your room. The shape and materials of your room can affect the sound quality of your home theater system. You may need to add acoustic treatments, such as sound-absorbing panels or bass traps, to improve the sound quality. Additionally, you may want to consider adding lighting to your home theater room. Dimming the lights can enhance the viewing experience and create a more immersive atmosphere.
Another important factor to consider is the placement of your components. Make sure your receiver and other electronics are easily accessible for maintenance and upgrades. You may also want to consider hiding your components in a cabinet or closet to keep your home theater room looking neat and organized. Finally, don’t forget to test your system before inviting guests over for a movie night. Make sure all components are working properly and that the sound and video quality meet your expectations.
Choosing the Best Location for Your Home Theater System
The location of your home theater system is crucial for optimal performance. Choose a room that is free of outside noise and distractions, and that can be darkened for better image quality. Ensure that there is enough space for your speakers, TV, and seating arrangement. Keep in mind that the size and shape of the room can affect the acoustics, and that you may need to add sound-absorbing materials or acoustic treatments to improve sound quality.
Another important factor to consider when choosing the location for your home theater system is the proximity to power outlets and cable connections. Make sure that the room has enough outlets to accommodate all of your devices, and that the cables can be easily routed to avoid tripping hazards. Additionally, consider the placement of windows and doors, as natural light and drafts can affect the viewing experience. By taking these factors into account, you can create a comfortable and immersive home theater experience.
Preparing Your Room for a Home Theater System
Before you start installing your home theater system, you need to prepare the room. Begin by clearing out any furniture or clutter that may interfere with your setup. Install blackout shades or curtains to minimize outside light. Check for any electrical outlets or wiring that may need to be updated or modified. If you plan to mount your speakers on the wall or ceiling, make sure to use the appropriate mounting hardware and anchors.
Another important factor to consider when preparing your room for a home theater system is the acoustics. The shape and size of the room, as well as the materials used for flooring, walls, and ceiling, can all affect the sound quality. To optimize the acoustics, you may want to add sound-absorbing materials such as acoustic panels or curtains. You can also experiment with speaker placement and calibration to achieve the best possible sound. Taking the time to properly prepare your room can make a significant difference in the overall performance of your home theater system.
Essential Tools and Materials for Installing a Home Theater System
Installing a home theater system requires a set of specific tools and materials. These include a drill, screws, screwdriver, hammer, wire stripper, Ethernet cable, HDMI cable, and speaker wire. Make sure to have all the necessary tools and materials on hand before you start the installation process.
It is also important to have a level and measuring tape to ensure that your speakers and TV are properly aligned and spaced. Additionally, if you plan on mounting your TV on the wall, you will need a wall mount kit and stud finder to locate the best spot for installation. Taking the time to gather all the necessary tools and materials beforehand will make the installation process smoother and more efficient.
Understanding the Different Types of Home Theater Systems
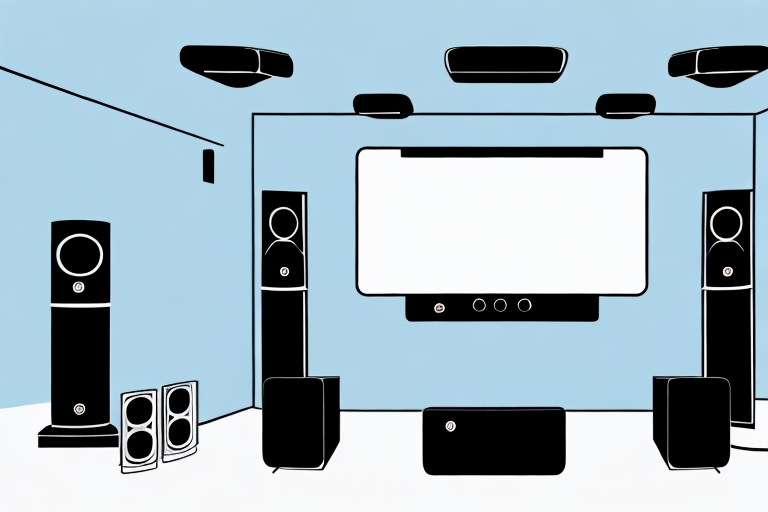
There are several types of home theater systems, each with its own set of features and capabilities. The most common types are soundbars, 5.1, 7.1, and 9.1 surround sound systems, and Dolby Atmos setups. Soundbars are a simple and compact option that offers basic audio enhancement for your TV. Surround sound systems provide a more immersive audio experience, with multiple speakers that create a 360-degree sound field. Dolby Atmos takes surround sound to the next level, with speakers that not only surround you but also create sound that moves in three-dimensional space.
When choosing a home theater system, it’s important to consider the size and layout of your room. A soundbar may be sufficient for a small space, but a larger room may require a more powerful surround sound system or even a Dolby Atmos setup. Additionally, it’s important to consider the source of your audio, whether it’s streaming services, Blu-ray discs, or gaming consoles, as some systems may be better suited for certain types of content. By understanding the different types of home theater systems and your specific needs, you can choose the right system to enhance your viewing experience.
Setting Up Your Home Theater Receiver and Speakers
The receiver is the heart of your home theater system, connecting and controlling all your audio and video components. Begin by connecting your receiver to your TV or projector, using an HDMI cable. Then, connect your speakers by matching the color-coded wires to the appropriate terminals on the back of the receiver and speaker. Depending on the type of speakers you have, you may need to adjust the settings on your receiver to optimize the sound quality.
It is important to note that the placement of your speakers can greatly affect the overall sound quality of your home theater system. For the best experience, place your front speakers at ear level and equidistant from the center of your TV or projector screen. Your center speaker should be placed directly above or below your TV or projector, while your surround speakers should be placed to the side and slightly behind your viewing area. Additionally, consider adding a subwoofer to your system for enhanced bass and a more immersive experience.
Connecting Your TV to Your Home Theater System
The next step is to connect your TV to your home theater system. This is done by connecting an HDMI cable from the cable box or streaming device to the input on your receiver, and then another HDMI cable from the output on your receiver to the HDMI input on your TV. Depending on your setup, you may need to adjust the settings on your TV or receiver to ensure that the audio and video sync up properly.
It is important to note that some older TVs may not have HDMI inputs. In this case, you can use component cables to connect your TV to your home theater system. Component cables have three video cables (red, green, and blue) and two audio cables (red and white). Simply connect the corresponding cables from your receiver to your TV, making sure to match the colors.
If you have a smart TV, you may be able to connect it to your home theater system using Wi-Fi or Bluetooth. This allows you to stream audio and video directly from your TV to your receiver without the need for cables. Check your TV and receiver manuals for instructions on how to set up a wireless connection.
Configuring Your Home Theater System for Optimal Audio and Video Quality
Once all your components are connected, it’s time to configure your home theater system for optimal audio and video quality. This may involve adjusting the volume levels on your speakers, calibrating the color settings on your TV, or adjusting the bass and treble levels on your receiver. Follow the instructions provided with your components to ensure that you get the best possible audio and video performance.
Calibrating Your Home Theater System for the Best Performance
Calibrating your home theater system is essential for achieving the best possible performance. This involves adjusting the settings on your receiver and speakers to match the acoustics of your room, as well as your own personal preferences. Use an audio calibration tool, such as the included microphone on your receiver, to measure the acoustics of your room and adjust the settings accordingly. You may also need to adjust the position and angle of your speakers to achieve optimal sound quality.
Troubleshooting Common Issues with Home Theater Systems
Despite your best efforts, you may encounter common issues with your home theater system, such as poor sound quality, distorted video, or synchronization problems. To troubleshoot these issues, start by checking all your connections and ensuring that everything is plugged in correctly. Check the settings on your receiver and TV to make sure that they are optimized for your setup. If the problem persists, consult the troubleshooting guide that came with your components or contact customer support for further assistance.
Enhancing Your Home Theater System with Additional Components and Accessories
As your home theater system grows, you may want to enhance it with additional components and accessories. These can include subwoofers, wireless rear speakers, streaming devices, or gaming consoles. Make sure to choose components that are compatible with your existing setup, and that provide the features and functionality you need.
Maintaining and Upgrading Your Home Theater System Over Time
Maintaining and upgrading your home theater system over time is important for keeping it in top condition and keeping up with the latest technology. Regularly clean your speakers and TV to prevent dust buildup, and replace any worn or damaged cables. Keep an eye out for new components or accessories that can enhance your system, such as updated receivers or streaming devices. Upgrading your speakers or TV can also provide a significant boost in audio and video quality.
With these tips and guidelines, you can install a home theater system that provides an immersive and enjoyable entertainment experience. Take the time to plan and prepare your setup, and follow the instructions provided with your components to ensure optimal performance. With the right combination of equipment, calibration, and maintenance, you can enjoy cinema-quality audio and video from the comfort of your own home.