Are you looking to take your home entertainment to the next level? An in ceiling home theater system is a perfect choice for those who want to enjoy a cinematic experience in the comfort of their own homes. However, installing an in-ceiling home theater system can be a daunting task if you don’t have the know-how. In this article, we’ll discuss the benefits of an in-ceiling home theater system, what you need for the installation, and a step-by-step guide to completing the installation.
Benefits of Installing an In Ceiling Home Theater System
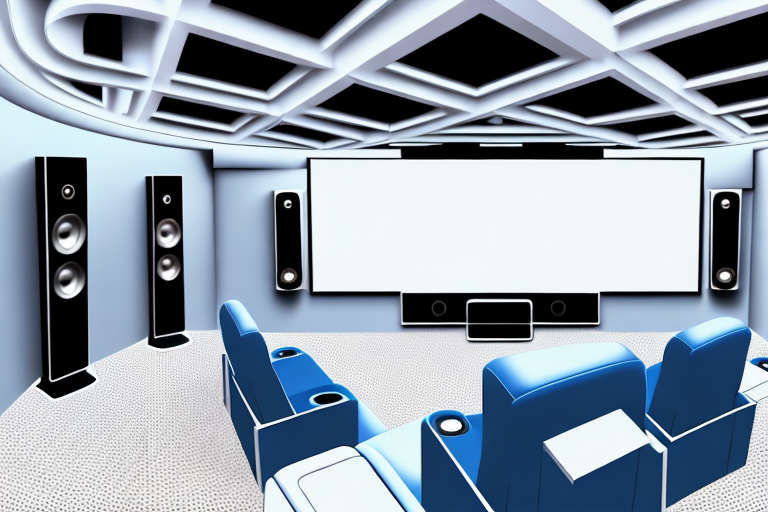
One of the main benefits of an in-ceiling home theater system is the aesthetic appeal. Unlike traditional speakers, in-ceiling speakers are mounted inside the ceiling, which gives a clean, professional look to your entertainment room. Not only do they provide a sleek appearance, but they also offer a world-class sound system. Another advantage of in-ceiling speakers is that they save floor space. Since the speakers are mounted on the ceiling, you don’t need to worry about finding a spot for them on the floor. Thus, an in-ceiling home theater system is perfect for those with smaller entertainment rooms.
In addition to the aesthetic appeal and space-saving benefits, an in-ceiling home theater system also provides a more immersive viewing experience. With speakers mounted above you, the sound is able to surround you, creating a more realistic and engaging experience. This is especially true for movies and TV shows with dynamic sound effects, such as explosions or thunderstorms.
Furthermore, in-ceiling speakers can be integrated with smart home technology, allowing you to control your entire entertainment system with just your voice or a mobile app. This means you can easily adjust the volume, switch between devices, and even choose what to watch without ever leaving your seat. Overall, an in-ceiling home theater system is a great investment for anyone looking to enhance their entertainment experience while also maintaining a clean and modern look in their home.
Planning the Installation: What You Need to Know
Before beginning the installation process, make sure you have all the necessary materials and tools. You’ll need a drywall saw, drill and bits, wire stripper, and a speaker cable. You’ll also need a stud finder to locate the ceiling joists. Plan the location of every component of your system. Mounting speakers in each corner of the room is usually a good idea. Make sure you have locations picked for the satellite speakers and subwoofer.
It’s important to consider the layout of your room when planning the installation. Take into account the size and shape of the room, as well as any furniture or obstacles that may affect the placement of your speakers. You may also want to consider the acoustics of the room and whether any soundproofing measures need to be taken. Additionally, think about the wiring and cable management for your system. It’s important to plan the routing of cables and ensure they are hidden or neatly organized to avoid any tripping hazards or unsightly clutter.
Choosing the Right Spot for Your In Ceiling Home Theater System
The first step is to choose the ideal location for your in-ceiling home theater system. Usually, you’ll want to pick an area where you’ll have the best sound quality. This location will likely be the room’s center. You’ll also need to consider areas close to potential power sources to avoid running excessive wiring.
Another important factor to consider when choosing the location for your in-ceiling home theater system is the size of the room. If the room is too small, the sound may be too overwhelming, and if the room is too large, the sound may not be sufficient. Therefore, it’s essential to choose a location that is proportional to the size of the room.
Additionally, you should also consider the type of ceiling you have. If you have a drop ceiling, it may be easier to install the system, but the sound quality may not be as good as it would be with a solid ceiling. On the other hand, if you have a solid ceiling, the installation may be more challenging, but the sound quality will likely be better.
Preparing Your Ceiling for Installation: Step-by-Step Guide
The next step is to prepare your ceiling for the installation. Use a stud finder to locate the ceiling joists. Then use a pencil to mark the spot for each speaker. Once you’ve done that, use a drywall saw to cut holes where you’ve marked for the speakers. Use a wire stripper to remove ¼ inch of insulation from the speaker wire. The wire will then be pulled through the holes in your ceiling, connecting each speaker.
It’s important to note that before you begin cutting into your ceiling, you should turn off the power to the room. This will ensure your safety and prevent any electrical accidents. Additionally, if you’re unsure about the location of any electrical wires or pipes in your ceiling, it’s best to consult a professional before proceeding with the installation.
Tools and Materials Required for the Installation
Here are the tools and materials you’ll need for installation:
- Drywall saw
- Drill bits
- Wire stripper
- Speaker cable
- Stud finder
Before you begin the installation process, it’s important to make sure you have all the necessary tools and materials. Double-check that you have enough speaker cable to reach from your audio source to the location where you plan to install the speakers. Additionally, you may want to have a level on hand to ensure that your speakers are installed straight and even.
It’s also a good idea to have a pencil and measuring tape available to mark the location of the speakers on the wall. If you’re installing the speakers in a room with carpet, you may need a carpet knife to cut away a small section of the carpet to make room for the speaker.
Wiring Your In Ceiling Home Theater System for Optimal Performance
The wiring connections in your in-ceiling home theater system are a critical aspect of the project. You want to ensure you have the best sound possible. Make sure you use high-quality speaker cables that are appropriate for the room size and speaker placement. You’ll also need to ensure that each connection is tight and secured, preventing any sound distortion.
Another important factor to consider when wiring your in-ceiling home theater system is the placement of your speakers. You want to ensure that your speakers are positioned correctly to provide the best sound quality. This means placing your speakers at the optimal height and distance from the listening area. You may also want to consider using angled speakers to direct the sound towards the listener.
It’s also important to consider the type of wiring you use for your in-ceiling home theater system. While copper wiring is the most common, you may want to consider using fiber optic wiring for better sound quality. Fiber optic wiring is less susceptible to interference and can provide a clearer, more accurate sound. However, it can be more expensive than copper wiring and may require professional installation.
Installing Speakers in Your Ceiling: Tips and Tricks
When you are installing speakers in your ceiling, you’ll want to ensure the speakers are installed in the right location. Usually, the best location is in each corner of the room. You’ll also want to ensure that each speaker has enough space around so that it does not vibrate against the ceiling. This vibration can cause sound distortion and a loss of sound quality. Follow the manufacturer’s instructions to install the speakers correctly.
Another important factor to consider when installing speakers in your ceiling is the type of wiring you use. It is recommended to use in-wall rated speaker wire, which is specifically designed for in-wall and in-ceiling installations. This type of wire is fire-resistant and has a thicker insulation to prevent any potential electrical hazards. Additionally, make sure to use wire that is rated for the power output of your amplifier or receiver to avoid any damage to your equipment.
How to Mount Your Projector on the Ceiling
Mounting the projector on your ceiling is an essential aspect of your home theater installation. The most crucial factor to consider is ensuring that the projector is at the correct height and angle. It’s essential to remember that the projector should be level with your screen, meaning that the distance between the projector and the viewer equals the width of the screen. Depending on the manufacturer, instructions could differ, so make sure to follow their guidelines to mount the projector correctly.
Before mounting the projector, it’s crucial to ensure that the ceiling can support the weight of the projector and the mount. You can use a stud finder to locate the ceiling joists and attach the mount to them for added stability. If you’re unsure about the ceiling’s strength, it’s best to consult a professional to avoid any accidents or damage to your home.
Another essential factor to consider is the projector’s ventilation. Make sure that the projector has enough space around it to allow for proper airflow and prevent overheating. You can also install a fan or ventilation system to ensure that the projector stays cool during use. Proper ventilation can extend the life of your projector and prevent any damage caused by overheating.
Connecting Your Devices to the In Ceiling Home Theater System
You’ll want to ensure that you connect all of your devices to your in-ceiling home theater system. This includes devices such as your TV, DVD player, and any gaming consoles. Follow the manufacturer’s instructions on how to connect these devices to ensure that you can enjoy the best sound and video quality from each device.
Setting Up Surround Sound with Your In Ceiling Home Theater System
Setting up surround sound in your in-ceiling home theater system is crucial to get the best sound quality. The sound should come from different directions, making it feel like you are in a cinema. Ensure that you get the correctly positioned satellite speakers and subwoofers to get unmatched surround sound. You may require the correct placement of each speaker to get the best sound quality, and you may benefit from researching the correct locations for the best surround sound experience.
Calibrating Your In Ceiling Home Theater System for Best Results
Calibrating your in-ceiling home theater system is necessary to get the best possible sound quality. You’ll use an SPL meter to set the correct loudness level for each speaker. You’ll also need to set the correct delays to ensure that each speaker is triggered correctly. By calibrating your in-ceiling home theater system, you’ll ensure that you get the best sound quality possible.
Troubleshooting Common Issues with In Ceiling Home Theater Systems
Common issues with in-ceiling home theater systems include sound distortion, poor sound quality, and incorrect hardware placement. If you experience this problem, begin by performing a series of diagnostic tests. This will allow you to identify any problems quickly. If you’re still experiencing issues, contact the manufacturer for support.
Maintenance Tips for Keeping Your In-Ceiling Home Theater System in Top Shape
To ensure that your in-ceiling home theater system stays in good condition, you’ll want to make sure that it’s free of dust, debris, and other harmful elements. Ensure that you keep the devices clean and in good condition. Also, ensure that you check the connections and cables to avoid potential damage or breakage.
In conclusion, installing an in-ceiling home theater system can be a challenging task. But, by following this step-by-step guide, you can ensure that you’ll have proper speaker placement, ideal surround sound, and high-quality sound and video. With enough patience and effort, you’ll be able to enjoy a world-class cinema experience in the comfort of your home.