Installing a home theater system can be an exciting and potentially complex process. But don’t worry, because with some patience, planning, and the right tools, you can have that cinematic experience in the comfort of your own home. In this article, we will guide you through each step, from understanding the basics of a home theater system to troubleshooting any issues that might arise during installation. So let’s get started!
Understanding the Basics of a Home Theater System
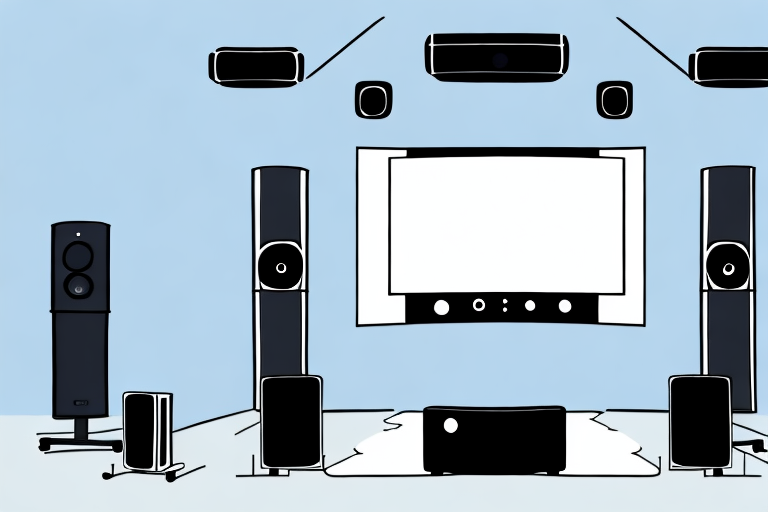
A home theater system is a combination of electronic components designed to recreate the experience of watching a movie in a theater. It typically includes a large screen display, speakers, amplifiers, and a variety of other devices like Blu-ray players, streaming devices, and gaming consoles. Whether you’re a movie enthusiast or a casual TV viewer, a home theater system can make your favorite entertainment more immersive and enjoyable.
One of the key components of a home theater system is the audio setup. The speakers are strategically placed around the room to create a surround sound effect, which enhances the viewing experience. Some systems even include a subwoofer to produce deep, rumbling bass sounds that can be felt as well as heard.
Another important aspect to consider when setting up a home theater system is the room itself. The size and shape of the room can affect the acoustics and overall viewing experience. It’s important to choose the right size screen for the room and to position the speakers correctly for optimal sound quality.
Choosing the Right Location for Your Home Theater System
The first step in installing a home theater system is choosing the right location. You’ll want to select a room that is big enough to accommodate your equipment and furniture, but not so large that the sound quality becomes diluted. Ideally, you should select a room that is rectangular in shape, which will help optimize your surround sound system. Consider other factors too, such as access to power outlets, acoustics, and the ability to control lighting.
Another important factor to consider when choosing the location for your home theater system is the distance from the screen to the seating area. The size of your screen and the resolution of your projector or TV will determine the optimal viewing distance. You don’t want to be too close to the screen, as this can cause eye strain, but you also don’t want to be too far away, as this can reduce the impact of the visuals.
Additionally, you should think about the layout of the room and how you can arrange your furniture to create the best viewing experience. Consider using a sectional sofa or recliners to provide comfortable seating for everyone. You may also want to invest in blackout curtains or shades to eliminate any glare or outside light that could interfere with your viewing experience.
Measuring and Planning the Space for Your Home Theater System
After choosing the right room, the next step is to measure and plan the space for your home theater system. Begin by measuring the dimensions of the room so you can determine the appropriate screen size and seating distance. It’s important to maintain a proper viewing angle and distance from the screen for optimal picture quality. If you’re unsure about what screen size or seating distance is right for you, seek advice from a professional installer.
Another important factor to consider when planning your home theater system is the acoustics of the room. The sound quality of your home theater system can be greatly affected by the shape and materials of the room. For example, a square room can create sound reflections that can distort the audio quality. To improve the acoustics of your room, consider adding sound-absorbing materials such as curtains, carpets, or acoustic panels. You can also consult with a professional installer or acoustic engineer to help optimize the sound quality of your home theater system.
Essential Tools and Equipment Needed for Installation
Before starting the installation process, it’s important to have the essential tools and equipment needed on hand. These may include a stud finder, wire cutters, drill, level, HDMI cables, and other connectors. Make sure you have all the necessary components for your specific system, including the screen, speakers, and other devices. If you’re unsure about what tools or equipment you’ll need, consult with an experienced home theater installer.
It’s also important to have a clear understanding of the layout and design of the room where the home theater system will be installed. This includes knowing the location of electrical outlets, cable jacks, and any other necessary connections. It’s also important to consider factors such as lighting and acoustics when setting up the system. Taking the time to plan and prepare before beginning the installation process can help ensure a smooth and successful installation.
Preparing Your Room for Installation: Wiring, Lighting, and Acoustics
Preparing your room for installation involves several important steps. First, you’ll need to run wires for speakers, subwoofers, and other devices. This might require cutting holes in walls or ceilings. Make sure to hide cables and wires behind walls or under carpets to avoid unsightly clutter. Second, you’ll want to optimize lighting and acoustics to create the best viewing environment possible. Consider installing dimmer switches, sound-absorbing panels, and blackout curtains.
Additionally, it’s important to consider the layout of your furniture and the placement of your speakers. The ideal setup is to have your speakers at ear level and equidistant from the primary listening position. You may also want to invest in a soundbar or surround sound system to enhance your viewing experience. Finally, don’t forget to test your system before settling in for a movie or TV show. Adjust the settings as needed to ensure optimal sound and picture quality.
Mounting and Installing Your TV: Tips and Tricks
Installing and mounting your TV can be a tedious process, but it’s crucial to ensure the best viewing experience. Begin by selecting the right type of mount for your TV, whether it’s a fixed mount, tilt mount, or full-motion mount. Make sure the mount is securely attached to the wall and use a level to ensure alignment. When connecting your TV to other devices, such as a Blu-ray player or cable box, use high-quality HDMI cables to ensure optimal image quality.
Another important factor to consider when mounting your TV is the viewing distance. The distance between the TV and the viewer should be at least twice the diagonal length of the screen. This will ensure that you have a comfortable viewing experience without straining your eyes. Additionally, it’s important to consider the height at which you mount your TV. The center of the screen should be at eye level when seated, which is typically around 42-45 inches from the floor.
Before mounting your TV, it’s also important to check for any potential hazards or obstacles in the wall where you plan to mount it. This includes electrical wiring, plumbing, or studs that may interfere with the installation process. If you’re unsure about the safety of the installation, it’s best to consult a professional to avoid any accidents or damage to your home.
Installing and Configuring Your Sound System: Speakers, Subwoofers, and Amplifiers
Your sound system is one of the most important components of your home theater system. When installing your speakers and subwoofers, it’s important to follow the manufacturer’s guidelines to ensure the best audio quality. Aim for a balanced sound by placing speakers at the appropriate height and distance from your listening position. If using an amplifier, make sure it’s powerful enough to support your speakers and provides the right level of sound.
Another important factor to consider when installing your sound system is the acoustics of the room. The size and shape of the room, as well as the materials used for flooring, walls, and ceiling, can all affect the sound quality. To optimize your sound system, you may want to consider adding acoustic treatments such as sound-absorbing panels or diffusers.
It’s also important to properly calibrate your sound system to ensure the best possible audio experience. This can be done using a sound meter or by using the built-in calibration tools on your amplifier or receiver. By adjusting the levels of each speaker and subwoofer, you can achieve a balanced and immersive sound that enhances your overall viewing experience.
Connecting Your Devices: DVD/Blu-ray Players, Streaming Devices, and Game Consoles
The next step in the installation process is connecting all your devices, including Blu-ray players, streaming devices, and gaming consoles. Make sure to use the appropriate cables or wireless connections that are compatible with your devices. Consider using a universal remote or smartphone app for convenience and ease-of-use. Ensure that your devices are configured correctly for optimal performance and compatibility with your home theater system.
It is important to note that some devices may require additional setup or configuration beyond just connecting them to your home theater system. For example, streaming devices may require you to log in to your streaming accounts and set up your preferences. Gaming consoles may require updates or additional settings to be adjusted for optimal performance. Be sure to consult the user manuals for each device and follow any necessary steps to ensure that everything is set up correctly.
Setting up Your Remote Control: Universal Remote or Smartphone App?
A remote control can make using your home theater system much easier and more convenient. Consider using a universal remote or a smartphone app to control your system. A universal remote can control multiple devices and make switching between them a breeze. Smartphone apps often provide additional features like media streaming and voice control. Make sure to configure and test your remote control to ensure the best experience.
It’s important to note that not all devices are compatible with universal remotes or smartphone apps. Before purchasing a remote control, make sure to check if your devices are compatible. Some devices may require specific remote controls or apps, so it’s important to do your research beforehand. Additionally, if you have multiple users in your household, consider setting up different profiles on your remote control or app to personalize the experience for each user.
Calibrating Your Home Theater System: Audio and Video Settings to Optimize Sound and Picture Quality
After installation, it’s important to calibrate your home theater system to ensure the best sound and picture quality. Begin by adjusting the audio settings, such as equalizer levels and speaker distances. Use visual calibration tools to ensure optimal image quality, including contrast, brightness, and color. If you have a professional installer, consider having them perform a calibration to ensure the best results.
Troubleshooting Common Issues During Installation
If you encounter issues during installation, don’t give up! Common issues may include poor sound quality, image distortion, or wiring problems. Consult the instruction manuals for troubleshooting tips or contact customer support for your specific devices. Consider hiring an experienced installer who can diagnose and fix any problems for the best experience.
With the right planning, tools, and equipment, you can install a home theater system that will provide endless entertainment and enjoyment. Following the steps outlined in this article will help ensure a successful installation that will provide a cinematic experience in the comfort of your own home.