A home theater sound system can elevate your movie and music experience to a whole new level. Installing it might seem like a daunting task, but with some planning and patience, it’s easy to accomplish. In this article, we’ll walk you through all the steps you need to take to install a home theater sound system, including choosing the right components, preparing your room, running the wires and cables, and optimizing the sound quality.
Understanding the Different Components of a Home Theater Sound System
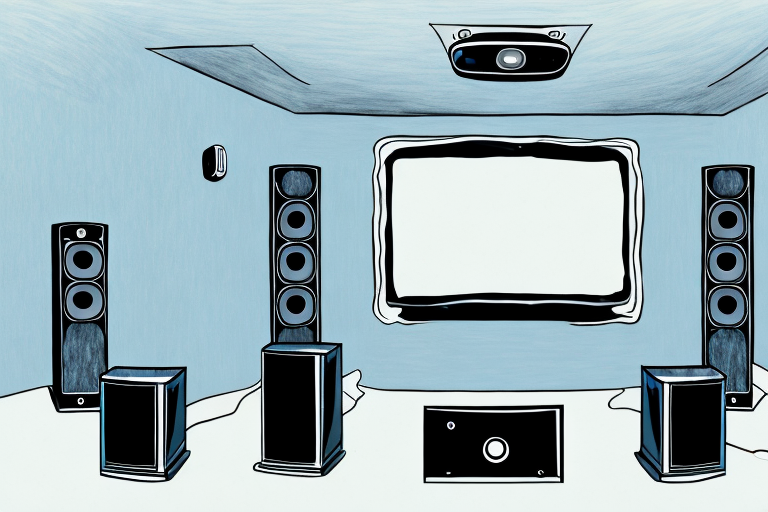
A home theater sound system is made up of several components, each of which plays a key role in delivering high-quality audio. The basic components of a home theater sound system include a receiver, speakers, and a source such as a DVD player or streaming device. The receiver is the central point that connects all the components, amplifies the audio, and distributes it to the speakers, while the speakers reproduce the sound.
In addition to the basic components, there are other elements that can enhance the audio experience of a home theater sound system. One such element is a subwoofer, which is a specialized speaker that reproduces low-frequency sounds such as bass and drums. Another element is a soundbar, which is a long, narrow speaker that can be mounted on a wall or placed on a shelf. Soundbars are designed to provide a wider soundstage and better dialogue clarity than the speakers built into a TV.
When setting up a home theater sound system, it’s important to consider the room’s acoustics and layout. The placement of the speakers can greatly affect the sound quality, and it’s recommended to position them at ear level and equidistant from the listener. Additionally, adding acoustic treatments such as curtains, rugs, and wall panels can help to reduce echoes and improve the overall sound quality of the system.
Choosing the Right Sound System for Your Home Theater
Choosing the right sound system for your home theater depends on several factors, such as the room size, your budget, and your audio preferences. Sound systems come in various configurations, such as 5.1, 7.1, and 9.1, which indicate the number of speakers and subwoofers. There are also sound systems with different types of speakers, such as bookshelf, floor-standing, or in-wall speakers, which are designed to fit different room sizes and layouts. You should also consider the audio formats and codecs supported by the sound system, as well as the brand’s reputation and warranty.
Another important factor to consider when choosing a sound system for your home theater is the connectivity options. Some sound systems come with built-in Bluetooth or Wi-Fi, which allows you to stream music or movies wirelessly from your smartphone, tablet, or computer. Others may have HDMI or optical inputs, which provide high-quality audio from your TV or other devices. Additionally, some sound systems may have a dedicated app that allows you to control the settings and customize the sound to your liking. Make sure to check the connectivity options and compatibility with your devices before making a purchase.
Preparing Your Room for the Sound System Installation
Before you start installing your sound system, it’s essential to prepare your room properly. This includes choosing the optimal location for the speakers, removing any obstacles that might block the sound waves, and minimizing any external noise sources. You should also pay attention to the acoustics of your room, such as the shape, size, and materials used for the walls and ceiling, as they affect the sound quality. You can use acoustic panels or curtains to address any issues with the room’s acoustics.
Another important factor to consider when preparing your room for a sound system installation is the electrical wiring. Make sure that the electrical outlets in the room are properly grounded and can handle the power requirements of your sound system. It’s also a good idea to use surge protectors to protect your equipment from power surges and voltage spikes. Additionally, you should ensure that all cables and wires are neatly organized and secured to prevent tripping hazards and to maintain a clean and professional look.
Measuring and Marking the Speaker Placement
It’s crucial to measure and mark the location of each speaker before installing it, as this ensures that the sound is evenly distributed throughout the room. You should follow the guidelines provided by the manufacturer of your sound system, such as the distance between the speakers and the listener, the height of the speakers, and the angle of the speakers towards the listener. You can use a tape measure, a level, and a pencil to mark the speaker locations on the wall or ceiling.
Another important factor to consider when measuring and marking the speaker placement is the acoustics of the room. The size, shape, and materials of the room can affect the sound quality and the placement of the speakers. For example, if the room has hard surfaces like tile or hardwood floors, the sound may bounce around and create echoes. In this case, you may need to add acoustic treatments like rugs or curtains to absorb the sound and improve the overall listening experience. It’s also important to avoid placing speakers too close to walls or corners, as this can create unwanted bass resonance and distortion.
Running the Wires and Cables to Connect the Speakers
Once you have marked the location of each speaker, you can start running the wires and cables to connect them to the receiver. You should measure the length of each wire and cut it to the appropriate size, leaving enough slack to account for any future adjustments or replacements. You should also use cable ties or clips to secure the wires to the wall or ceiling and prevent tripping hazards. It’s essential to follow the color-coded or labeled connections on both the speakers and the receiver to ensure that each speaker is connected to the right channel.
Setting Up the Audio Receiver and Amplifier
After you have connected all the speakers to the receiver, you can start setting up the audio receiver and amplifier. This typically involves connecting the source device, such as a DVD player or streaming device, to the receiver using an HDMI or optical cable, and then configuring the receiver’s settings, such as the audio input, the audio format, and the volume levels. You should also calibrate the sound system using a test tone generator or an automatic calibration feature that adjusts the sound based on the room’s acoustics and speaker location.
Configuring and Calibrating the System for Optimal Performance
The final step is to configure and calibrate the sound system for optimal performance. This involves fine-tuning the settings of each speaker and the audio receiver based on your listening preferences and the content type. For instance, you can adjust the bass and treble levels for music, or switch between surround sound modes for movies. You should also test the sound system using different types of content to ensure that the audio is clear, balanced, and immersive.
Troubleshooting Common Installation Issues
Despite your best efforts, you might encounter some common installation issues, such as distortion, low volume, or connectivity problems. These issues can be caused by various factors, such as faulty wiring, interference from other devices, or incompatible audio formats. You should troubleshoot the issues by checking the wiring, resetting the system, updating the firmware, or contacting the manufacturer’s support team for assistance.
Adding Additional Features to Your Home Theater Sound System
Your home theater sound system is a versatile platform that can support various additional features, such as a subwoofer, a center speaker, a soundbar, or wireless connectivity options. These features can enhance the sound quality, improve the usability, and add convenience to your home theater setup. You should explore the options and choose the ones that fit your needs and preferences.
Maintaining Your Home Theater Sound System
Keeping your home theater sound system in good condition requires some periodic maintenance, such as cleaning the speakers, updating the firmware, replacing the batteries, or checking the wiring. You should also avoid exposing the system to extreme temperatures, moisture, or dust, and handle the components with care to avoid damage. Regular maintenance ensures that your sound system delivers the best audio performance for years to come.
Comparing Different Brands of Home Theater Sound Systems
There are several brands of home theater sound systems available in the market, each with its own pros and cons. By comparing different brands based on factors such as price, quality, features, and customer support, you can make an informed decision on which brand to choose. You can also read reviews and ask for recommendations from other users or experts to get a better idea of each brand’s performance and value.
Tips for Optimizing Audio Quality in a Home Theater Sound System
Optimizing the audio quality in a home theater sound system requires some tips and tricks, such as using high-quality cables, positioning the speakers correctly, adjusting the sound settings, and selecting the right audio formats and codecs. You should also avoid common mistakes, such as overloading the speakers, placing them near reflective surfaces or corners, or using compressed or low-bitrate audio files. By following these tips, you can enhance the audio performance of your home theater sound system.
Understanding Different Audio Formats and Codecs for Home Theater Sound Systems
Audio formats and codecs are the standards for storing and transmitting digital audio. Different formats and codecs have different levels of compression, quality, and compatibility, which affect the playback quality on your home theater sound system. Some of the common audio formats and codecs supported by home theater sound systems include Dolby Digital, DTS, PCM, and Dolby Atmos. You should understand the differences between these formats and codecs and choose the ones that are compatible with your sound system and the content you want to play.
Upgrading Your Home Theater Sound System Over Time
Your home theater sound system is not a one-time investment, but rather a long-term project that you can upgrade over time. You might want to add new features, replace the components, or switch to a different brand or model as technology evolves. Upgrading your home theater sound system requires some research, planning, and budgeting, but it can ensure that your audio experience stays up-to-date and enjoyable.
Best Practices for Hiding Wires and Cables in Your Home Theater Setup
Wires and cables are an essential part of any home theater setup, but they can also be an eyesore and a tripping hazard. To hide the wires and cables, you can use various methods, such as cable sleeves, wire covers, conduit pipes, or in-wall wiring. You should also plan the wiring and cabling before installing the sound system, and leave enough space for future upgrades or replacements. By following these best practices, you can make your home theater sound system look neat and organized.
In conclusion, installing a home theater sound system requires some planning, effort, and patience, but it’s worth it in the end for the immersive audio experience it provides. By following the steps outlined in this article, you can choose the right components, prepare your room, run the wires and cables, and optimize the sound quality. You can also expand and upgrade your sound system over time, and enjoy a home theater setup that delivers high-quality audio for years to come.