When it comes to PC audio, we all want the best. And what can be better than having a 5.1 home theater setup right in your own PC? With a 5.1 home theater system, you can enjoy high-definition sound quality like never before, with the most immersive and realistic sound experience ever. In this article, we’ll take you through the step-by-step process of how to install a 5.1 home theater system in your PC.
Understanding 5.1 Home Theater System
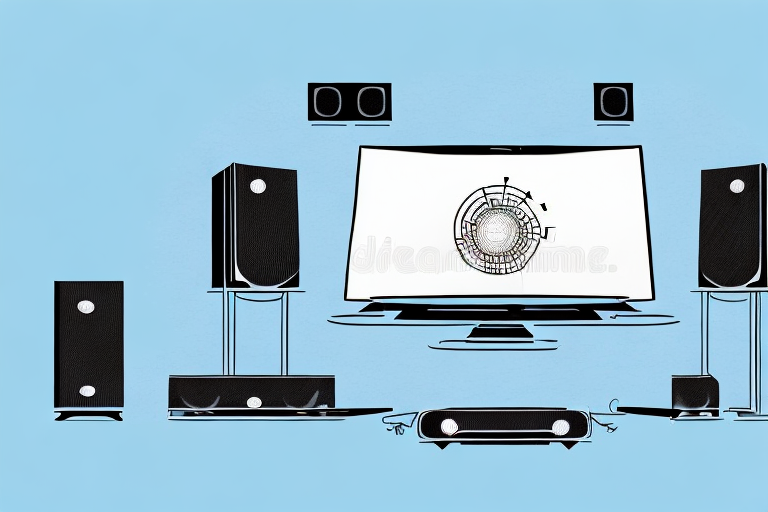
Before we dive into the installation process, let’s first understand what a 5.1 home theater system is. A 5.1 home theater system consists of six speakers: a center speaker, two front speakers, two rear speakers, and a subwoofer. The “5” in the name represents the five primary speakers, and the “.1” represents the subwoofer.
It’s important to note that a 5.1 home theater system is designed to create a surround sound experience. The center speaker is responsible for dialogue and vocals, while the front speakers provide sound effects and music. The rear speakers are used for ambient sounds and background noise, and the subwoofer delivers deep bass and low-frequency effects. When properly set up, a 5.1 home theater system can provide an immersive audio experience that enhances your movie and TV watching experience.
Choosing the Right Components for a 5.1 Home Theater Setup
Selecting the right components for your home theater system is vital to achieving the best sound quality. Here are some of the essential components that you’ll need:
- A sound card that supports 5.1 channel audio output
- Five speakers and a subwoofer
- A PC with at least four output jacks for audio input and output
When selecting your speakers, it’s important to consider the size of your room and the placement of the speakers. You want to ensure that the sound is evenly distributed throughout the room and that the subwoofer is placed in a location that will provide the best bass response.
Another important factor to consider is the quality of the cables you use to connect your components. High-quality cables can make a significant difference in the sound quality of your system, so it’s worth investing in good cables to ensure the best possible audio experience.
Preparing Your PC for 5.1 Home Theater System Installation
Before installing the home theater system, it is crucial to prepare your PC. Here are some things to keep in mind:
- Ensure that your PC has the latest audio drivers installed.
- Disconnect your PC from the power plug to avoid any electrical damage.
- Remove any previous audio hardware from your PC.
Additionally, it is recommended to check the compatibility of your PC with the 5.1 home theater system. You can do this by checking the system requirements of the home theater system and comparing them with your PC’s specifications. This will ensure that your PC can handle the system and provide optimal performance.
Installing the Sound Card and Drivers for a 5.1 Home Theater Setup
Once you have prepared the PC, you can proceed to install the sound card. Here are the steps you need to follow:
- Insert the sound card into an available PCI slot on your motherboard.
- Attach the audio cable from the sound card to the subwoofer.
- Install the drivers for the sound card using the CD that came with it or by downloading them from the manufacturer’s website.
It is important to note that some sound cards may require additional power from the power supply unit. Make sure to check the specifications of your sound card and connect the necessary power cables if required. Once the drivers are installed, you can configure the sound settings in your operating system to enable the 5.1 surround sound. Enjoy your immersive home theater experience!
Connecting the Speakers to Your PC for a 5.1 Home Theater System
Now that you have installed the sound card, it’s time to connect the speakers to your PC. Here are the steps:
- Connect the center speaker to the green jack on the back of the sound card.
- Connect the front speakers to the black jack on the back of the sound card.
- Connect the rear speakers to the gray jack on the back of the sound card.
- Connect the subwoofer to the orange jack on the back of the sound card.
It is important to note that some sound cards may have different colored jacks or may require different connections. Be sure to consult the manual for your specific sound card to ensure proper installation.
Once all the speakers are connected, you can test the system by playing a movie or music with surround sound. Adjust the volume and balance settings as needed to achieve the desired sound quality.
Configuring Sound Settings for Optimal Performance in a 5.1 Home Theater Setup
After connecting the speakers, you’ll need to configure the audio settings. Here are the steps to follow:
- Open the “Sound” option in the Control Panel.
- Select the “Playback” tab and choose your sound card as the default playback device.
- Click “Configure Speakers” and select 5.1 Surround Sound.
- Click “Test” to test the speakers’ audio output.
It’s important to note that the placement of your speakers can greatly affect the overall sound quality. For a 5.1 setup, the center speaker should be placed directly above or below the TV, while the front left and right speakers should be placed at ear level and angled towards the listening area. The rear left and right speakers should be placed behind the listening area, at ear level, and angled towards the center of the room. Proper speaker placement can enhance the surround sound experience and provide a more immersive viewing experience.
Testing and Calibrating Your 5.1 Home Theater System for Best Results
Now that the system is set up, it’s time to test and calibrate the system to ensure optimal performance. Here are some tips:
- Use a calibration tool to ensure that the sound output is balanced and accurate from all the speakers.
- Adjust the volume levels to achieve the desired sound levels from different speakers and test it with various audio formats.
Another important aspect of testing and calibrating your 5.1 home theater system is to ensure that the speakers are placed correctly. The front left, center, and right speakers should be at the same distance from the listening position and at the same height. The rear left and right speakers should be placed behind the listening position, at an angle of 110-120 degrees from the front speakers.
Additionally, it’s important to consider the acoustics of the room. If the room has hard surfaces, such as tile or hardwood floors, it may cause sound reflections and distortions. Adding soft furnishings, such as curtains or rugs, can help to absorb sound and improve the overall audio quality.
Tips and Troubleshooting Guide for Installing a 5.1 Home Theater System in Your PC
Here are some tips for making the most out of your home theater system:
- Always keep your audio drivers up to date.
- Check for any interference from other devices that affect the audio quality.
- Make sure the speakers are plugged in correctly and in the right location.
- Use high-quality audio cables as they can affect the sound quality.
Another important tip is to ensure that your PC meets the minimum system requirements for a 5.1 home theater system. This includes having a compatible sound card and enough processing power to handle the demands of high-quality audio.
If you encounter any issues with your home theater system, try troubleshooting by checking the connections and settings. You can also consult the user manual or online forums for solutions to common problems.
Upgrading an Existing Audio Setup to a 5.1 Home Theater System in Your PC
If you already have an audio setup that you want to upgrade to a 5.1 home theater system, here’s what you need:
- A sound card that supports 5.1 channel audio output
- A center speaker
- Two front and rear speakers
- A subwoofer
- The necessary cables
With this upgrade, you can experience high-quality sound from your existing setup and enjoy it like never before.
It’s important to note that not all PCs are capable of supporting a 5.1 home theater system. Before making any purchases, check your PC’s specifications to ensure that it can handle the upgrade. Additionally, consider the size of your room and the placement of the speakers to optimize your listening experience. With the right setup, you can transform your PC into a home theater system that rivals the cinema.
Conclusion
With this comprehensive guide, you can now install a 5.1 home theater system in your PC and enjoy high-definition sound quality right at home. Remember to follow all the steps and make the necessary preparations for the best results. Happy listening!
Additionally, it is important to note that regular maintenance and cleaning of your home theater system can greatly improve its longevity and performance. Be sure to dust your speakers and clean your cables regularly to prevent any buildup or damage. With proper care, your home theater system can provide you with years of high-quality sound and entertainment.