If you’re looking to create a cinematic experience in the comfort of your own home, installing a Durabrand home theater system is a great way to start. But before you can sit back and enjoy your favorite movies and TV shows with immersive audio and video quality, there are a few steps to take to properly hook up your Durabrand home theater system. In this guide, we’ll cover everything you need to know, from understanding the components to configuring audio settings and troubleshooting common issues.
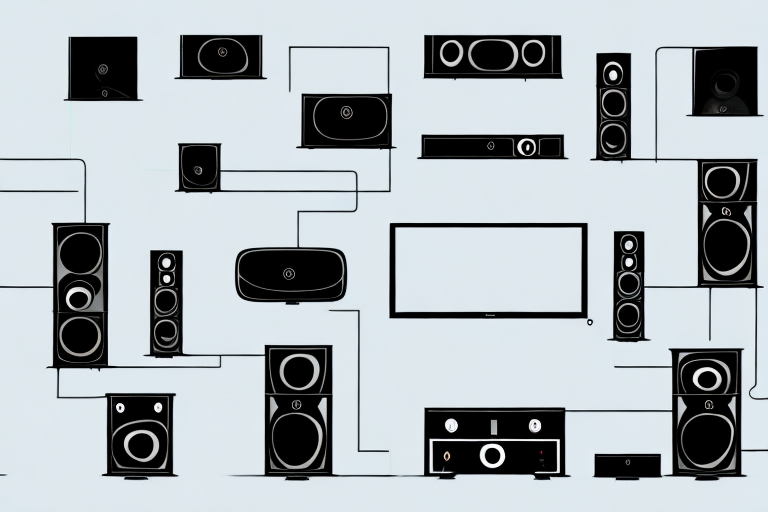
Understanding the Components of a Durabrand Home Theater System
Before diving into the installation process, it’s important to have a clear understanding of the different components that make up a Durabrand home theater system. These include:
- Receiver: This is the main hub that connects all the different audio and video components, such as your speakers, TV, and Blu-ray player.
- Speakers: A typical Durabrand home theater system includes a set of front, rear, and center speakers, as well as a subwoofer for added bass.
- TV: This is the visual component of your home theater setup.
- Blu-ray or DVD player: This is where you’ll play your favorite movies and TV shows.
With a clear understanding of these components, you’ll be better equipped to connect them in the proper way.
It’s important to note that Durabrand home theater systems come in a variety of models, each with their own unique features and specifications. Some models may include additional components, such as a soundbar or satellite speakers, while others may have built-in Wi-Fi or Bluetooth connectivity for streaming content from your phone or tablet.
When selecting a Durabrand home theater system, it’s also important to consider the size and layout of your room. Larger rooms may require more powerful speakers or a larger TV screen to ensure optimal viewing and sound quality. Additionally, you may want to consider investing in a universal remote control to simplify the process of controlling all your different components.
Preparing Your Room for the Durabrand Home Theater System
Once you have your components in hand, the next step is to prepare your room for the installation. Here are a few things to keep in mind:
- Choose the right location: Consider the size and shape of the room, as well as any furniture and decor that may impact your installation.
- Clear the space: Make sure there’s enough clearance around each component for proper ventilation and operation.
- Plan your wiring: Think about how you’ll run and hide wiring throughout your setup to minimize clutter and maximize safety.
Another important factor to consider when preparing your room for the Durabrand Home Theater System is lighting. You want to make sure that the room is not too bright or too dark, as this can affect your viewing experience. Consider installing dimmer switches or blackout curtains to control the amount of light in the room.
Additionally, it’s important to think about the acoustics of the room. Hard surfaces like tile or hardwood floors can create echoes and distort the sound quality. Consider adding area rugs or curtains to absorb sound and improve the overall audio experience.
Connecting the Speakers to the Durabrand Home Theater System
With your room prepped, it’s time to start making connections. Here’s how to hook up your Durabrand home theater system’s speakers:
- Connect the front left and right speakers to the receiver, using the red and black terminals labeled “Front.”
- Connect the center speaker to the receiver, using the terminal labeled “Center.”
- Connect the rear left and right speakers to the receiver, using the terminals labeled “Rear.”
- Connect the subwoofer to the receiver, using either the LFE or subwoofer output jack.
It’s important to note that when connecting your speakers, you should pay attention to the polarity of the wires. The red wire should be connected to the red terminal, and the black wire should be connected to the black terminal. This ensures that the speakers are in phase and will produce the best sound quality.
Additionally, if you have a larger room or want to enhance your home theater experience, you may want to consider adding additional speakers, such as surround sound speakers or a soundbar. These can be connected to your Durabrand home theater system using the available speaker terminals or HDMI ports.
Connecting Your TV to the Durabrand Home Theater System
With your speakers connected, it’s time to move on to the visual component of your home theater setup. Here’s how to connect your TV:
- Use an HDMI cable to connect the HDMI output on your Blu-ray or DVD player to the HDMI input on your TV.
- Use an optical cable to connect the digital audio output on your TV to the corresponding input on your receiver.
It’s important to note that if your TV doesn’t have an optical output, you can use the RCA output instead. Simply connect the red and white RCA cables from the audio output on your TV to the corresponding input on your receiver. Additionally, if you have a smart TV, you can connect it to your home theater system using Wi-Fi or Bluetooth for streaming audio and video content.
Setting Up Your DVD or Blu-ray Player with the Durabrand Home Theater System
With your TV connected, it’s time to set up your DVD or Blu-ray player. Here’s how to do it:
- Plug in the power cable and turn on the player.
- Use an HDMI cable to connect the HDMI output on the player to the HDMI input on your TV.
- Connect the player to the receiver, using an HDMI cable to send video and audio signals directly to the receiver.
Once you have completed the above steps, you may need to adjust the audio and video settings on your player to ensure the best possible viewing experience. Check your player’s manual for instructions on how to access these settings. Additionally, if you have a smart TV, you can connect your player to the internet to access streaming services like Netflix and Hulu. Simply connect your player to your home Wi-Fi network and follow the on-screen instructions to set up your accounts.
Configuring Your Durabrand Home Theater System’s Audio Settings
With all your components hooked up, it’s time to configure the audio settings to optimize your home theater experience.
- Speaker calibration: Use your receiver’s auto-calibration feature to ensure that each speaker is properly balanced and adjusted according to its location in the room.
- Sound modes: Experiment with different sound modes to find the one that works best for your content and preferences. Some popular modes include “Movie,” “Music,” and “Game.”
- Custom EQ settings: Adjust the equalization settings on your receiver to fine-tune sound quality for different types of content.
It’s important to note that the acoustics of your room can greatly affect the sound quality of your home theater system. Consider adding acoustic treatments, such as sound-absorbing panels or curtains, to reduce echoes and improve overall sound clarity. Additionally, make sure to position your speakers correctly and avoid placing them in corners or against walls, as this can cause distortion and muddiness in the sound.
Troubleshooting Common Issues with a Durabrand Home Theater System
Even with proper installation, there may be some issues that arise when using your Durabrand home theater system. Here are some common issues and how to address them:
- No sound: Check to make sure all cables are properly connected and that the volume is turned up. If that doesn’t work, check your receiver’s audio settings to ensure nothing is muted or turned all the way down.
- Poor video quality: Check your cables to make sure they’re properly connected and undamaged. If that doesn’t work, try adjusting your TV’s picture settings or upgrading to higher-quality video cables.
- Out-of-sync audio and video: This can happen if there’s a delay between the TV and the receiver. Try adjusting the delay settings on your receiver to see if that resolves the issue.
Another common issue with Durabrand home theater systems is the remote control not working. If this happens, try replacing the batteries in the remote or resetting the remote by removing the batteries and holding down the power button for 10 seconds before replacing the batteries.
If you’re experiencing issues with your Durabrand home theater system overheating, make sure it’s properly ventilated and not placed in an enclosed space. You can also try cleaning the vents and fans to ensure proper airflow.
Maximizing Your Viewing Experience with a Durabrand Home Theater System
With all installation and configuration complete, it’s time to sit back and enjoy your cinematic experience. Here are a few tips for maximizing your viewing experience with a Durabrand home theater system:
- Adjust lighting: Make sure your room is properly lit to prevent eye strain and visual fatigue.
- Choose the right content: Look for high-quality movies and TV shows that are optimized for home theater viewing.
- Control ambient noise: Reduce ambient noise in the room by closing windows and doors or using noise-cancelling headphones.
Upgrading Your Durabrand Home Theater System for Better Audio and Video Quality
If you’re looking to take your home theater experience to the next level, consider upgrading your system with higher-quality audio and video components. This can include upgrading your receiver, speakers, and cables to achieve better clarity and dynamic range.
Understanding Different Sound Modes on a Durabrand Home Theater System
As mentioned earlier, different sound modes can help enhance your home theater experience. Here’s a breakdown of some common sound modes and what they do:
- Movie: This mode emphasizes dialogue and ambient sounds, while balancing vocals and sound effects.
- Music: This mode emphasizes vocals and instruments, while reducing ambient noise and sound effects.
- Game: This mode emphasizes sound effects and action, with a focus on quick response times and immersive gameplay.
How to Properly Place and Position Speakers in a Durabrand Home Theater Setup
While proper placement and positioning of your speakers can greatly impact audio quality, it can often be overlooked. Here are some general guidelines for placing your speakers:
- Front left and right speakers: These should be placed at ear-level, roughly equidistant from the TV and facing the primary seating area.
- Center speaker: This should be placed above or below the TV, facing the primary seating area.
- Rear left and right speakers: These should be placed behind the primary seating area, facing inward toward the TV.
- Subwoofer: This can be placed in various locations throughout the room, but should generally be placed near a wall or corner to maximize bass response.
Customizing Sound Settings for Different Types of Content on a Durabrand Home Theater System
Lastly, it’s important to customize sound settings based on the type of content you’re viewing. Here are some general guidelines for adjusting settings for different types of content:
- Dialogue-heavy content: Increase the center channel speaker volume and reduce surround sound volume.
- Action or music-heavy content: Increase surround sound volume and decrease center channel speaker volume.
- Quiet content: Reduce overall volume and increase center channel speaker volume.
By following these steps and tips, you’ll be on your way to enjoying an immersive home theater experience with your Durabrand system. Happy viewing!