Home theater systems offer an immersive cinematic experience in the comfort of your own home. They can be a little intimidating to set up, but by following this guide, you’ll be able to get everything connected and running in no time. Let’s start with the basics of planning your home theater system.
Planning Your Home Theater System
The first step in hooking up your home theater system is to plan it out. Decide on the room you want to use and measure the space to make sure you have enough room for your desired components. Consider factors like seating arrangement, lighting, and soundproofing as well.
You’ll also need to determine the type and size of display you want. HD LCD and plasma TVs are popular options, but you could also go with a projector and screen. Once you’re ready to purchase your components, carefully review the specs to ensure compatibility with other components and your room dimensions.
Another important factor to consider when planning your home theater system is the audio setup. You’ll want to choose speakers that are compatible with your chosen display and receiver, and position them strategically for optimal sound quality. Additionally, you may want to invest in a subwoofer for enhanced bass and a more immersive experience.
Choosing the Right Components for Your Home Theater System
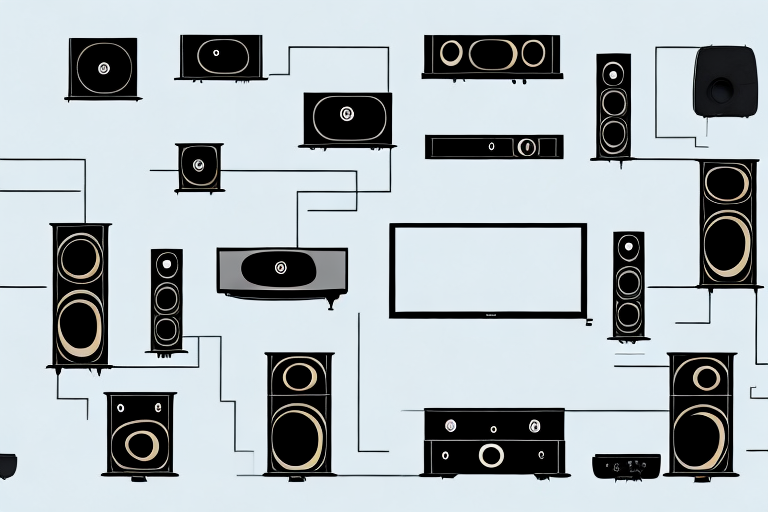
The next step is to choose the components for your home theater system. At minimum, you’ll need a receiver/amplifier, speakers, and a display. Consider what other components you want to add, such as a Blu-ray player, gaming console, and streaming device.
When selecting speakers, consider their size, power, and placement. Larger speakers often provide better sound quality, but you’ll need to find a balance between size and aesthetics. Consider placing speakers in different locations to create surround sound.
Your amplifier or receiver should have multiple HDMI inputs for compatibility with various devices. The receiver should also list power output specs in watts per channel (WPC) so that you can match the amplifier power to the recommended speaker power.
Another important factor to consider when choosing components for your home theater system is the type of display you want. There are various options available, including LCD, LED, OLED, and plasma displays. Each has its own advantages and disadvantages, so it’s important to do your research and choose the one that best fits your needs and budget.
Understanding the Basic Connections for Your Home Theater System
Before we dive into the details of connecting your components, let’s review the basic types of connections that you’ll be using:
- HDMI – for digital video and audio
- Composite – for analog video and stereo audio
- Component – for analog video and stereo audio
- Optical – for digital audio
- Coaxial – for digital audio
While composite and component connections are slowly being phased out, they’re still commonly used for legacy equipment. HDMI connections are the most popular for modern devices.
It’s important to note that not all devices will have the same types of connections. For example, some older TVs may only have composite or component inputs, while newer devices may only have HDMI or optical inputs. It’s important to check the inputs and outputs of each device before attempting to connect them to ensure compatibility and the best possible audio and video quality.
Connecting Your TV to the Home Theater System
If you’re using a TV as your display, connect it to your home theater system using an HDMI cable. Check your TV’s manual to determine which HDMI input to use and adjust its settings to ensure the source is the correct one, typically labeled HDMI1 or HDMI2. Make sure the receiver is set to match that source. Test the connection by playing a movie and ensure video and sound are synchronized.
It’s important to note that some older TVs may not have an HDMI input. In this case, you can use a component video cable to connect the TV to the receiver. However, keep in mind that this may result in a lower quality picture compared to HDMI.
If you’re experiencing issues with the connection, try resetting both the TV and the receiver. You can also try using a different HDMI cable or input. If the problem persists, consult the manuals for both the TV and receiver or contact their respective customer support teams for assistance.
Connecting Your Audio System to the Home Theater System
Next, it’s time to connect your audio system to the home theater system. Connect speakers to their corresponding amplifier/receiver outputs, taking care to identify the correct “+” and “-” connections. Use an HDMI or optical cable to connect the audio output of game consoles or media players to the receiver. Remember that digital signals don’t need separate cables for video and audio; this means a single HDMI cable can be used to transfer both audio and video data from a compatible device.
It’s important to note that the placement of your speakers can greatly affect the overall sound quality of your home theater system. Consider the size and shape of your room, as well as the location of your seating area, when deciding where to place your speakers. Experiment with different placements to find the optimal configuration for your space.
If you’re experiencing any issues with your audio system, such as poor sound quality or connectivity problems, try troubleshooting the issue before seeking professional help. Check all cables and connections to ensure they are properly plugged in and functioning. You may also want to consult the user manual for your specific audio and home theater systems for additional troubleshooting tips.
Configuring Your Surround Sound Speakers for Optimal Sound Quality
If you’ve opted for surround sound, make adjustments to the speaker settings to ensure optimal sound quality. Generally, side speakers should be placed at ear level, while rear and center speakers should be slightly above ear level. Ensure the speakers are not enclosed in an area that would reduce sound quality. Most receivers come with an automatic sound optimization system that analyzes your speaker configuration and room dimensions to provide the best possible sound. Some home theater systems come with packaged speaker systems that are configured and balanced for a quick setup.
Setting Up Your Subwoofer for Bass Performance
The subwoofer is responsible for delivering the bass performance that complements the overall sound quality of your system. If your receiver has multiple subwoofer outputs, make sure to connect the subwoofer to the correct output location. Make adjustments to subwoofer settings to ensure optimal sound quality. There is often a low-pass filter that can be adjusted to optimize the frequency range and crossover point. Keep in mind the subwoofer bass thresholds should be adjusted for the room size, the number of speakers, and the acoustics of the room.
Programming Your Universal Remote Control for Easy Use of Home Theater System
If you receive a universal remote control with your home theater system, you can program it to control multiple devices by following the instructions provided with the remote and your other devices. Once programmed, you should be able to turn on and control all the components of your home theater system with a single remote.
Calibrating Video and Audio of Your Home Theater System Using Test Patterns and Tools
To achieve the best picture and sound quality with your new home theater system, it’s essential to calibrate it using test patterns and tools. Most home theater components have built-in test patterns for adjusting color, brightness, and contrast. The receiver may have automatic calibration settings that adjust the audio output for the room configuration. If you are not familiar with this process, there are many online tutorials that can guide you on how to calibrate your system to have optimal performance.
Troubleshooting Common Issues with a Home Theater System
If you experience technical problems while connecting or using your home theater system, don’t panic. Many common technical issues can be resolved quickly. Verify your connections are correct and cables are plugged in correctly. Check that the components are set to the correct input source, and the volume levels are set to an appropriate level to prevent distortion. Verify that settings for sound processing are correct and that you’re not forcing a 5.1 or 7.1 soundstream when the equipment you are playing with can only output stereo sound. Most common errors can be resolved easily but if you encounter issues beyond your knowledge then it’s best to consult a professional technologist for advanced assistance.
Maintaining and Cleaning Your Home Theater System
To keep your home theater system in top condition, it’s important to regularly clean and maintain it. Always refer to the manufacturer’s manual for cleaning and maintenance recommendations for your specific components. Avoid using any chemicals or cleaning agents that are not recommended. Use a soft cloth to clean your equipment to avoid scratches and damage, and inspect your wiring for fraying or tears regularly.
Upgrading or Expanding Your Home Theater System
If you’re looking to upgrade or expand your home theater system in the future, keep in mind that compatibility is crucial. While it could be tempting to mix and match components or purchase items separately, ensure that all new components are compatible with your existing home theater system. You should also be aware of the location, power requirements, and dimensions of your new components. If you plan to upgrade frequently, consider purchasing a high-end home theater system that is more flexible and future-proofed.
Tips and Tricks to Enhance Your Viewing Experience with a Home Theater System
To elevate your viewing experience, consider some essential tips and tricks that can help enhance your home theater system further. Use blackout curtains or shades to block out natural light and reduce reflections on the screen. Consider wall mounting your TV or speakers to maximize space, and make sure your seating is optimally positioned. And most importantly, remember to enjoy the experience of movies and games on a large high-resolution screen with high-quality audio
Comparing Different Types of Home Theater Systems: Pros and Cons
Before you make your final decision on the type of home theater system to purchase, it’s essential to compare the different types on the market, along with their pros and cons:
- All-In-One Home Theater Systems – These systems are easy to set up, but the range of expandability is limited.
- Component Systems – These systems are customizable and can be expanded or upgraded, but they can be more expensive and require additional setup time.
- Soundbars – These systems offer an inexpensive solution for improving audio capabilities but fall short of offering a true surround sound experience. They do provide an improvement in sound quality over your TV speakers, but the sound enhancement is minimal.
- Wireless Home Theater Systems – This emerging trend provides an elegant solution for hiding wires, but it does require a stable wireless network and a quality connection. It can be more expensive than traditional wired systems.
Now that we’ve covered each aspect of setting up and using a home theater system, you should be ready to get started. With a little patience and attention to detail, you’ll be on your way to enjoying an immersive cinematic experience in no time.