If you are a movie buff looking for a home theater system that can deliver breathtaking sound quality, then the Paramax Home Theater System is one option that you might want to consider. However, like any home theater system, installing it requires a certain level of expertise and patience. In this article, we will provide you with a step-by-step guide on how to hang your Paramax Home Theater System. So, let’s get started!
Preparing for Installation: A Checklist of Tools and Materials
Before you begin the installation process, it is important to take stock of the tools and materials you will need. The installation process for the Paramax Home Theater System is not overly complex, but it does require several essential tools such as a stud finder, drill with a 3/32 inch bit, a level, a tape measure, a screwdriver, and a wire stripper. Additionally, you will need to ensure that you have the necessary mounting brackets, screws, and cables. If you need to purchase any tools or materials, make sure to do so beforehand to avoid any unnecessary delays during the installation process.
It is also important to consider the location where you will be installing the home theater system. Make sure that the area is free from any obstructions and that there is enough space to accommodate the system. You may also want to consider installing soundproofing materials to minimize any noise disturbance to other parts of the house or neighbors.
Before starting the installation process, it is recommended to read through the instruction manual thoroughly. This will help you understand the installation process and ensure that you do not miss any important steps. It is also a good idea to have a friend or family member assist you during the installation process, as some steps may require an extra set of hands.
Setting Up the Mounting Bracket: A Step-by-Step Guide
The first step in installing your Paramax Home Theater System is to set up the mounting bracket correctly. The mounting bracket is what will hold your speakers in place and keep them secure. Begin by using your stud finder to locate the studs in the wall where you plan to mount the speakers. Once you have located the studs, use a level to mark the position where you want to hang the mounting bracket. Next, use a drill with a 3/32 inch bit to drill pilot holes into the marked spots. Once the pilot holes are drilled, you can then attach the mounting bracket to the wall using screws.It is important to ensure that the mounting bracket is level and securely attached to the wall. This will prevent your speakers from moving or falling off the wall during use.
After attaching the mounting bracket to the wall, it is important to test its stability. Gently tug on the bracket to ensure that it is securely attached to the wall and can hold the weight of your speakers. If the bracket feels loose or unstable, remove it and reattach it using longer screws or a different location on the wall.
Once the mounting bracket is securely attached, you can then attach the speakers to the bracket. Follow the manufacturer’s instructions for attaching the speakers to the bracket, making sure that they are level and facing the correct direction. Once the speakers are attached, you can then connect them to your home theater system and enjoy high-quality sound in your home.
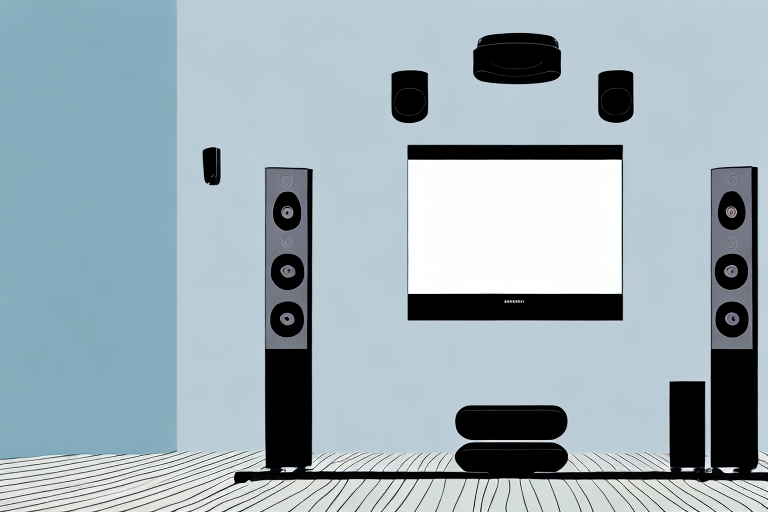
Mounting the Speakers Correctly: Tips and Tricks
Once the mounting bracket is securely attached to the wall, you can then mount the speakers. Make sure to follow the instructions provided by the manufacturer carefully to avoid any damage to your speakers. Some tips to keep in mind when mounting your speakers include ensuring that they are level, that the mounting screws are securely in place, and that the speakers are facing the correct direction. Additionally, it is important to make sure that the speakers are not too close together or too far apart. You want to create a balanced sound field that will deliver the optimal listening experience.
Another important factor to consider when mounting your speakers is the height at which they are mounted. Generally, it is recommended to mount speakers at ear level for the best sound quality. However, if you have a large room or high ceilings, you may need to adjust the height accordingly to ensure that the sound is evenly distributed throughout the space.
It is also important to take into account the type of wall or surface you are mounting the speakers on. If you are mounting on a drywall, you may need to use anchors to ensure that the screws are securely in place. If you are mounting on a brick or concrete wall, you may need to use a drill and masonry bit to create the necessary holes for the screws.
Running Cables and Wires: Best Practices for a Clean Setup
Now that your speakers are mounted, it is time to run the cables and wires. This is an important step that can make a big difference in the appearance of your setup. Begin by attaching the speaker wires to the back of your speakers. Make sure to follow the instructions provided by the manufacturer to ensure that the wires are properly connected.Once the wires are attached to your speakers, you can then run them along the wall using cord clips or wire ties to keep them tidy. Make sure to avoid running the wires across high-traffic areas, as this could pose a safety hazard. Finally, connect the wires to your receiver or amplifier following the instructions provided by the manufacturer.
It is also important to consider the length of the cables and wires you are using. If the cables are too long, they can create a cluttered and messy appearance. On the other hand, if the cables are too short, they may not reach the necessary components. Measure the distance between your speakers and your receiver or amplifier before purchasing cables to ensure that you get the appropriate length. Additionally, consider investing in high-quality cables to ensure optimal sound quality and longevity.
Adjusting the System for Optimal Sound Quality
After the installation process is complete, it is important to adjust your system for optimal sound quality. This can include adjusting the equalizer settings, ensuring that the speakers are positioned at the correct height and angle, and testing the sound quality with different audio sources. Refer to the user manual provided by the manufacturer for specific instructions on how to adjust your system to meet your preferences.
One important factor to consider when adjusting your system for optimal sound quality is the acoustics of the room. The size and shape of the room, as well as the materials used for flooring, walls, and ceiling, can all affect the sound quality. To improve the acoustics, you may need to add sound-absorbing materials, such as curtains or acoustic panels, or adjust the placement of furniture to reduce echoes and reverberation.
Another way to enhance the sound quality of your system is to use high-quality audio cables and connectors. Poor-quality cables can introduce noise and interference, which can degrade the sound quality. Look for cables that are shielded and have gold-plated connectors, as these can help to minimize interference and provide a cleaner signal.
Troubleshooting Common Problems During Installation
During the installation process, you may encounter a few common problems that can be easily resolved. For example, if the mounting bracket is not level, you may need to reposition it and drill new pilot holes. If the speakers are not producing sound, you may need to check the wire connections and adjust the equalizer settings. Keep in mind that troubleshooting is an important part of the installation process, and you should not hesitate to consult the manufacturer’s website or customer support if you need assistance.
Another common problem during installation is the incorrect placement of the speakers. It is important to position the speakers at the correct height and distance from the listener to ensure optimal sound quality. If you are unsure about the correct placement, refer to the manufacturer’s instructions or seek advice from a professional installer.
In some cases, the installation process may require additional tools or equipment that are not included in the package. It is important to check the contents of the package before starting the installation and ensure that you have all the necessary tools and equipment. If you do not have the required tools, you may need to purchase or rent them before proceeding with the installation.
Maintenance Tips for Your Paramax Home Theater System
To ensure the longevity of your Paramax Home Theater System, it is important to perform regular maintenance tasks. This may include dusting the speakers with a soft cloth, checking the wire connections for wear and tear, and replacing any damaged cables or wires. Additionally, you may want to invest in a surge protector to protect your speakers from power surges.
Enhancing Your Viewing Experience with Surround Sound
One of the best features of the Paramax Home Theater System is its ability to deliver surround sound. Surround sound can create a more immersive viewing experience by simulating sounds coming from different directions. Consider investing in additional speakers to create a 5.1 or 7.1 surround sound setup.
Investing in Professional Installation Services: Pros and Cons
If you are not confident in your ability to install your Paramax Home Theater System, consider hiring a professional installation service. Professional installers have the expertise and experience needed to install your system quickly and efficiently. However, this service can be expensive, and you may need to wait several days or even weeks for an appointment. You will also miss out on the satisfaction that comes with installing your own home theater system.
Comparing Paramax Home Theater Systems to Other Brands on the Market
Finally, it is important to compare Paramax Home Theater Systems to other brands on the market. While the Paramax Home Theater System is known for its superior sound quality, other brands may offer better features or a more user-friendly setup. Do your research before making a decision to ensure that you are getting the best value for your money.
Upgrading Your System: Add-Ons and Accessories to Consider
If you are looking to take your home theater setup to the next level, consider investing in add-ons and accessories. This may include a subwoofer to add depth to the sound, a universal remote to make controlling your system easier, or additional speakers to create a true surround sound experience. Again, make sure to do your research before making any purchases to ensure that you are getting the best value for your money.
Tips for Incorporating Your Home Theater System into a Smart Home Setup
Finally, if you have a smart home setup, you can easily incorporate your Paramax Home Theater System into it. This can allow you to control your system using your smartphone or voice assistant. Consider investing in a smart home hub to make controlling your home theater system even easier.
By following these tips and guidelines, you can hang your Paramax Home Theater System with confidence and enjoy fantastic sound quality in the comfort of your own home. Happy viewing!