A home theater system is a great way to enjoy your favorite movies and TV shows in the comfort of your own home. But setting one up can be a daunting task, particularly when it comes to connecting all the components. In this article, we will guide you through the process of connecting a receiver to your home theater system. We will cover the basics of what a receiver is and how it works, the different types of receivers available, how to select the right one for your needs, and all the steps involved in setting it up.
Understanding the Basics: What is a Receiver and How Does it Work?
A receiver is the heart of your home theater system. It’s a device that takes incoming audio and video signals from your sources, such as cable or satellite TV, Blu-ray player, or gaming console, and processes and amplifies them to be played through your speakers and displayed on your TV. A receiver also provides a central hub for switching between the different sources and controlling various settings. It works by converting the digital signals into analog signals that can be played back through your speakers and displayed on your TV.
One important feature of a receiver is its ability to decode and process surround sound formats, such as Dolby Atmos or DTS:X. These formats allow for a more immersive audio experience, with sound coming from multiple directions and heights. The receiver can decode these formats and send the appropriate signals to the speakers, creating a more realistic and engaging soundstage.
Another important aspect of a receiver is its connectivity options. Many modern receivers offer a variety of inputs and outputs, including HDMI, optical, and coaxial connections. This allows you to connect a wide range of devices to your home theater system, from gaming consoles to streaming devices. Some receivers also offer wireless connectivity options, such as Bluetooth or Wi-Fi, which can make it easier to stream music or other content from your phone or tablet.
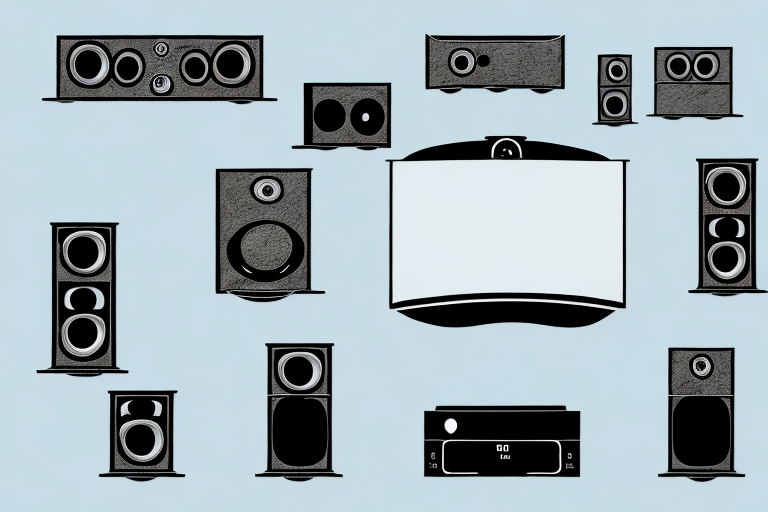
Types of Receivers for Home Theater Systems
There are different types of receivers available depending on your needs and budget. The most common types of receivers are:
- AV receivers: These are the most versatile and popular type of receivers, as they can handle both audio and video signals and support multiple sound formats.
- Stereo receivers: These are designed to only handle two channels of audio, but they often provide superior sound quality and are a more affordable option.
- Home theater in a box systems: These are all-in-one systems that come with a receiver and speakers that are bundled together. They are a good option for beginners, but they lack the flexibility and quality of separate components.
It’s important to consider the features you need when choosing a receiver for your home theater system. Some receivers come with built-in Wi-Fi or Bluetooth connectivity, which allows you to stream music from your phone or computer. Others may have advanced audio processing capabilities, such as Dolby Atmos or DTS:X, which can provide a more immersive sound experience. Additionally, some receivers may have more inputs and outputs than others, which can be useful if you have multiple devices you want to connect to your system.
Selecting the Right Receiver for Your Home Theater System
When selecting a receiver for your home theater system, there are several factors to consider, such as:
- Compatibility with your sources: Make sure the receiver can handle all your sources and their associated formats, such as 4K Ultra HD or Dolby Atmos.
- Number of channels: This refers to how many speakers the receiver can power. Common options are 5.1 (five speakers and a subwoofer) or 7.1 (seven speakers and a subwoofer).
- Power output: This determines the volume and clarity of sound produced by your speakers. Look for a receiver with enough power to fill your room size and accommodate your speakers’ impedance and sensitivity.
- Connectivity options: Consider what types of cables and ports your sources and speakers have, and make sure the receiver has matching inputs and outputs.
- User interface and features: Look for a receiver that is easy to use and has the features you need, such as Wi-Fi, Bluetooth, streaming services, or multi-zone capabilities.
Preparing Your Home Theater System for Receiver Setup
Before you start connecting your receiver, make sure your home theater system is properly set up and configured. This includes:
- Placing your TV and speakers in their optimal positions and angles.
- Running and labeling your cables neatly and safely.
- Checking for any electrical or grounding issues.
- Calibrating your TV and speakers’ settings to your preference.
Connecting the Receiver to the TV: HDMI, RCA, or Optical Cable?
The next step is to connect your receiver to your TV. There are three main types of cables you can use:
- HDMI: This is the most common and recommended option, as it carries both audio and video signals in high quality and supports various versions and features.
- RCA: This is an older and simpler option that uses color-coded cables to transfer analog video and stereo audio separately.
- Optical: This is a digital option that uses a fiber optic cable to transmit audio signals in high definition and can be used if your TV or receiver lacks HDMI or RCA ports.
To connect your receiver to your TV, simply plug one end of the chosen cable into the corresponding output port on the receiver and the other end into the input port on the TV. Then, select the appropriate input source on your TV using the remote control or the receiver’s menu.
Connecting Speakers to Your Receiver: Wiring and Placement Tips
The most critical part of connecting your receiver is connecting your speakers. Here are some tips to follow:
- Match your speakers with your receiver’s power output and impedance rating.
- Label and color-code your speaker wires and inputs to avoid confusion.
- Place your speakers at the optimal height, distance, and angle for the best sound quality and imaging.
- Use proper speaker wire lengths and gauges to avoid signal loss or interference.
- Integrate a subwoofer into your system for better bass response.
To connect your speakers to your receiver, you will need to strip the wire insulation, insert the wire into the appropriate input terminals on the receiver, and tighten the screws securely. Then, connect the other end of the wire to the corresponding speaker terminals, making sure the polarity is correct (positive to positive, negative to negative).
Configuring Your Receiver Settings: Audio and Video Calibration
Once everything is connected, you need to configure your receiver’s settings to match your preferences and room acoustics. Here are some important settings to adjust:
- Channel and speaker setup: Assign each speaker to its corresponding channel and configure their distances and levels using a calibration tool or a test tone generator.
- Sound modes and processing: Choose the sound mode that suits your content and mood, such as stereo, surround, or Dolby Atmos, and adjust the other settings, such as EQ, crossover, or dynamic range, to your liking.
- Video settings: Optimize your TV’s picture quality by adjusting the color, contrast, brightness, and sharpness settings, as well as enabling advanced features, such as HDR or motion smoothing.
Refer to your receiver’s user manual or online resources for more detailed instructions on how to configure and calibrate it.
Troubleshooting Common Problems with Receiver Setup
Even with careful planning and execution, you may encounter some issues with your receiver setup. Here are some common problems and solutions:
- No sound or picture: Check if your cables are properly connected and if your TV is set to the correct input source. Also, make sure your receiver is not muted or in standby mode.
- Poor sound quality: Check if your speaker wires are properly connected and if your sound mode and processing settings are appropriate. Also, make sure your room acoustics are not causing echoes or reflections.
- Interference or noise: Check if there are any sources of interference, such as other electronics or wireless signals, and move them away from your receiver. Also, make sure your cables are not damaged or crossed.
Enhancing Your Home Theater Experience with Advanced Receiver Features
Besides the basic features and settings, many modern receivers offer advanced features that can enhance your home theater experience, such as:
- Multi-room audio and video distribution: Send different content to different rooms or zones using wireless or wired connections.
- Voice control and automation: Use virtual assistants, such as Alexa or Google Assistant, to control your receiver’s functions or set up scene triggers with smart devices.
- Wireless streaming and casting: Access and play content from your smartphone, tablet, or computer using Wi-Fi or Bluetooth connections.
- Home network integration: Connect your receiver to your home network and access your media files or online streaming services directly.
Explore your receiver’s capabilities and try out these features to see if they suit your needs and preferences.
DIY vs Professional Installation: Which One is Right for You?
If you feel confident and comfortable with technology, you can certainly set up your receiver and home theater system on your own with the help of online resources and tutorials. However, if you lack the skills, time, or tools required, or if you want a more personalized or complex installation, you can hire a professional installer. They can offer you advantages, such as:
- Expertise and experience: They know how to deal with various challenges and scenarios and can provide you with advice and solutions.
- Efficiency and safety: They can complete the installation faster and ensure that all the cables and components are handled and installed safely and neatly.
- Customization and optimization: They can tailor your system to your preferences and budget and fine-tune your audio and video settings to your room acoustics.
Consider your budget, timeline, and goals before deciding whether to DIY or hire a professional installer.
Maintenance Tips for Keeping Your Receiver and Home Theater System in Top Shape
Finally, to ensure that your receiver and home theater system provide you with optimal performance and longevity, you need to maintain them properly. Here are some tips to follow:
- Clean your components regularly with a soft cloth and avoid using any harsh chemicals or abrasive materials.
- Avoid placing your components in hot or humid environments, near windows or vents, or on top of each other.
- Update your receiver’s firmware and software regularly to fix any bugs or security issues and enable new features.
- Perform regular calibration and checks on your audio and video settings and speaker cables to avoid any degradation or malfunction.
By following these tips, you can protect your investment and enjoy your home theater system for many years to come.