If you’re looking to enhance your entertainment experience, the Yamaha YHT-4950U 4K DTS:X Audio System is an excellent choice. This system packs a powerful audio punch, but learning how to configure it can be intimidating. In this guide, we’ll walk you through the process of setting up and customizing your Yamaha YHT-4950U so you can enjoy immersive audio with ease.
Understanding Yamaha YHT-4950U 4K DTS:X Audio System
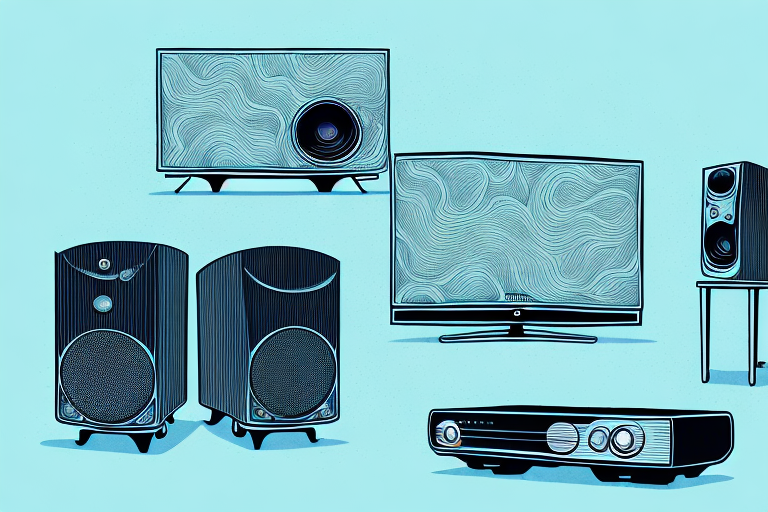
Before we dive into the technical details, let’s first understand the Yamaha YHT-4950U 4K DTS:X Audio System. This system features a powerful 5.1 channel speaker setup and supports the latest DTS:X technology, which delivers immersive and realistic audio. It also supports 4K video pass-through, allowing you to enjoy high-quality video content with minimal loss of quality.
In addition to its impressive audio and video capabilities, the Yamaha YHT-4950U also comes with a range of convenient features. For example, it includes Bluetooth connectivity, allowing you to easily stream music from your smartphone or tablet. It also has a user-friendly interface, making it easy to navigate and adjust settings. Additionally, the system comes with a remote control, so you can easily control your audio and video playback from the comfort of your couch.
Connecting Yamaha YHT-4950U to your TV
The first step in setting up the Yamaha YHT-4950U is to connect it to your TV. You can use either an HDMI or an optical cable to connect the audio system to your TV. Once connected, you can control the system using your TV’s remote, simplifying the overall setup process.
It is important to note that if you are using an HDMI cable, make sure to connect it to the HDMI ARC (Audio Return Channel) port on your TV. This will allow the audio from your TV to be played through the Yamaha YHT-4950U speakers. Additionally, if your TV does not have an HDMI ARC port, you can use the optical cable to connect the audio system to your TV’s optical output.
How to Set Up Yamaha YHT-4950U Audio System
Setting up the Yamaha YHT-4950U Audio System is straightforward. The system comes with all the necessary cables and a comprehensive manual that takes you through the setup process step-by-step. Ensure that all the speakers are correctly connected and placed. Next, you can power on the system and select the correct source for your sound input. You can choose from various sources like HDMI, Optical, Analog, Bluetooth, or the built-in FM tuner.
It is essential to calibrate the audio system to ensure that you get the best sound quality. The Yamaha YHT-4950U Audio System comes with a built-in YPAO (Yamaha Parametric Acoustic Optimizer) that automatically adjusts the sound settings based on your room’s acoustics. To calibrate the system, you need to connect the included microphone to the system and follow the instructions on the manual. Once the calibration is complete, you can enjoy high-quality sound that is optimized for your room.
Configuring Basic Audio Settings for Yamaha YHT-4950U
Once set up, you’ll want to ensure that the Yamaha YHT-4950U is configured correctly for your audio preferences. Here are some basic settings you can adjust:
- Speaker Distance and Volume Levels: You can set the individual distance and volume levels for each speaker to ensure the optimal audio balance.
- Sound Mode: The Yamaha YHT-4950U ships with various sound modes that modify sound levels for different types of content like movies, music, and gaming.
- EQ Settings: Fine-tune your audio experience by adjusting the bass, treble, and balance settings using the built-in equalizer.
Aside from the basic settings, the Yamaha YHT-4950U also offers advanced audio configuration options. One of these options is the ability to adjust the crossover frequency of the speakers. This allows you to set the frequency at which the speakers transition from one to another, resulting in a smoother and more seamless audio experience.
Another advanced setting is the ability to adjust the dynamic range control. This feature allows you to compress the audio signal, resulting in a more consistent volume level across different types of content. This is particularly useful when watching movies or TV shows with varying audio levels.
Optimizing Audio Output using Yamaha YHT-4950U
The Yamaha YHT-4950U features advanced audio settings that allow you to optimize your audio output. Here are a few settings you can customize for the perfect audio experience:
- Dialogue Level Adjustment: This setting lets you enhance speech or dialogues that may otherwise be hard to hear over background noise.
- Bass Extension: The bass extension feature enables you to selectively amplify the low-frequency sounds for a more full-bodied audio experience.
- Virtual Presence Speaker: This setting simulates the presence of additional speakers to create a larger and more immersive soundstage.
In addition to these settings, the Yamaha YHT-4950U also offers a range of sound modes that can be used to optimize your audio output for different types of content. For example, the “Movie” mode enhances the surround sound effect for a more cinematic experience, while the “Music” mode emphasizes the clarity and detail of the audio.
Furthermore, the Yamaha YHT-4950U comes with a built-in calibration system that automatically adjusts the audio settings based on the acoustics of your room. This ensures that you get the best possible audio experience, regardless of the size or shape of your room.
How to use the DTS:X technology on Yamaha YHT-4950U
The DTS:X technology allows you to enjoy high-quality audio that’s immersive and realistic. To enable this feature, you’ll need to ensure that your audio source is compatible with DTS:X technology. You can also adjust the height and sound position of individual speakers for a more immersive listening experience.
Additionally, the Yamaha YHT-4950U comes with a built-in calibration system that automatically adjusts the sound settings based on your room’s acoustics. This ensures that you get the best possible sound quality, regardless of your room’s size or shape. To use this feature, simply run the calibration system and follow the on-screen instructions. Once completed, you’ll be able to enjoy DTS:X technology at its fullest potential.
Tips and Tricks for Customizing Your Yamaha YHT-4950U Audio System
To get the most out of your Yamaha YHT-4950U Audio System, here are some tips and tricks you can try:
- Use the remote control app to control your audio system from your smartphone or tablet.
- Experiment with different sound modes to find the optimal setting for your content.
- Use the room calibration feature to optimize your audio output based on your room’s unique acoustics.
Another tip to enhance your audio experience is to invest in high-quality speakers that are compatible with your Yamaha YHT-4950U Audio System. This will ensure that you are getting the best possible sound quality.
Additionally, you can customize your audio system by adjusting the equalizer settings. This will allow you to fine-tune the bass, treble, and other audio frequencies to your liking. You can also save your custom equalizer settings for different types of content, such as music or movies.
How to Troubleshoot Common Issues with the Yamaha YHT-4950U Audio System
If you encounter any issues with your Yamaha YHT-4950U Audio System, don’t despair. Here are some common issues and how to fix them:
- If you’re not getting any sound, check that all cables are securely connected.
- If the sound is low, increase the volume levels on the individual speakers or the system’s volume control.
- If you’re experiencing inconsistent audio quality, try resetting the audio system.
Another common issue that users may encounter with the Yamaha YHT-4950U Audio System is difficulty connecting to Bluetooth. If you’re having trouble connecting your device to the audio system via Bluetooth, make sure that the audio system is in pairing mode and that your device is within range. You may also need to clear the list of previously paired devices on the audio system to ensure that it can connect to your device. If you’re still having trouble, consult the user manual or contact Yamaha customer support for further assistance.
Expert Advice on Getting the Best Sound Quality from your Yamaha YHT-4950U Audio System
For the best sound quality from your audio system, consider your room acoustics and adjust the speaker positions to optimize the audio output. Ensure that you also frequently update the system’s firmware to access the latest features and improvements. With the Yamaha YHT-4950U Audio System, you can enjoy immersive and realistic audio with ease.
Another important factor to consider when optimizing the sound quality of your Yamaha YHT-4950U Audio System is the type of audio content you are playing. Different types of audio, such as music, movies, and video games, require different settings to achieve the best sound quality. Take the time to experiment with the system’s settings and presets to find the optimal configuration for each type of content. By doing so, you can ensure that you are getting the most out of your audio system and enjoying a truly immersive audio experience.
Understanding the Different Sound Modes on the Yamaha YHT-4950U.
The Yamaha YHT-4950U comes with various sound modes that modify sound levels for different types of content like movies, music, and gaming. Here’s a look at some popular sound modes:
- Movie Mode: This mode enhances dialogue levels, and ambient surround sounds, perfect for watching movies.
- Music Mode: This mode amplifies instruments and vocals and is best suited for music content.
- Gaming Mode: This mode emphasizes sound effects and music, ideal for gaming content.
How to Adjust Sound Levels and Equalizer Settings on the Yamaha YHT-4950U.
Adjusting the sound levels and equalizer settings on the Yamaha YHT-4950U is easy, and it’s an effective way to customize your audio experience based on your preferences. You can adjust the bass, treble, and overall sound levels using the built-in equalizer. The individual volume levels for each speaker can also be adjusted to optimize the audio balance.
A Beginner’s Guide to Using the Remote Control for the Yamaha YHT-4950U.
The Yamaha YHT-4950U remote control is intuitive and easy to use. Here are some basic remote control actions and their functions:
- Power Button: Use to turn the audio system on or off.
- Input Button: Use to select the audio input type like HDMI or Optical.
- Sound Mode Button: Use to switch between different sound modes.
- Volume Buttons: Use to adjust the overall volume levels for the audio system or individual speaker volumes.
Comparing the Yamaha YHT-4950U with Other 4K DTS:X Audio Systems in the Market.
The Yamaha YHT-4950U is an excellent choice for those looking for a 4K DTS:X audio system. But how does it compare with other systems in the market? In terms of value for money, the Yamaha YHT-4950U delivers exceptional audio quality at an affordable price. Compared to higher-end models, it may not offer as many advanced features, but it still offers a powerful audio punch at a more accessible price point.