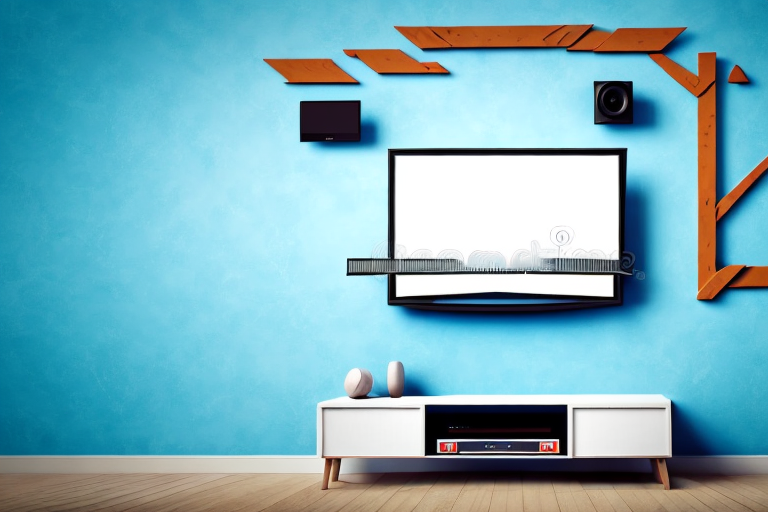
Television sets have become bigger over time, and with that increase in size, there has also been a need for stronger wall mounts. Adding a crossbeam is a simple and effective solution to this problem. A crossbeam distributes the weight of the TV mount evenly across the wall, making it more stable and secure. In this article, we will discuss the steps you need to take to add a crossbeam to your TV mount setup.
Why You Need a Crossbeam for Tv Mount
Installing your television on a wall that has no stud support can be dangerous. Without proper anchoring, the heavy load of the TV and wall mount can cause the wall to buckle. Over time, this can lead to a catastrophic failure. The best way to ensure your TV mount is secure is to use a crossbeam. A crossbeam can provide the necessary support to distribute the weight of your TV evenly across the wall. This makes it more secure and less likely to damage your wall or pose a risk to anyone in the room.
Another benefit of using a crossbeam for your TV mount is that it allows for more flexibility in placement. With a crossbeam, you can mount your TV in a wider range of locations, even if there are no studs available. This can be especially useful if you want to mount your TV in a specific spot, such as above a fireplace or in a corner of the room.
Additionally, using a crossbeam can make it easier to hide cables and wires. By attaching the crossbeam to the wall, you can run cables and wires behind it, keeping them out of sight and creating a cleaner, more organized look. This can be especially important if you have a lot of devices connected to your TV, such as a soundbar, gaming console, or streaming device.
Materials Needed for Adding a Crossbeam for Tv Mount
You will need some materials before you can begin the process of adding a crossbeam for your TV mount setup. These include a drill, screws, a wood drill bit, a saw, a level, a tape measure, and a piece of wood for the crossbeam itself. Make sure all your materials are of high quality to ensure a strong and sturdy installation.
It is also important to consider the weight of your TV when selecting the piece of wood for the crossbeam. A heavier TV will require a thicker and stronger piece of wood to support it. Additionally, if you plan on mounting your TV in a location with high foot traffic or in an area prone to earthquakes, it may be necessary to use additional materials such as brackets or anchors to ensure the TV remains securely in place.
Measuring and Cutting the Crossbeam to Size
Your first step will be to measure the length of your TV mount. Cut a piece of wood to that length, ensuring that it is wide enough to hold the weight of the mount and television. Next, use a wood drill bit to drill two holes in each end of the crossbeam. This will allow you to secure the crossbeam to the wall later on.
It is important to choose the right type of wood for your crossbeam. Hardwoods such as oak or maple are ideal for their strength and durability. Softwoods like pine or spruce may not be able to support the weight of your TV and mount over time.
Before cutting the wood, make sure to wear protective gear such as safety glasses and gloves. Use a saw that is appropriate for the type of wood you are cutting, and make sure to cut slowly and steadily to avoid any mistakes or accidents.
How to Secure the Crossbeam to the Wall
After you have measured and cut the crossbeam to the right size, it’s time to attach it to the wall. Use a level to ensure that the beam is straight across the wall. Hold the beam in place and mark where you will need to drill the holes in the wall. Use a wood drill bit to drill pilot holes into the wall for the screws. Take care to ensure that the holes are in the studs so that the beam is attached securely.
Once you have drilled the pilot holes, you can begin to attach the crossbeam to the wall. Use wood screws that are long enough to go through the beam and into the wall studs. Make sure to tighten the screws firmly, but be careful not to over-tighten them as this can cause the wood to split. Once the beam is securely attached to the wall, you can add any additional decorative elements or hardware that you desire.
Adding Support Brackets to the Crossbeam
Next, you will need to add brackets to support the TV mount. Use a tape measure to measure the distance between the screw holes on your TV mount. Then, use a saw to cut two pieces of wood to the same length. Secure the pieces of wood to the crossbeam with screws by placing them under the crossbeam and aligning them with the holes you have already drilled.
It is important to ensure that the brackets are securely attached to the crossbeam to prevent any accidents or damage to the TV. You can use a level to make sure that the brackets are straight and even before tightening the screws.
If you are mounting a heavier TV, it may be necessary to use additional support brackets or even consult a professional for assistance. Always follow the manufacturer’s instructions and safety guidelines when mounting a TV to ensure a secure and stable installation.
How to Install the Tv Mount onto the Crossbeam
With the crossbeam securely fastened to the wall and brackets added for support, it’s time to attach the TV mount to the crossbeam. Follow the instructions provided by the manufacturer to attach the mount to the support brackets. Make sure that all screws and bolts are tightened compactly and your TV mount is properly secured to the crossbeam.
It’s important to note that the weight of your TV should be taken into consideration when choosing the appropriate TV mount and crossbeam. Make sure that the weight capacity of the mount and crossbeam can support the weight of your TV. If you’re unsure, consult with a professional or refer to the manufacturer’s guidelines.
Additionally, it’s recommended to use a level to ensure that your TV mount is straight and properly aligned. This will prevent any potential damage to your TV or mount, and also provide a better viewing experience. Take your time during the installation process and double-check all connections to ensure a safe and secure installation.
Troubleshooting Common Installation Issues with a Crossbeam and TV Mount
If you experience any problems during the installation of your crossbeam and TV mount, you may need to troubleshoot. Common issues that occur include mount slippage, misaligned holes, and difficulty finding the right stud in the wall. If you cannot get your TV mount installed securely, consult a professional to help you find a solution for your specific problem.
One additional issue that may arise during the installation of a crossbeam and TV mount is the weight of the TV causing the mount to sag or tilt. This can be especially problematic if the mount is not properly secured to a stud in the wall. To prevent this issue, it is important to choose a mount that is rated for the weight of your TV and to ensure that it is properly installed with the appropriate hardware. Additionally, you may want to consider using a crossbeam to distribute the weight of the TV more evenly and provide additional support.
Tips for Maintaining Your New Crossbeam and TV Mount Setup
Now that your TV mount and crossbeam are installed, it’s important to ensure that it stays secure and safe. Check the mount and beam periodically to ensure that they have not loosened over time. Also, avoid placing heavy objects on the TV mount or using it to support anything else. This can cause damage to the wall and the mount, which could lead to a dangerous situation.
Another important tip for maintaining your new crossbeam and TV mount setup is to keep the area around it clean and free of clutter. Dust and debris can accumulate on the mount and beam, which can affect their stability over time. Use a soft cloth to wipe down the mount and beam regularly to keep them clean and free of dust. Additionally, if you notice any signs of wear or damage to the mount or beam, it’s important to address them immediately to prevent any further damage or safety hazards.
Comparing Different Types of Crossbeams for TV Mounts
There are several options available in the market when it comes to crossbeams for TV mounts. Wood and metal are the two most common materials used for crossbeams. Wood is cheaper and easier to work with, but metal crossbeams are sturdier and have a higher weight capacity. Choose the one that is appropriate for your wall and TV setup.
Another factor to consider when choosing a crossbeam for your TV mount is the length of the beam. Longer crossbeams provide more stability and support for larger TVs, but they may also be more difficult to install. Shorter crossbeams are easier to install, but may not be suitable for heavier TVs. It’s important to measure your TV and wall space to determine the appropriate length of crossbeam for your setup.
The Benefits of Using a Crossbeam for Your TV Mount
Adding a crossbeam for your TV mount offers many benefits. Firstly, it provides additional support, ensuring that your mount will remain stable. Secondly, it helps distribute the weight of your TV evenly across the wall, reducing the risk of damage to the plaster or drywall. Lastly, it keeps your TV mount setup safe by preventing any accidents or malfunctions.
Another benefit of using a crossbeam for your TV mount is that it allows for more flexibility in positioning your TV. With a crossbeam, you can adjust the height and angle of your TV mount without worrying about it becoming unstable or damaging the wall. This is especially useful if you have a large room or multiple seating areas.
In addition, a crossbeam can also improve the overall aesthetic of your TV setup. By hiding the cables and wires behind the crossbeam, you can create a cleaner and more organized look. This can be especially helpful if you have a lot of devices connected to your TV, such as a soundbar, gaming console, or streaming device.
How to Remove and Replace a Crossbeam for Your TV Mount
If you require to remove and replace the existing crossbeam, follow the above steps in reverse. Unscrew the TV mount from the support brackets on the crossbeam. Remove the support brackets from the crossbeam and unscrew the crossbeam from the wall. To install a new crossbeam, follow the above steps again from the beginning.
That brings us to the end of our comprehensive guide on how to add a crossbeam for a TV mount. Remember to always use high-quality materials and to double-check everything before proceeding with installation. Once the crossbeam is installed, your TV mount setup will feel much safer and more stable.