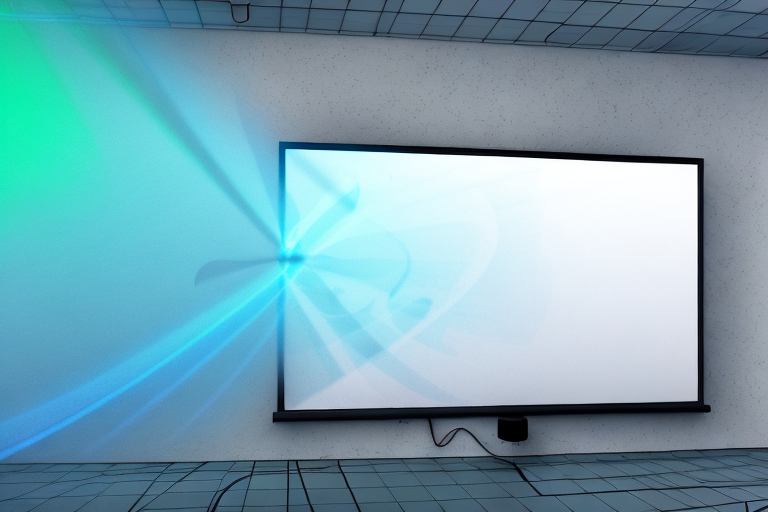
Projector screens add a touch of elegance and sophistication to any home entertainment setup. However, it’s essential to prepare the wall that will serve as the screen’s backdrop before installation to achieve an optimal viewing experience. In this article, we’ll take you through every step you need to consider when preparing a wall for a projector screen.
Choosing the right wall for your projector screen
When picking the right wall, selecting the white or light-colored wall should be a priority. This wall will reflect light more efficiently and help produce a brighter picture. It would be best to avoid windows, doors, or walls that might experience high traffic since they interfere with the viewing experience. Also, ensure that the wall is perpendicular to the projector’s throw distance.
Another factor to consider when choosing the right wall for your projector screen is the texture of the wall. A smooth wall surface will reflect light more evenly, resulting in a better image quality. Textured walls, on the other hand, can cause shadows and uneven light distribution, which can negatively impact the viewing experience.
It’s also essential to consider the room’s lighting when selecting the wall for your projector screen. If the room has a lot of natural light, it’s best to choose a wall that is not directly facing a window. You can also consider using blackout curtains or blinds to control the amount of light entering the room. If the room has artificial lighting, ensure that the wall you choose is not in the direct path of any light fixtures, as this can cause glare and affect the image quality.
Understanding the importance of surface texture and color
The texture and color of your wall significantly affect your viewing experience. A wall should have a flat and smooth surface since it provides an even distribution of light, and creates a clear picture. Avoid walls with rough surfaces, cracks or with missing bits of plaster since they can cause shadows and ruin the picture’s quality. A white or light-colored surface is always preferred since darker colors dull the projected image, reducing the brightness and clarity of the picture.
Additionally, it is important to consider the ambient light in the room when choosing the color of your wall. If the room has a lot of natural light, a white or light-colored wall will reflect the light and enhance the brightness of the picture. However, if the room has low light, a darker wall color may be more suitable to create a cozy atmosphere. It is also important to note that glossy or reflective surfaces can cause glare and distract from the picture, so it is best to choose a matte finish for your wall.
Cleaning the wall for an optimal viewing experience
Before projecting, it’s essential to ensure that the wall is clean and free of dust or debris. This can be done using a soft cloth or microfiber towel, which should be applied gently without damaging the painted surface. Additionally, a quick vacuuming with a soft brush over the surface can help eliminate any loose dirt or debris that might be embedded in the wall’s texture.
It’s important to note that certain cleaning products should be avoided when cleaning the wall. Harsh chemicals or abrasive materials can damage the paint or texture of the wall, which can affect the quality of the projected image. If a more thorough cleaning is needed, it’s recommended to consult with a professional cleaner or painter to ensure that the wall is properly cleaned without causing any damage.
Measuring and marking the screen’s position on the wall
Once you’ve chosen the wall to install the projector screen, measure the height and width of the screen from the wall’s edge. It’s recommended that the middle of your screen should align with your eyes once you’re seated for viewing. Mark the position using a pencil or any other marking tool to make it easier to work on the surface.
It’s important to also consider the distance between the projector and the screen when measuring and marking the position. The distance will affect the size of the image projected on the screen. Refer to the projector’s manual for the recommended distance and adjust accordingly. Once you’ve marked the position, double-check the measurements and make any necessary adjustments before proceeding with the installation.
Tips for leveling and aligning the screen
It’s crucial to level and align the screen correctly during installation. A slight deviation in either the alignment or angle will affect the projected image’s position, resulting in a less than optimal viewing experience. Using a small level and measuring tape can aid in aligning the screen and ensuring that it’s level.
Another important factor to consider when leveling and aligning the screen is the distance between the projector and the screen. This distance can affect the size and clarity of the projected image. It’s recommended to consult the projector’s manual or use an online calculator to determine the optimal distance for your specific projector model.
In addition to using a level and measuring tape, it’s also helpful to have a second person assist with the installation. This person can provide a second set of eyes to ensure that the screen is level and aligned correctly. It’s also important to take your time during the installation process and make any necessary adjustments before securing the screen in place.
Preparing the wall surface with primer and paint
If necessary, prime the wall surface with a white primer designed for interiors. The primer forms a good background and ensures that the paint adheres to the wall surface better. After the primer has dried, apply white or light-colored matte paint for the best results.
It is important to note that the type of paint you choose can affect the overall look and feel of the room. Glossy paint can create a more modern and sleek look, while matte paint can give a more subtle and relaxed feel. Consider the style and purpose of the room when choosing the type of paint to use.
Additionally, it is recommended to use a paint roller for larger wall surfaces, as it can provide a more even and efficient application. Use a paintbrush for smaller areas and for cutting in around edges and corners. Take your time and apply the paint in thin, even coats for the best results.
Installing a specialized projector screen paint
Alternatively, there is a range of specialized projector screen paints available on the market. These paints have high reflectivity levels, producing brighter and more colorful images than a regular painted wall. Some varieties of these paints also reduce glare, improving the viewing experience by reducing reflections.
When choosing a specialized projector screen paint, it is important to consider the type of projector you will be using. Some paints are optimized for use with specific types of projectors, such as DLP or LCD. Additionally, the color of the paint can affect the image quality. White or light gray paints are typically recommended for most projectors, but some projectors may perform better with darker colors. It is also important to properly prepare the wall surface before applying the paint, as any imperfections or bumps can affect the image quality.
Applying a DIY projector screen solution
If you prefer a DIY approach, you can make your projection screen using a white or light-colored cloth, stretched and mounted on a wooden frame. Choose a cloth that is tightly woven and has a tight weave, as it produces a uniform surface. When the cloth is stretched, taut only enough to remove wrinkles but not too tight that it distorts the image.
It is important to note that the type of cloth you use can affect the quality of the image. A high-quality, specialized projector screen fabric will produce the best results, but it can be expensive. If you are on a budget, a white blackout curtain or a white shower curtain can also work as a makeshift screen. However, keep in mind that these materials may not produce the same level of image quality as a specialized fabric.
Hanging the screen on the prepared wall
After the wall is dry and the screen is ready, hang the screen on the wall at the marked position. Ensure that the screen is level and correctly aligned with both the wall and the projector. While setting up, ensure that your projector is at the right distance from the screen and that it projects an accurately positioned and sized image.
It is also important to consider the lighting in the room when hanging the screen. Avoid placing the screen in direct sunlight or in a location with bright overhead lights, as this can cause glare and make it difficult to see the projected image. Instead, opt for a location with controlled lighting or use blackout curtains to block out any unwanted light.
Final adjustments and calibration of your projector
After hanging the screen, set the focus, tilt, and zoom of your projector to perfectly match the screen size and wall proportions. Calibration ensures that you have optimal image quality and clarity. Adjust the brightness, color, contrast, and other settings using your projector’s control panel for the best results.
It is important to note that the ambient lighting in the room can also affect the image quality. If the room is too bright, it may be necessary to use blackout curtains or blinds to reduce the amount of light entering the room. On the other hand, if the room is too dark, you may need to add some ambient lighting to prevent eye strain and improve the overall viewing experience.
Additionally, it is recommended to periodically clean the projector lens and air filter to maintain optimal performance. Dust and debris can accumulate over time and affect the image quality. Refer to your projector’s manual for specific instructions on how to clean and maintain your device.
Troubleshooting common issues with projector screens
If you notice any issues with your projection during viewing, such as dim or blurry images, consider adjusting the room’s lighting to minimize any unwanted glare or shadow. Alternatively, it could be that the projector’s or screen’s settings need adjusting. Also, ensure that you clean the screen regularly since dust and debris could accumulate and affect the projected image’s quality.
Maintenance tips to keep your projector screen in top condition
It’s essential to maintain your projector screen regularly for optimal performance. Keep sharp objects away from the screen to prevent damage that might cause irreparable blemishes. Additionally, avoid spilling liquids on the projection screen since it can potentially cause blotches or water stains. Lastly, vacuum and clean your projector screen regularly to ensure that it remains clean and free from dust.
Conclusion
A projector screen adds an unparalleled viewing experience in any home entertainment setup. By following the steps above, you can prepare your wall to produce a clear and bright picture. It’s essential to choose the right wall, ensure that the surface is flat and smooth, and align your screen accurately. Whether you choose to use a specialized paint, a fabric screen or an actual projector screen, do regular maintenance to keep it in the best condition for years of enjoyment.