Projectors are becoming more popular for home entertainment systems, offering a larger screen experience than traditional TVs. However, installing a projector in your living room can be intimidating if you’re not familiar with the process. In this article, we’ll guide you through the installation process step-by-step to help you achieve the perfect setup for your home theater system.
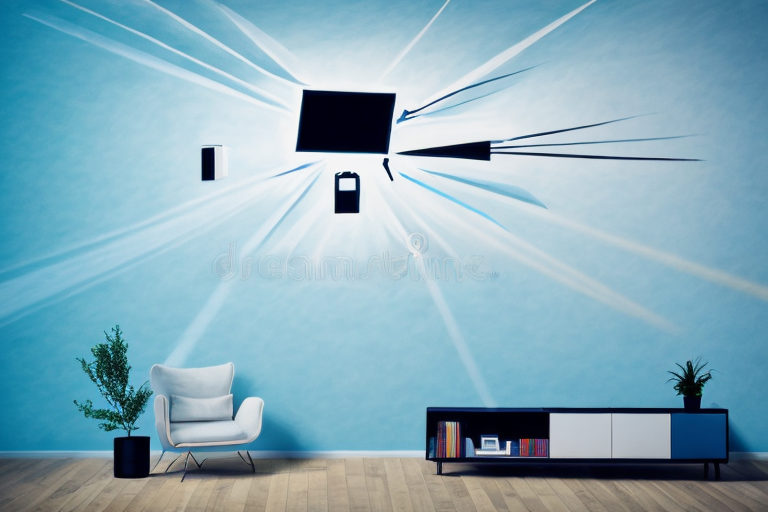
Assessing Your Living Room for Projector Installation
The first step to installing a projector in your living room is to assess the space. You’ll need to decide where to place your projector and screen, and ensure that the room has adequate space for comfortable seating and optimal viewing angles.
Consider the amount of natural light in the room, as well as the potential for glare or reflection. You may need to invest in blackout curtains or blinds to ensure that the room can be darkened sufficiently for a clear image.
You’ll also need to consider the placement of your audio equipment, particularly if you’re using external speakers. Make sure that there’s enough space to place your speakers in a location that will provide optimal sound quality.
Another important factor to consider is the distance between the projector and the screen. This will depend on the size of your screen and the throw distance of your projector. Make sure to measure the distance accurately to ensure that the image is clear and in focus.
Choosing the Right Projector for Your Living Room
Once you’ve assessed your living room, it’s time to choose a projector that fits your needs. Consider factors such as resolution, brightness, and contrast ratio to ensure that you’ll be able to achieve a high-quality image.
If you’re planning on using your projector for gaming, you’ll want to look for a model with low input lag to ensure that your gameplay is smooth and responsive.
It’s also worth considering the type of projection technology you prefer. LED projectors are becoming more popular due to their long lifespans and energy efficiency, while DLP projectors offer a high contrast ratio for an immersive viewing experience.
Another important factor to consider when choosing a projector for your living room is the throw distance. This refers to the distance between the projector and the screen, and it can affect the size of the image you can achieve. Make sure to measure the distance between where you plan to place the projector and where you want the image to appear, and choose a projector with a throw distance that fits your space.
Finally, don’t forget to consider the sound quality of your projector. While some projectors come with built-in speakers, they may not provide the best audio experience. You may want to invest in a separate sound system or soundbar to enhance your viewing experience.
Understanding Projection Distance and Screen Size
The next step in the installation process is to determine the ideal projection distance and screen size for your living room. The distance from the projector to the screen will affect the size of the image, so it’s important to choose a projector with the appropriate throw ratio for your space.
You’ll also need to determine the best location to mount your screen. Consider factors such as height, viewing angle, and distance from the projector to ensure that you’re creating an optimal viewing experience for all viewers.
Another important factor to consider when determining the ideal projection distance and screen size is the ambient light in your living room. If your room has a lot of natural light or bright artificial lighting, you may need a brighter projector or a screen with a higher gain to ensure that the image is visible and clear. On the other hand, if your room is relatively dark, you may be able to use a projector with a lower brightness and a screen with a lower gain.
Setting Up Your Projector Mount and Screen
Now that you’ve determined the ideal placement for your projector and screen, it’s time to mount them. There are a number of different mounting options available, including ceiling mounts, wall mounts, and floor stands.
Make sure that you carefully measure and level your mount or stand to ensure that your screen is properly aligned. It’s also important to ensure that your projector is securely mounted to prevent any accidents or damage.
When choosing a mounting option, consider the size and weight of your projector and screen. Ceiling mounts are a popular choice for larger screens, as they allow for maximum visibility and can be adjusted to the perfect height. Wall mounts are a good option for smaller screens and can be a space-saving solution. Floor stands are a versatile option that can be moved around easily, but may not provide the same stability as ceiling or wall mounts.
Connecting Your Video Source to the Projector
Once your projector and screen are set up, it’s time to connect your video source. This could be a cable box, gaming console, streaming device, or any other device that outputs video.
Most projectors have a variety of connection options, such as HDMI or VGA ports, so make sure that you choose the appropriate one for your device. It’s also worth ensuring that your cables are long enough to reach your devices from your projector location.
If you’re using a laptop as your video source, you may need to adjust the display settings to ensure that the image is being projected correctly. This can usually be done by pressing the “Windows” key and “P” key simultaneously on a Windows computer, or by going to “System Preferences” and selecting “Displays” on a Mac.
It’s important to note that some older devices may not be compatible with newer projectors, or may require additional adapters to connect. If you’re unsure about compatibility, it’s always a good idea to consult the user manual or contact the manufacturer for guidance.
Adjusting Picture Quality and Positioning
After connecting your video source, it’s important to adjust the picture quality and positioning to ensure that you’re getting the best possible image. This may involve adjusting settings such as brightness, contrast, and color temperature to optimize the image for your living room.
You’ll also want to ensure that the image is properly centered and oriented. Adjusting the keystone correction can help correct any distortion or misalignment caused by the projection angle.
Another important factor to consider when adjusting picture quality and positioning is the ambient lighting in the room. If the room is too bright, it can wash out the image and make it difficult to see. On the other hand, if the room is too dark, it can make the image appear dull and lackluster.
To combat these issues, you may want to consider installing blackout curtains or shades to block out excess light, or adding ambient lighting to the room to create a more balanced and comfortable viewing experience.
Calibrating Audio Settings for Optimal Sound Quality
Once your image is optimized, it’s time to focus on your audio settings. If you’re using external speakers, make sure that they’re properly positioned and calibrated for the best possible sound quality.
You may also want to adjust settings such as treble, bass, and balance to ensure that your audio is balanced and clear.
Another important factor to consider when calibrating your audio settings is the acoustics of the room you’re in. The size and shape of the room, as well as the materials used for flooring, walls, and ceiling, can all affect the sound quality. To optimize your audio, you may want to add sound-absorbing materials such as curtains, carpets, or acoustic panels to reduce echoes and reverberations.
Troubleshooting Common Projector Installation Issues
Even with careful planning and set up, you may encounter issues during your installation process. Common issues could include image distortion or flickering, audio dropouts, or connectivity problems.
It’s important to troubleshoot any issues before settling on any one solution. Some issues may be resolved by adjusting settings, while others may require more significant changes such as changing cables or adjusting placement.
If you are experiencing image distortion or flickering, it may be due to a low-quality cable or an incompatible resolution. Try using a higher quality cable or adjusting the resolution settings on your device to see if this resolves the issue.
If you are experiencing audio dropouts, it may be due to a loose connection or interference from other electronic devices. Check all connections and try moving any nearby electronic devices away from the projector to see if this improves the audio quality.
Tips for Maintaining and Cleaning Your Projector and Screen
Once your installation is complete, it’s important to protect your investment by properly maintaining and cleaning your projector and screen. This could involve regular dusting, cleaning the screen with a microfiber cloth, or periodically replacing your projector bulb to maintain optimal image quality.
Another important aspect of maintaining your projector and screen is to ensure that they are stored in a safe and secure location when not in use. This can help prevent damage from accidental bumps or falls, as well as protect them from dust and other environmental factors. Additionally, it’s important to follow the manufacturer’s instructions for cleaning and maintenance, as using the wrong products or techniques could cause damage to your equipment.
Enhancing Your Viewing Experience with Accessories like Speakers, Soundbars, and Streaming Devices
Finally, consider enhancing your viewing experience with additional accessories such as external speakers, soundbars, and streaming devices. These can help you achieve a more immersive and streamlined experience for all of your viewing needs.
External speakers can greatly improve the audio quality of your viewing experience, especially if you are watching movies or TV shows with dynamic sound effects or music. Soundbars are another popular option that can provide a more surround sound-like experience without the need for multiple speakers. Additionally, streaming devices like Roku or Amazon Fire Stick can give you access to a wider range of content and streaming services, making it easier to find and watch your favorite shows and movies.
Comparing Different Types of Screens to Find the Best One for You
Finally, don’t forget to consider the different types of screens available to achieve the best possible image quality. There are a wide variety of screen materials available, from matte white to gray or even glass bead, each offering unique benefits and drawbacks.
Make sure that you research different screen materials and take the time to select a screen that will provide you with the best possible image quality for your living room.
One important factor to consider when selecting a screen is the gain, or the amount of light reflected back to the viewer. A higher gain screen will reflect more light, resulting in a brighter image, but may also produce hot spots or uneven lighting. A lower gain screen will produce a more even image, but may require a brighter projector to achieve the desired brightness.
Another consideration is the aspect ratio of the screen. Most screens are designed for a 16:9 aspect ratio, which is the standard for high definition content. However, if you plan to watch a lot of older movies or television shows, you may want to consider a screen with a 4:3 aspect ratio to avoid black bars on the sides of the image.
Creating a Cozy Atmosphere with Lighting and Décor
Finally, consider ways to make your home theater space more comfortable and inviting with thoughtful lighting and décor choices. Soft, dim lighting can create a cozy atmosphere for movie nights, while decorative touches such as throw pillows and blankets can add a touch of personality to your space.
By carefully planning and executing your projector installation, you can create a stunning and immersive home theater experience that will provide entertainment for years to come.