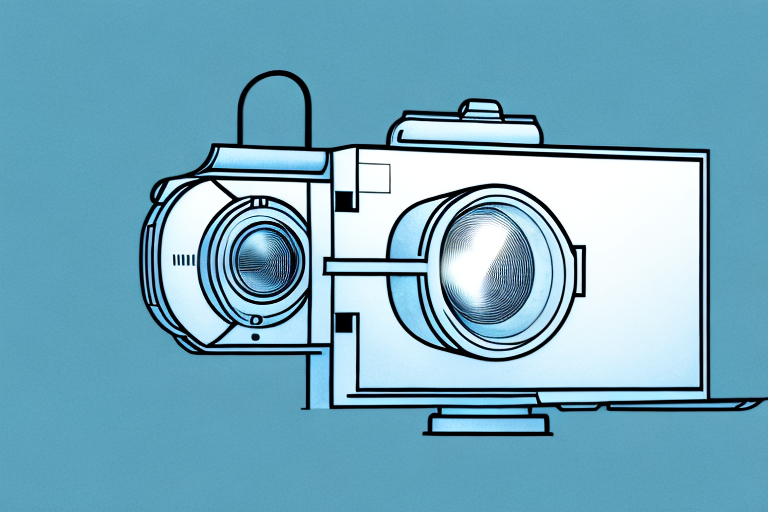
If you’ve ever used a projector, you may have wondered whether it’s possible to aim it downwards. The answer is yes, but there are important factors to consider. In this article, we’ll look at everything you need to know about aiming a projector downwards, including projector alignment, pros and cons, safety considerations, impact of ambient light, installation tips, best projectors, screen options, overcoming challenges, creative uses, focus and keystone correction, common mistakes to avoid, achieving optimal image quality, mounting options, and frequently asked questions. By the end of this article, you’ll have a comprehensive understanding of aiming a projector downwards and how to do it successfully.
Understanding projector alignment
Before you aim a projector downwards, it’s crucial to understand projector alignment. This refers to the position of the projector in relation to the screen. Projectors typically have an ideal range of angles for optimal image quality. If the projector is too far left or right of the screen, the image will be distorted. The same applies if the projector is too high or too low. To ensure proper projector alignment, use a projector mount and follow the manufacturer’s instructions.
Another important factor to consider when aligning a projector is the distance between the projector and the screen. This distance affects the size of the projected image and the clarity of the image. If the projector is too close to the screen, the image may appear blurry or distorted. On the other hand, if the projector is too far from the screen, the image may appear too small. To determine the optimal distance, consult the projector’s manual or use an online calculator.
It’s also important to consider the lighting conditions in the room when aligning a projector. Bright ambient light can wash out the image and reduce its clarity. To combat this, consider using blackout curtains or blinds to block out natural light. Additionally, you can adjust the brightness and contrast settings on the projector to compensate for the lighting conditions in the room.
The pros and cons of aiming a projector downwards
When deciding whether to aim a projector downwards, it’s essential to consider the pros and cons. One of the significant benefits of downward projection is that it can save space since the projector can be installed on a high shelf or ceiling. This frees up floor space, making it ideal for small rooms. Downward projection can also help reduce ambient light glare, which can be beneficial for presentations or movie nights. However, there are potential drawbacks, such as the need for keystone correction, which can lead to image distortion. Depending on the projector, downward projection may also reduce brightness and color accuracy.
Another advantage of downward projection is that it can provide a more immersive viewing experience. When the projector is aimed downwards, the image is projected onto a larger surface area, such as a wall or screen, creating a more significant and more immersive image. This can be particularly useful for home theater setups or gaming rooms.
On the other hand, downward projection may not be suitable for all types of rooms or setups. For example, if the projector is installed in a room with high ceilings, the downward projection may not be effective, as the image may appear too small. Additionally, if the projector is not installed correctly, it can lead to eye strain or discomfort for viewers, as they may need to tilt their heads upwards to view the image properly.
How to safely aim a projector down without damaging it
To safely aim a projector downwards, it’s important to use a secure mount and follow the manufacturer’s instructions. Never attempt to modify the projector or mount without professional guidance. Ensure that the mount is strong enough to support the projector’s weight and that the power cable and other cords are not in the way of the projection. Always use caution when working with electrical equipment and avoid touching the projector’s lens or other parts as they can be hot.
Additionally, it’s important to consider the surface on which the projector is being aimed. Make sure the surface is flat and even to avoid distortion or uneven projection. If the surface is not flat, use keystone correction to adjust the image. It’s also recommended to use a screen specifically designed for projectors to ensure the best image quality. Lastly, always turn off the projector and unplug it before making any adjustments to the mount or cords.
The impact of ambient light on downward projector projection
Ambient light can have a noteworthy impact on a projector’s image quality when aiming downwards. Direct sunlight or bright lights can cause glare and make it harder to see the image. Therefore, it’s crucial to consider the room’s lighting conditions when aiming a projector downwards. Using blackout curtains or shades can help reduce ambient light and improve picture quality. Alternatively, selecting a projector model with higher lumens can help counteract the effects of ambient light.
Another factor to consider when projecting downwards is the color of the projection surface. A white or light-colored surface will reflect more light and can cause washed-out images in brightly lit rooms. In contrast, a gray or black projection surface can absorb ambient light and improve contrast, resulting in a clearer image. It’s important to choose a projection surface that is appropriate for the lighting conditions of the room.
Additionally, the distance between the projector and the projection surface can affect image quality. When projecting downwards, the distance between the projector and the surface should be adjusted to avoid distortion or blurriness. It’s recommended to consult the projector’s manual or a professional installer to determine the optimal distance for your specific projector model.
Projector installation tips for downward projection
When installing a projector for downward projection, make sure to consider the following tips:
- Use a secure mount that can support the projector’s weight.
- Ensure the projected image does not interfere with any fixtures, fans, or other objects in the room.
- Use a high-quality HDMI cable for the best image quality.
- If possible, use an HDMI splitter to allow for multiple input sources.
Additionally, it is important to consider the distance between the projector and the screen. The further the distance, the larger the image will be, but it may also result in a loss of image quality. It is recommended to consult the projector’s manual or use an online calculator to determine the optimal distance for the desired screen size and image quality.
Best projectors for downward projecting in different settings
Choosing the best projector for downward projection depends on the specific setting and intended use. For home theaters, consider models from Sony, Epson, or BenQ, which offer high brightness and contrast ratio for optimal image quality. For business or classroom settings, projectors from ViewSonic, Optoma, or NEC are popular choices for their reliability and ease of use.
For outdoor events or large venues, projectors with high lumens and resolution are necessary to ensure visibility and clarity. Brands such as Panasonic, Christie, and Barco offer projectors with up to 30,000 lumens and 4K resolution, making them ideal for outdoor movie screenings, concerts, and sports events. Additionally, some projectors come with features such as lens shift and keystone correction, which allow for easy adjustment of the image to fit the screen or surface.
Projector screen options for downward projection
When aiming a projector downwards, it’s essential to choose the right screen to ensure the best image quality. Consider using a fixed-frame screen, which can be easily mounted to the wall or ceiling. Alternatively, a motorized screen can be installed to retract when not in use, saving space. For outdoor settings, an inflatable screen can be a convenient and portable option.
Another option to consider is a tensioned screen, which uses a system of cables and weights to keep the screen taut and prevent any wrinkles or waves from forming. This can result in a smoother and more uniform image. However, tensioned screens can be more expensive and require professional installation.
It’s also important to consider the screen material when choosing a projector screen for downward projection. A high-gain screen can help to reflect more light back to the audience, resulting in a brighter image. However, this can also lead to hotspots and uneven lighting. A matte white screen may be a better option for a more uniform image, but it may not be as bright as a high-gain screen.
Overcoming challenges when aiming a projector downwards
Aiming a projector downwards can present unique challenges, such as keystone correction and image distortion. To overcome these obstacles, ensure that the projector is installed perpendicular to the screen and use keystone correction settings to adjust the image’s shape. Additionally, avoid aiming the projector too far up or down, as this can lead to image distortion.
Creative uses for downward projecting projectors
Downward projecting projectors can be used in various creative ways, such as projecting images onto the floor for art installations or in dance performances. They can also be used for projecting text or graphics onto walls or ceilings for a unique and eye-catching display.
How to adjust the focus and keystone correction for downward projection
To adjust the focus and keystone correction for downward projection, use the projector’s settings menu. Keystone correction refers to the ability to adjust the shape of the projected image to ensure it is square and not distorted. In some models, keystone correction is automatic, while in others, it must be manually adjusted using the remote control or on-screen settings.
Common mistakes to avoid when aiming a projector down
When aiming a projector downwards, there are several common mistakes to avoid. These include:
- Aiming the projector too far up or down, causing image distortion
- Not using a secure mount, causing the projector to fall or become damaged
- Not considering ambient light glare, leading to a poor-quality image
- Not adjusting the keystone correction, causing image distortion
Tips for achieving optimal image quality when aiming a projector downwards
To achieve the best image quality when aiming a projector downwards, consider using these tips:
- Use a high-quality HDMI cable for the best image quality
- Choose a projector with high lumens and contrast ratio
- Use blackout curtains or shades to reduce ambient light glare
- Ensure the projector is perpendicular to the screen and at the correct distance
Different mounting options for downward projecting projectors
There are several mounting options for downward projecting projectors, including ceiling mounts, wall mounts, and shelf mounts. Ceiling mounts are the most popular option and offer the most flexibility. Wall mounts are suitable for smaller rooms or where the ceiling is too high to use a ceiling mount. Shelf mounts are ideal for small projectors or temporary installations.
Frequently asked questions about aiming projectors downwards
Here are some frequently asked questions about aiming projectors downwards:
- Can I aim any projector downwards?
- What is keystone correction?
- How do I adjust keystone correction?
- What are the best projectors for home theaters?
- What’s the difference between a fixed-frame and motorized screen?
For more information on these and other questions, check the projector’s manual or contact the manufacturer for guidance.
Conclusion
Aiming a projector downwards is possible and can offer many benefits in terms of space-saving, reducing ambient light glare, and creative use. However, it’s crucial to consider the projector’s alignment, safety, ambient light, installation tips, best projectors, screen options, keystone correction, common mistakes to avoid, achieving optimal image quality, different mounting options, and frequently asked questions. By following these guidelines and using the proper equipment, you can aim a projector downwards with confidence and enjoy the best image quality possible.