Are you ready to take your movie and TV viewing experience to the next level? A 9.2 home theater system may be just what you need. But before you start purchasing equipment and setting it up, there are some important things to consider. In this article, we’ll guide you through every step of the process – from understanding the components of a 9.2 system, to choosing the right location and screen size, to setting up your speakers for the best sound quality possible, and much more. By the end of this article, you’ll be able to enjoy your own personal cinema experience right in the comfort of your own home.
Understanding the components of a 9.2 home theater system
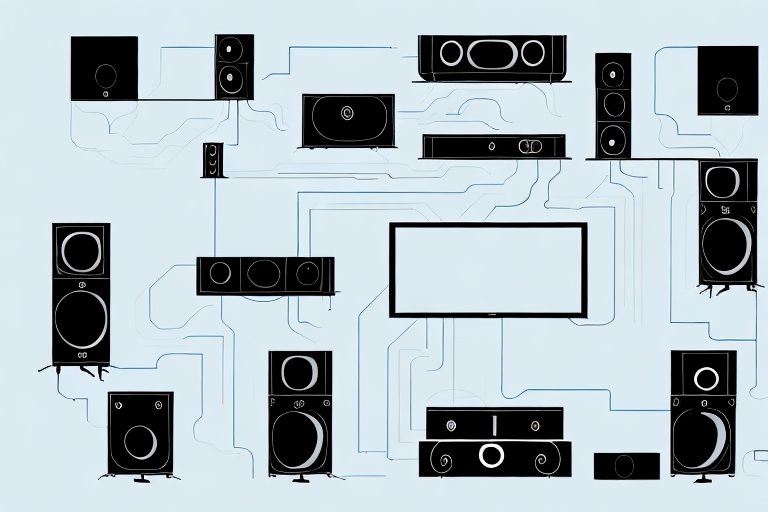
A 9.2 home theater system consists of a receiver, speakers, and a subwoofer. The receiver is the heart of your system and connects all of the other components together. It should have enough channels to accommodate your system – in this case, nine channels for speakers and two for subwoofers. Your speakers should be high quality and placed strategically to optimize your audio experience. The subwoofers handle the low-frequency sound that adds depth and dimension to the audio.
When selecting speakers for your 9.2 home theater system, it’s important to consider the size of your room and the placement of the speakers. For example, if your room is small, bookshelf speakers may be a better option than floor-standing speakers. Additionally, you should aim to place your speakers at ear level and equidistant from your listening position to create a balanced soundstage. Experimenting with different speaker placements can help you achieve the best possible audio experience.
Choosing the right location for your home theater system
The location of your home theater system is crucial for optimal viewing and sound quality. Ideally, it should be a room with little to no external light and minimal noise. You should also consider whether the room has a flat, unobstructed wall, as this makes it easier to mount your screen and speakers without getting in the way. Remember that some speakers should be placed up high or in the ceiling, while others should be at ear level – so ensure you have enough space to do so.
Another important factor to consider when choosing the location for your home theater system is the size of the room. A larger room may require more speakers or a larger screen to ensure that everyone in the room can see and hear the content clearly. On the other hand, a smaller room may not require as many speakers or a large screen, but you should still ensure that the seating arrangement is optimized for the best viewing experience. Additionally, you may want to consider the layout of the room and whether there are any obstructions that could affect the sound quality, such as large furniture or curtains.
How to select the right screen size and resolution for your home theater
The size and resolution of your screen are equally important to consider. The optimal screen size should be based on your seating distance – generally, larger screens have better resolution and should be used in larger rooms, whereas smaller screens have lower resolutions and are better for smaller rooms. The resolution of your screen should be at least 1080p or higher, as this will ensure the best picture quality.
Another important factor to consider when selecting the right screen size and resolution for your home theater is the type of content you will be watching. If you plan on watching a lot of high-definition movies or playing video games, then a larger screen size with a higher resolution would be ideal. However, if you mainly watch standard-definition TV shows or movies, then a smaller screen size with a lower resolution may suffice.
It’s also important to consider the aspect ratio of your screen. The most common aspect ratio for home theater screens is 16:9, which is the same as most HDTVs. However, if you plan on watching a lot of movies, you may want to consider a screen with a wider aspect ratio, such as 2.35:1 or 2.40:1, which will provide a more cinematic experience.
Setting up your 9.2 channel speaker system for optimal sound quality
When it comes to setting up your speakers, you should aim for balanced audio distribution throughout the room. This means that all speakers should be evenly spaced and placed in strategic locations to ensure minimal distortion and maximum clarity. Be sure to follow the manufacturer’s instructions when setting up your speakers to achieve the best sound quality.
Another important factor to consider when setting up your speaker system is the room’s acoustics. The size and shape of the room can greatly affect the sound quality. For example, a room with high ceilings and hard surfaces will produce more echoes and reverberations, which can negatively impact the sound quality. To combat this, you can add acoustic treatments such as sound-absorbing panels or curtains to reduce the reflections and improve the overall sound quality.
Additionally, it’s important to calibrate your speaker system to ensure that each speaker is producing the correct level of sound. You can use a sound meter or a calibration microphone to measure the sound levels and adjust the settings accordingly. This will help to create a more immersive and balanced sound experience, where each speaker is contributing to the overall audio quality.
Understanding audio codecs and how they affect sound quality in your home theater system
Audio codecs are an important factor to consider when setting up a home theater system, as they directly affect sound quality. Some codecs provide better compression, higher sound quality, or lower latency. Dolby Atmos and DTS:X are popular codecs that provide immersive sound and help create a more authentic cinematic experience.
When choosing an audio codec, it’s important to consider the compatibility with your devices. Some codecs may not be supported by certain devices, which can result in a loss of sound quality or even no sound at all. It’s also important to consider the size of the audio files, as some codecs may produce larger files that take up more storage space.
Another factor to consider is the type of content you will be watching or listening to. Different codecs may be better suited for certain types of content, such as music or movies. For example, some codecs may provide better surround sound for movies, while others may provide better clarity for music.
How to calibrate your home theater system for optimal picture and sound
A calibrated home theater system ensures optimal picture and sound quality. Calibration involves adjusting the settings of your TV and receiver, such as brightness, contrast, and color, to match the lighting conditions of your room. It is an essential step in the setup process that ensures that every component works together to deliver the best possible audio-visual experience.
One important factor to consider when calibrating your home theater system is the viewing distance. The distance between your seating area and the TV should be proportional to the size of the screen. For example, if you have a 55-inch TV, the optimal viewing distance is around 7 feet. If you sit too close or too far away, it can affect the clarity and detail of the picture. Additionally, you should also consider the height of the TV in relation to your eye level, as this can impact the viewing angle and overall comfort of your viewing experience.
Tips on wiring and cable management for a clean, organized setup
Wiring and cable management are often overlooked but are essential for creating a clean and organized home theater setup. You can use cable ties, cable wraps, or conduit to keep your cables organized and out of sight. It’s also important to ensure that all cables are labeled to prevent confusion during maintenance or troubleshooting.
One important tip for cable management is to plan ahead before setting up your home theater. Consider the placement of your devices and the length of cables needed to connect them. This will help you avoid excess cable length and clutter. Additionally, using color-coded cables can make it easier to identify which cables belong to which devices.
Another useful tool for cable management is a cable tray or raceway. These can be mounted on walls or under desks to keep cables organized and off the floor. They also provide easy access for adding or removing cables as needed. Remember, a well-organized setup not only looks better but can also improve the performance and lifespan of your devices by reducing the risk of damage from tangled or pinched cables.
How to integrate your 9.2 home theater system with other smart devices in your home
You can integrate smart home devices, such as voice-activated assistants and automated lighting, to your 9.2 home theater system for added convenience. This will enable you to control your home theater components using voice commands or automated routines. It’s important to ensure that these devices are compatible with your receiver and other components.
Troubleshooting common issues with a 9.2 home theater system
Home theater systems are complex and often face common issues such as receiver or speaker malfunctions. Troubleshooting these issues involves checking connections, reviewing your system settings, and performing basic maintenance and cleaning. If the problems persist, you can seek professional advice.
How to enhance your viewing experience with ambient lighting and décor
The right ambient lighting and décor can help create a cinematic atmosphere in your home theater. Light dimmers, LED strips, or recessed lights can all be used to create the right ambiance. You can also decorate your walls with posters or other movie memorabilia to give your space an authentic movie-inspired feel.
Understanding the different types of projectors available for a 9.2 home theater system
If you’re considering a projector for your home theater system, it’s important to understand the different types available. There are two main types of projectors: DLP and LCD. DLP projectors are known for their crisp images, while LCD projectors are more affordable and have a longer lifespan. It’s important to do your research and select the projector that best suits your needs and budget.
How to set up a dedicated media room for your home theater system
If you’re serious about creating a home theater experience, a dedicated media room is the way to go. A dedicated room will prevent external noise and light from interrupting your viewing experience. You can soundproof the room, install recliners or couches, and even add a mini-fridge or popcorn machine for the ultimate cinema-like experience.
Tips on optimizing seating arrangement and placement for the best viewing experience
Optimizing your seating arrangement is crucial for the best viewing experience. The optimal viewing distance is generally twice the screen size – so if your screen size is 60 inches, your viewing distance should be around 120 inches. You should also ensure that all seats have an unobstructed view of the screen and are not too close to the speakers.
How to maintain and clean your home theater system for long-term durability
Maintenance and cleaning are essential for ensuring that your home theater system lasts for years to come. Clean your TV screen and speakers regularly to prevent dust build-up and use compressed air to clean the insides of your speakers. You should also update your system’s software regularly and ensure that all cables are securely connected.
We hope this guide has been helpful in setting up your 9.2 home theater system. Remember, every step is crucial for optimal performance. With the right components, settings, and arrangement, your home theater system will provide an immersive and authentic cinematic experience right in your own home.